2
ENG
ENGLISH
ASSEMBLING AND PREPARING
ASSEMBLING AND PREPARING
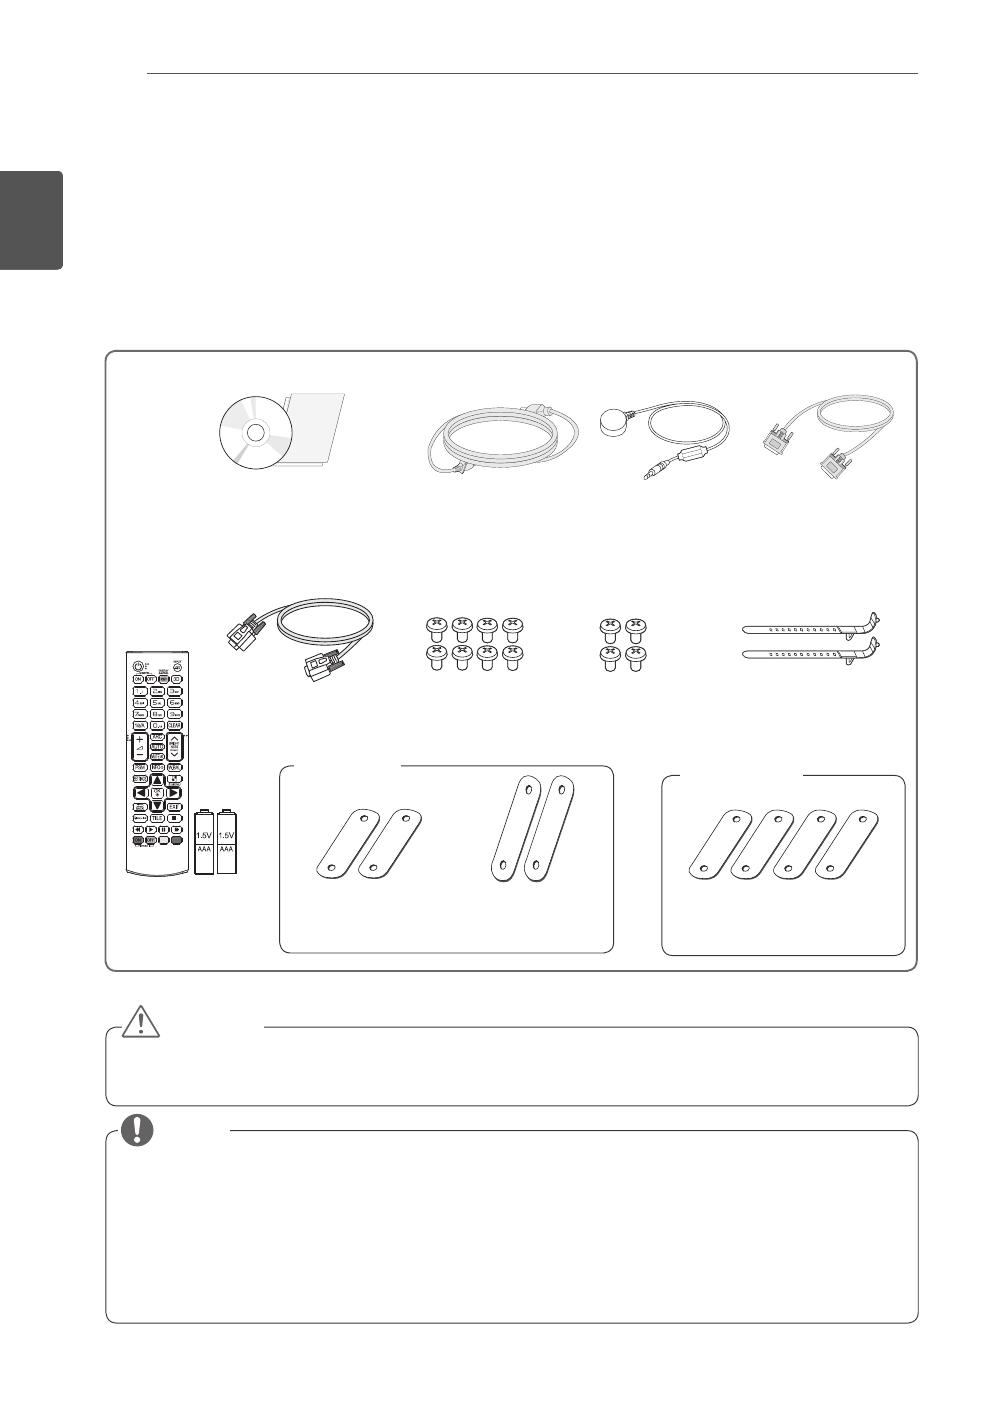
Accessories
Check your product box for the following items. If there are any missing accessories, contact the local
dealer where you purchased your product. The illustrations in this manual may differ from the actual product
and accessories.
Do not use any pirated items to ensure the safety and product life span.
Any damages or injuries by using pirated items are not covered by the warranty.
CAUTION
The accessories supplied with your product may vary depending on the model.
Product specifications or contents in this manual may be changed without prior notice due to upgrade
of product functions.
SuperSign software and manual.
- Downloading from the LG Electronics website.
- Visit the LG Electronics website (
http://www.lgecommercial.com/supersign
) and download the latest
software for your model.
NOTE
Power Cord
DVI Cable
IR Receiver
CD (Owner's Manual)
/ Cards
RS-232C Cable
Remote Control
and Batteries
Short Vertical
Tiling Guide(2 ea)
Long Horizontal
Tiling Guide(2 ea)
M6 Screws
(4 ea)
M4 Screws
(8 ea)
Mounting Cable Tie (2 ea)
(For Cable Arrangement)
55LV35A
47LV35A
Tiling Guide(4 ea)


