Truelife Pulse BT Používateľská príručka

Kategória
Jednotky krvného tlaku
Typ
Používateľská príručka
1
INSTRUCTIONS FOR USE
BEDIENUNGSANLEITUNG
VOD K POUŽITÍ
VOD NA POUŽÍVANIE
INSTRUKCJA UŻYCIA
HASZNÁLATI ÚTMUTA
NAVODILA ZA UPORABO
NAPUTAK ZA UPORABU
EN
DE
CZ
SK
PL
HU
SL
HR
2
BOX CONTENTS
1× Blood pressure monitor
1× Arm cu
1× Storage case
4× 1.5V AA alkaline battery
1× Manual
1× Safety Instructions
The pressure monitor measures blood pressure (systolic and diastolic)
using the oscillometric method and also heart rate.
1. PRODUCT DESCRIPTION
123
12
10
8
6
4
5
11
9
7
1. Display
2. Inlet for cu hose
3. Arm cu
4. Change user
5. Power
6. Up/down
7. AC adapter input
8. Memory
9. Average value
10. Time settings
11. Alarm
12. Volume
Display description
26
24
23
1 29
22
27
28
25
15
19 21
20181716
14
13
12
8
9
10
11
7
6
5
4
3
2
1. Alarm 1
2. Date
3. Time
4. Severe hypertension
5. Moderate hypertension
6. Mild hypertension
7. Elevated normal pressure
8. Normal pressure
9. Optimal pressure
10. Improperly tted cu
11. Alarm settings
12. Date and time settings
13. Average value mode
14. Motion during measurement
15. Memory
16. Current entry in memory
17. User
18. Total memory
19. Low battery indicator
20. Bluetooth
21. Heart rate symbol
22. Irregular heartbeat indicator
23. Heart rate
24. Air discharge indicator
25. Diastolic (lower) blood pressure
26. Pressure indicator
27. Systolic (upper) blood pressure
28. Volume level
29. Alarm 2
EN – INSTRUCTIONS FOR USE
3
2. BATTERY INSTALLATION
Remove the battery cover on the back of the monitor unit and insert 4×
1.5V AA batteries. Make sure that the batteries are inserted according to
the polarity indicated in the battery compartment. Do not use batteries
that are past their expiration date.
The battery must be replaced when the battery symbol and „E6“ appear
on the display after switching on the monitor. The symbol together with
the code indicate a low battery level. With a critically low battery level, the
device will not take readings. This device is not suitable for rechargeable
batteries.
If you will not be using the device for a long period of time, remove the
batteries.
3. USING THE AC ADAPTER
(The AC adapter is not included. It can be purchased as an optional ac-
cessory.)
a) Connecting
1. Insert the adapter connector into the DC jack on the right side of the
monitor unit.
2. Plug the adapter into a 100–240 V socket.
3. The monitor will turn on.
b) Disconnecting
1. Unplug the adapter.
2. Pull the adapter connector out of the DC jack on the side of the monitor.
Note: Only use the original adapter.
Note: When using the adapter, you can leave the batteries inside the device.
4. SETTING THE DATE AND TIME
The unit automatically enters the date and time settings menu after the
batteries are inserted or the power adapter is plugged in. This can manually
be accessed by holding the time settings button for 5 seconds.
1. Year“ ashes on the display.
2. Use the up/down and arrows to set the correct year and conrm
with the power button.
3. Continue in the same way to set the month > day > hour > minute.
IMPORTANT: The rst time you set up the device, you must set the exact date
and time. If it is not set correctly, the values will not be correctly copied to the
calendar when the readings are transferred to a mobile device.
Note: The readings are stored in the memory when the batteries are replaced.
However, you will need to set the date and time again.
5. ADJUSTING THE VOLUME
The blood pressure monitor uses audible alerts for some functions. The
volume of these alerts can be adjusted.
1. Press the volume button to enter volume settings.
2. The volume icon will start ashing.
3. Use the up arrow to increase the volume and the down arrow to
decrease it.
4. After setting the desired volume, press the power button to conrm
and exit the mode.
6. SETTING AN ALARM
You can set two audible alerts on the monitor – alarms.
1. Press the alar button to enter the alarm settings.
2. The alarm icon will ash on the display. Press the alarm button again
and choose between two alarms ( or ).
3. When the icon you have selected ashes, you can use the up and down
buttons to toggle between turning the alarm on and o .
Press and hold the alarm button until the alarm icon stops ashing.
4
4. Continue by setting the alarm time. First, use the up and down bu-
ttons to set the hour and conrm with the power button.
5. Continue in the same way to set the minutes.
6. Finally, conrm everything with the power button and you will exit
the alarm settings.
7. If you want to turn o the set alarm, follow the same steps as you would
when setting the alarm, and then select the icon in point 3 to .
Conrm with the power button.
7. MEASURING BLOOD PRESSURE
Several factors play a role in measuring blood pressure. For the most accu-
rate values, you must follow the following principles.
1. Before taking a measurement, be completely at rest for 5–10 minutes.
If you have been performing heavy manual work before taking the rea-
ding, rest for an hour to an hour and a half.
2. Do not smoke, drink caeinated beverages or alcoholic beverages for at
least half an hour before the measurement and limit the intake of foods
that could cause an increase or decrease in blood pressure.
3. If you feel a strong urge to urinate, do not take a reading but empty your
bladder rst. A full bladder can cause an increase in blood pressure of
up to 10 mmHg.
4. Take measurements on your bare arm while sitting upright and comfor-
tably.
5. Rest the cued arm loosely on a at surface. The cu should be at the
same height as the heart.
6. Always measure on the same arm – ideally on the left. However, if the
pressure on your right arm is higher, give preference to measurements
on this side.
7. Whilst taking a reading, even minor activities can increase the pressure
by 5 mmHg. Therefore, do not move or talk whilst taking a measurement.
8. Repeat the measurement at least twice with an interval of at least one
minute between each reading so as to release the pressure in the vessels
completely.
9. Take measurements regularly and at the same time. Only regular mea-
surements at the same time of day over a long period of time allow for a
meaningful assessment of blood pressure values.
7.1 Attaching the cu
Any eort to support your arm whilst taking a reading can increase pressu-
re and distort measurement results. Hold the arm on which you are taking
a reading so that the cu is roughly at the level of the heart. This will take
the most accurate measurement.
1. Put the cu on your left arm so
that the hose faces downwards
and the lower part of the cu
so that it is approximately
1–2 cm above the elbow.
2. Make sure that the cu is
not tightened too tightly.
You should be able to tuck
two ngers between the cu
and arm.
3. Place your hand on the table with your palms pointed upwards so that
you feel comfortable with the cu roughly at heart level. Do not bend
the hose.
If it is not possible to use your left arm for a reading, you can also take
measurements on your right arm. However, the measurement should only
be carried out on one arm.
7.2 Taking measurements
1. Press the power button to enter measurement mode.
2. The icon of the currently selected user starts ashing on the display. Use
the switch to select user 1 or user 2 .
3. After selecting the user, the cu will automatically start to inate and the
blood pressure measurement process will begin.
4. Whilst taking a blood pressure reading, the heart rate is also measured.
The heart icon ashes at the same heart rate as the heart.
5. Once the measurement is complete, the display shows the values of
systolic and diastolic blood pressure and the heart rate value below.
Note: If you want to stop the measurement for any reason, just press the power
button.
5
8. DISPLAY READINGS TAKEN AND AVERAGE VALUE
Before displaying the average and previously taken readings, rst select
the user for whom you want to display the values using the switch.
The device can store 480 readings per user. If the memory is exceeded,
the oldest entry is erased. To display the readings, follow the instructions
below.
1. Press the memory button to enter memory mode.
2. The display shows the most recently taken readings of the user. The date
and time of the measurement can also be seen on the display.
3. Use the up and down buttons to display older values.
You can also view average values on the monitor. To display them, follow
the instructions below.
1. Press the average value button to enter average value mode.
2. The display shows the average of the last three measurements.
3. Use the up and down buttons to view average values for the last
7 days measured in the morning – AM (5:00–9:00) and in the evening
– PM (18:00–20:00).
9. DELETE STORED VALUES
In the blood pressure monitor, you can delete either the individual rea-
dings taken, or all the readings taken of the selected user.
Note: Always make sure that the correct user is selected and that wrong rea-
dings are not deleted.
To delete each value, follow the instructions below.
1. Press the memory button to enter memory mode.
2. Use the up and down buttons to select the value you want to delete.
3. Once you have selected the value, hold down the memory button until
CL -- appears on the display.
4. When CL -- is displayed, press the memory button to conrm. Cl 00 will
then appear on the display. The value is now deleted.
If you want to delete all rea-
dings taken of the selected
user, follow the instructions
below.
1. Press the average value button to enter memory mode.
2. Hold down the average value button until CL -- appears on the display.
3. When CL -- is displayed, press the average value button to conrm.
Cl 00 will then appear on the display. All readings taken of the selected
user have now been deleted.
10. TRANSFERRING READINGS TO A MOBILE DEVICE
The TrueLife Pulse BT blood pressure monitor allows you to transfer the re-
adings to your mobile device so you can keep them with you at all times.
Below you will nd instructions on how to transfer values.
First, you need to download, install and register the app.
1. Download the MedM Health app to
your mobile device for free. It can be
found on Google Play for Android
phones or the App Store for iOS
phones.
2. Install and open the app.
3. Continue by registering in the application. Fill in your email address and
password. This information is used as login information.
Once you have registered, you can sign in with the email address and pass-
word you entered when you registered. Next, you need to pair the mobile
device with the blood pressure monitor. Follow the instructions below.
1. Make sure that Bluetooth is enabled on both the mobile device and the
blood pressure monitor.
2. To turn Bluetooth on/o on the blood pressure monitor, press the
time settings button twice in succession. This will access Bluetooth
settings. Use the up and down buttons to turn Bluetooth on or o.
If the Bluetooth icon ashes on the display, it is turned on. If the icon
does not ash, Bluetooth is o.
3. Open the MedM Health app on your mobile device and then press „My
Devices“ on the app menu and then „Insert New. The mobile device
starts searching for the blood pressure monitor.
4. On the blood pressure monitor, press the average value button. The
monitor will then start transmitting a Bluetooth signal.
5. When the mobile device successfully nds the blood pressure monitor,
the app will display a picture of the monitor with the word „BPM Smart“.
6
Press the image, and then „Add to Device“. The mobile device will start
pairing with the blood pressure monitor.
6. When pairing is complete, the monitor will be added to the app.
Note: The blood pressure monitor must be transmitting a signal throughout
the pairing process. If the icon stops ashing on the monitor display, press
the average value button again to resume signal transmission.
Your blood pressure monitor is now paired to your mobile device. To trans-
mit the readings, follow the instructions below.
1. Make sure the mobile device is near the blood pressure monitor. The ma-
ximum distance is 5 metres.
2. Open the MedM Health app on your mobile device.
3. In the app on your mobile device, press the blue icon that says „Blood
Pressure“ on the home screen. In the newly opened window, tap the
blood pressure monitor image and the words „Press to connect“.
4. Make sure Bluetooth is enabled on the blood pressure monitor and press
the average value button to enter average value mode.
5. The readings are then transferred from the blood pressure monitor to
the mobile device. Tap the „Save“ button and the values will be saved
to the app.
Note: If transmission of the readings fails, the error message „E7“ will appear
on the blood pressure monitor display. Make sure Bluetooth is enabled on both
your mobile device and the blood pressure monitor. Then repeat the transfer.
Note: The blood pressure monitor comes with Bluetooth turned on automati-
cally. In places where the use of a Bluetooth device is prohibited, disable Blue-
tooth as per the instructions.
Note: The MedM Health app is provided by a third party. Elem6 s.r.o. assumes
no responsibility for the data you provide.
Note: The application is not a medical device. The application is used only for
storing measured data on a mobile device. Stored measured data is not sent or
consulted with doctors in any way.
Note: The application does not replace a consultation with a specialist, especi-
ally a doctor, or any medical care. It is also not for diagnostic purposes.
Note: If you have any questions about your condition, always contact your
doctor.
Note: Neither MedM Health nor elem6 s.r.o. are providers of healthcare or me-
dical consultations.
11. IRREGULAR HEARTBEAT
Irregular heartbeat is dened as a rhythm that is 25% lower or 25% higher
than the average rhythm measured by the device whilst measuring blood
pressure. If the device detects irregular heart rhythm two or more times
during the measurement, an irregular heart rhythm icon appears on
the display when the reading is displayed.
If the irregular heart rhythm icon is displayed frequently after taking a rea-
ding, we recommend seeing your doctor for a check-up.
12. TABLE OF VALUES
Below you will nd sample tables of blood pressure values. Tables are not
used to determine the diagnosis. Always consult your doctor regarding the
results.
The diastolic (mmHg)
The systolic (mmHg)
Severe hypertension
Moderate hypertension
Mild hypertension
High-normal pressure
Normal pressure
120
110
100
90
85
80
105
95
130 140 160 180
Blood pressure levels SBP
mmHg
DBP
mmHg
Optimal < 120 < 80
Normal 120–129 80–84
High-normal 130–139 85–89
Grade 1 hypertension 140–159 90–99
Grade 3 hypertension 160–179 100–109
Grade 3 hypertension >180 > 110
7
13. ERROR MESSAGES AND TROUBLESHOOTING
If any of the following problems occur whilst taking a reading, please refer
to the table below.
Problem Probable cause Solution
Nothing appears on
the display when the
blood pressure monitor
is switched on.
Low battery. Replace all batteries with
new ones.
The batteries are inserted
incorrectly.
Check and, if necessary, insert
the batteries correctly to match
their polarity with the markings
in the battery compartment.
Error message 1
(E1)
No pulse is detected, or
the cu is not attached
properly.
Put the cu back on and fasten
it properly. The cu should be
at the level of the heart
Error message 2
(E2)
Motion detected. Your
hand or body was moving
when the reading was
being taken.
Repeat the measurement. Stay
calm when taking a measure-
ment and do not talk.
Error message 3
(E3)
No pressure detected. The
cu is poorly fastened or
too loose.
Put the cu back on and fasten
it properly.
Error message 4
(E4)
The monitor cannot
measure the pressure
correctly.
If the heart rate is very weak or
irregular, the pressure gauge
may not be able to measure
blood pressure.
Put the cu back on and fasten
it properly. Sit back, relax and
repeat the measurement.
Error message 5
(E5)
The cu is over-inated.
Blood pressure is over
300 mmHg.
We recommend seeing a
doctor as soon as possible for
a check-up.
Error message 6
(E6)
The batteries are low. Replace all batteries with
new ones.
Error message 7
(E7)
The transfer of values to
the mobile device failed.
Make sure Bluetooth is enabled
on both your mobile device and
the blood pressure monitor.
Cu is still inating. The system is locked. Restart the blood pressure
monitor – remove the batteries,
wait 1 minute, and then put the
batteries back in.
14. SPECIFICATIONS
Measurement Method Oscillometric
Pressure Measurement Range 30-250 mmHg
Heart Rate Measurement Range 40-180 bpm
Pressure Measurement Accuracy ± 3 mmHg
Heart Rate Measurement Accuracy ± 5%
Memory 960 readings
Power Supply 4× AA Battery DC 6V or AC Adapter
Pressure Monitor Weight 805 g (full package)
Pressure Monitor Dimensions 136 × 190 × 52 mm (without cu)
Lifetime approx. 10,000 readings
Operating Temperature -25 - 70 ° C
Operating Humidity 10-90% RH
SAFETY WHEN WORKING WITH THE DEVICE
1. Carefully read the attached safety instructions.
2. For correct handling of the product, read the latest version of the manu-
al, which is available for download at www.truelife.eu.
Print errors and information changes reserved.
Note: This product is intended for use in homes and similar environments. We
declare that if the TrueLife Pulse BT is used as a professional medical device,
a safety inspection (BTK) must be carried out regularly at the following inter-
vals: 24 months after purchase of the product, then every 12 months.
Importer:
elem6 s.r.o., Braškovská 15,
16100 Prague 6, Czech Republic,
Made in P.R.C. REF.: MD4781
0123
EC REP Shanghai International Holding Corp. GmbH (Europe)
Eiestrasse 80, 20537 Hamburg, Germany
Grandway Technology (Shenzhen) Limited, No. 5, the Second Industrial
Zone, Zhukeng Community, Longtian Street, Pingshan District,
Shenzhen, 518118, The People‘s Republic of China
Last revision date: 2020-09
8
LIEFERUMFANG
1× Blutdruckmessgerät
1× Oberarmmanschette
1× Etui
4× Alkalische Batterie Adapter 1,5V
1× Manual
1× Sicherheitsinstruktionen
Der Druckmonitor misst den Blutdruck (systolisch und diastolisch) mit der
oszillometrischen Methode und sowie die Herzfrequenz.
1. PRODUKTBESCHREIBUNG
123
12
10
8
6
4
5
11
9
7
1. Display
2. Anschluss für den Schlauch
der Manschette
3. Armmanschette
4. Benutzerwechsel
5. Ein-/Ausschalten
6. Aufwärts/Abwärts
7. Buchse für den Netzadapter
8. Speicher
9. Durchschnittswert
10. Zeiteinstellung
11. Wecker
12. Lautstärke
Display-Beschreibung
26
24
23
1 29
22
27
28
25
15
19 21
20181716
14
13
12
8
9
10
11
7
6
5
4
3
2
1. Wecker 1
2. Datum
3. Uhrzeit
4. Schwere Hypertonie
5. Mittelschwere Hypertonie
6. Leichte Hypertonie
7. Normal erhöhter Blutdruck
8. Normaler Blutdruck
9. Optimaler Blutdruck
10. Falsch aufgelegte Manschette
11. Regime der Weckerstellung
12. Regime der Datum-
und Uhrzeiteinstellung
13. Durchschnittswert-Regime
14. Bewegung während der Messung
15. Speicher
16. Aktueller Eintrag im Speicher
17. Benutzer
18. Gesamtspeicher
19. Batterie-schwach-Symbol
20. Bluetooth
21. Symbol für Herzfrequenz
22. Indikator des unregelmäßigen
Pulsschlags
23. Pulsfrequenz
24. Symbol für Luft ablassen
25. Diastolischer (niedrigerer)
Blutdruck
26. Symbol für Aufpumpen
27. Systolischer (höherer) Blutdruck
28. Lautstärke
29. Wecker 2
DE – BEDIENUNGSANLEITUNG
9
2. BATTERIEN EINLEGEN
Entfernen Sie den Deckel des Batteriefachs auf der Rückseite des Blutdruck-
messgeräts und legen Sie 4× Adapter 1,5V-Batterie ein. Vergewissern Sie
sich, dass die Batterien richtig gemäß den Polaritäts-Zeichen im Batterie-
fach eingelegt wurden. Benutzen Sie keine Batterien nach Ablauf des Min-
desthaltbarkeitsdatums.
Die Batterien müssen ausgewechselt werden, wenn nach dem Einschal-
ten des Blutdruckmessgeräts auf dem Blutdruck das Batterie-Symbol
und der Hinweis „E6“ erscheinen. Das Symbol in Verbindung mit dem
Hinweis signalisiert niedriges Energielevel, das Gerät wird keine Messung
durchführen. Das Gerät ist für die Nutzung von wiederauadbaren Batte-
rien nicht geeignet.
Falls Sie das Gerät längere Zeit nicht benutzen nehmen Sie die Batterien
heraus.
3. BENUTZUNG DES NETZADAPTERS
(Der Netzadapter gehört nicht zu Lieferumfang. Er kann als wählbares Zu-
behör dazu gekauft werden.)
a) Anschluss
1. Verbinden Sie den Adapter-Konnektor mit dem Blutdruckmessgerät
über die DC-Buchse auf der rechten Seite des Geräts.
2. Schließen Sie den Adapter an das Stromnetz 100-240 V an.
3. Das Blutdruckmessgerät wird eingeschaltet.
b) Abschalten
1. Ziehen Sie den Adapter aus der Steckdose.
2. Schieben Sie den Adapter-Konnektor aus der DC-Buchse auf der Seite
des Blutdruckmessgeräts hinaus.
Hinweis: Es soll nur der Original-Adapter genutzt werden.
Hinweis: Bei der Nutzung des Adapters müssen die Batterien nicht herausge-
nommen werden.
4. EINSTELLUNG DES DATUMS UND DER UHRZEIT
Nach Einlegen von Batterien, Anschluss des Netzadapters oder Drücken
der Taste Zeiteinstellung“ für die Dauer von 5 Sekunden bendet sich das
Gerät im Regime der Einstellung des Datums und der Uhrzeit.
1. Auf dem Display blinkt jetzt die Anzeige Year“.
2. Mit Hilfe der Tasten „aufwärts/abwärts“ und stellen Sie das richtige
Jahr ein. Alles bestätigen Sie mit der Taste „einschalten/ausschalten“ .
3. Bei der Einstellung des Monats > des Tages > der Stunde > der Minute
fahren Sie in derselben Art und Weise fort.
WICHTIGER HINWEIS: Bei der ersten Installierung müssen das genaue Da-
tum und die Uhrzeit eingestellt werden. Bei falscher Einstellung können bei
der Übertragung der gemessenen Werte nicht richtig im Kalender gespeichert
werden.
Hinweis: Die gemessenen Werte bleiben bei Batteriewechsel gespeichert. Da-
tum und Uhrzeit müssen jedoch neu eingestellt werden.
5. EINSTELLUNG DER LAUTSTÄRKE
Das Blutdruckmessgerät nutzt bei einigen Funktionen Signaltöne. Ihre
Lautstärke kann eingestellt werden.
1. Drücken Sie die Taste „Lautstärke“ . Jetzt sind Sie im Regime der Laut-
stärke- Einstellung.
2. Die Lautstärkeanzeige fängt an zu blinken.
3. Für Erhöhung der Lautstärke nutzen Sie die Taste „aufwär ts“ und für
die Reduzierung die Taste „abwärts“.
4. Für die Einstellung der gewünschten Lautstärke drücken Sie die Taste
„einschalten/ausschalten“ für Bestätigung und Beendigung des Mo-
dus.
10
6. EINSTELLUNG DES WECKERS
Mit dem Blutdruckmessgerät können Sie zwei Signaltöne – Wecker – ein-
stellen.
1. Drücken Sie die Taste Wecker“ . Jetzt sind Sie im Regime der Wecker-
stellung.
2. Auf dem Display blinkt jetzt die Weckeranzeige. Drücken Sie noch ein-
mal die Taste „Wecker“ und wählen Sie zwischen den beiden Weckern
( or ).
3. Sobald die von Ihnen gewählte Anzeige blinkt, können Sie mit Hilfe der
Tasten „aufwärts“ und „abwärts“ zwischen dem Einschalten des
Weckers und Ausschalten des Weckers wählen. Zur Bestäti-
gung drücken Sie die Taste „Wecker“ und halten Sie diese Taste so
lange gedrückt, bis die Weckeranzeige nicht mehr blinkt.
4. Fahren Sie mit der Einstellung der Uhrzeit des Weckers fort. Zunächst
geben Sie mit Hilfe der Pfeiltasten „aufwärts“ und „abwärts“ die
Stunde ein und dann bestätigen Sie die Stunde mit der Taste „einschal-
ten/ausschalten“ .
5. Beim Eingeben von Minuten gehen Sie in derselben Art und Weise vor.
6. Zum Schluss bestätigen Sie alles mit der Taste „einschalten/ausschalten“
und damit beenden Sie gleichzeitig das Regime der Weckerstellung.
7. Wenn Sie den gestellten Wecker abschalten möchten, gehen Sie in de-
rselben Art und Weise wie bei der Weckerstellung vor und in Punkt 3
wählen Sie die Anzeige . Alles bestätigen Sie mit der Taste „ein-
schalten/ausschalten“ .
7. BLUTDRUCKMESSUNG
Bei der Blutdruckmessung spielen mehrere Faktoren eine Rolle. Wenn wir
möglichst präzise Werte erhalten möchten, dann sind folgende Grundsätze
zu befolgen.
1. Ruhen Sie sich vor jeder Messung 5 bis 10 Minuten aus. Wenn Sie vor der
Messung schwere manuelle Arbeiten verrichten, verlängern Sie diese
Ruhezeit auf 60 bis 90 Minuten.
2. Mindestens eine halbe Stunde vor der Messung sollten Sie aufs Rauchen
sowie koeinhaltige und alkoholische Getränke verzichten und Sie den
Konsum von Lebensmitteln einschränken, die einen erhöhten oder
niedrigeren Blutdruck verursachen könnten.
3. Falls Sie einen starken Harndrang verspüren, leeren Sie vor der Messung
Ihre Blase. Eine volle Harnblase kann eine Erhöhung des Blutdrucks um
bis zu 10 mmHg verursachen.
4. Führen Sie die Messung direkt auf der Haut durch und setzen Sie dabei
aufrecht und bequem.
5. Legen Sie Ihren Arm mit der Manschette auf eine Unterlage. Achten Sie
darauf, dass sich die Manschette auf der Herzhöhe bendet.
6. Führen Sie die Messung stets am gleichen Arm – idealerweise am linken
Arm – durch. Wenn Ihr Blutdruck beim rechten Arm höher ist, sollte bei
der Messung diese Seite vorgezogen werden.
7. Jede während der Messung ausgeübte Tätigkeit auch mit einem sehr
kleinen Aufwand kann den Blutdruck um 5 mmHg erhöhen. Aus diesem
Grunde sollten Sie sich währen der Messung nicht bewegen und Sie so-
llten auch nicht sprechen.
8. Wiederholen Sie die Messung mindestens einmal mit einem Zeitabstand
von mindestens einer Minute, damit der Druck in den Venen für die neue
Messung gemindert wird.
9. Führen Sie die Messung regelmäßig und stets zu derselben Uhrzeit
durch. Nur regelmäßige Messungen zu derselben Uhrzeit während ei-
ner längeren Zeitspanne ermöglichen eine sinnvolle Beurteilung der
Blutdruckwerte.
7.1 Anlegen der Manschette
Jedwede Versuche, den Arm während der Messung zu stützen, könnten
den Blutdruck erhöhen und somit die Messergebnisse beeinträchtigen.
Halten Sie den Arm mit der Manschette in einer solchen Position, dass sich
die Manschette ungefähr auf der Herzhöhe bendet. Dadurch werden die
Messergebnisse am genausten.
1. Legen Sie die Manschette am
linken Arm so an, dass der
Schlauch nach unten hängt
und dass sich der untere Teil
der Manschette ca. 1–2 cm über
dem Ellenbogen bendet.
2. Vergewissern Sie sich, dass
die Manschette nicht zu eng
angelegt wurde. Zwischen
die Manschette und den Arm
sollten zwei Finger passen.
11
3. Legen Sie Ihren Unterarm mit Handäche nach oben so, dass Sie sich
bequem fühlen und die Manschette ungefähr auf der gleichen Höhe wie
das Herz liegt. Der Schlauch darf nicht geknickt werden.
Wenn der linke Arm für die Messung nicht genutzt werden kann, können
Sie die Messung auch am rechten Arm vornehmen. Die Messung sollte
allerdings stets nur an einem Arm vorgenommen werden.
7.2 Durchführung der Messung
1. Drücken Sie die Taste „einschalten/ausschalten“ . Jetzt sind Sie im Re-
gime der Messung.
2. Auf dem Display blinkt jetzt die Ikone des soeben gewählten Benutzers.
Mit der Schiebetaste können Sie zwischen Benutzer 1 und Benutzer 2
wählen.
3. Nach dem Auswählen des Benutzers wird die Manschette automatisch
aufgepumpt und die Messung des Blutdrucks beginnt.
4. Zeitgleich mit der Blutdruckmessung beginnt auch die Messung der
Herzfrequenz. Auf dem Display blinkt in derselben Pulsfrequenz wie das
Herz das Symbol .
5. Sobald die Messung beendet wurde, erscheinen auf dem Display die
Werte des systolischen und des diastolischen Blutdrucks und unter
ihnen der Wert der Pulsfrequenz.
Hinweis: Falls Sie die Messung aus irgendeinem Grund beenden möchten,
drücken Sie einfach die Taste „einschalten/ausschalten“ .
8. ANZEIGEN DER GEMESSENEN WERTE UND DES DURCHSCHNITT
SWERTS
Vor dem Anzeigen der Durchschnittswerte und der zu einem früheren Zeit-
punkt gemessenen Werte wählen Sie zunächst mit der Schiebetaste den
Benutzer aus, dessen Werte angezeigt werden sollen.
Das Blutdruckmessgerät kann sich bei jedem Benutzer 480 gemessene
Werte merken. Bei der Überschreitung der Speicherkapazität werden die
ältesten gespeicherten Daten überschrieben. Zum Anzeigen der geme-
ssenen Werte gehen Sie gemäß der unten angeführten Anleitung vor.
1. Drücken Sie die Taste „Speicher . Jetzt sind Sie im Speicher-Regime.
2. Auf dem Display werden die zuletzt gemessenen Werte des Benutzers
angezeigt. Ferner erscheinen das Datum und die Uhrzeit der Messung
auf dem Display.
3. Ältere Werte werden mit Hilfe der Taste „aufwärts“ und „abwärts“
angezeigt.
Sie können auch die Durchschnittswerte abrufen. Falls Sie diese Werte
abrufen möchten, gehen Sie gemäß der unten angeführten Anleitung vor.
1. Drücken Sie die Taste „Durchschnittswert“ . Jetzt sind Sie im Durch-
schnittswert-Regime.
2. Auf dem Display erscheint der Durchschnittswert der letzten drei Mes-
sungen.
3. Mit Hilfe der Tasten „aufwärts“ und „abwärts“ können Sie die Durch-
schnittswerte der Messungen für die letzten 7 Tage in den Morgenstun-
den – AM (5:00–9:00) und in den Abendstunden – PM (18:00–20:00)
abrufen.
9. LÖSCHEN DER GESPEICHERTEN WERTE
In dem Blutdruckmessgerät können Sie enweder einzelne gemessene
Werte oder alle gemessenen Werte des ausgewählten Benutzers löschen.
Hinweis: Bitte vergewissern Sie sich immer, dass der richtige Benutzer aus-
gewählt wurde und dass nicht die falschen gemessenen Werte gelöscht wer-
den.
Beim Löschen der einzelnen Werte gehen Sie folgendermaßen vor.
1. Drücken Sie die Taste „Speicher . Jetzt sind Sie im Speicher-Regime.
2. Für die Wahl des Werts, den Sie löschen möchten, drücken Sie die Taste
„aufwärts“ und „abwärts“ .
3. Sobald Sie den Wert ausgewählt haben, halten Sie die Taste „Speicher
gedrückt, bis CL – angezeigt wird.
4. Nachdem CL – angezeigt wurde bestätigen Sie alles mit dem Drücken
der Taste „Speicher“ . Auf dem Display erscheint CL 00. Jetzt ist der
Wert gelöscht.
Falls Sie sämtliche
gemessenen Werte des
ausgewählten Benutzers
löschen möchten, gehen Sie
wie unten beschrieben vor.
1. Drücken Sie die Taste „Durchschnittswert“ . Jetzt sind Sie im Speicher
-Regime.
12
2. Drücken Sie die Taste „Durchschnittswert“ bis auf dem Display CL –
angezeigt wird.
3. Nachdem CL – angezeigt wurde bestätigen Sie alles mit dem Drücken
der Taste „Durchschnittswert“ . Auf dem Display erscheint CL 00.
Jetzt sind sämtliche gemessenen Werte des ausgewählten Benutzers
gelöscht.
10. ÜBERTRAGUNG VON GEMESSENEN WERTEN AUF EIN MOBIL
GERÄT
Das Blutdruckmessgerät TrueLife Pulse BT ermöglicht die Übertragung der
gemessenen Werte auf ein Mobilgerät, damit Sie diese Werte immer dabei
haben. Unten nden Sie eine Anleitung, wie bei der Übertragung von Wer-
ten vorzugehen ist.
Zunächst ist es erforderlich, eine Applikation herunterzuladen, zu installie-
ren und sich in der Applikation zu registrieren.
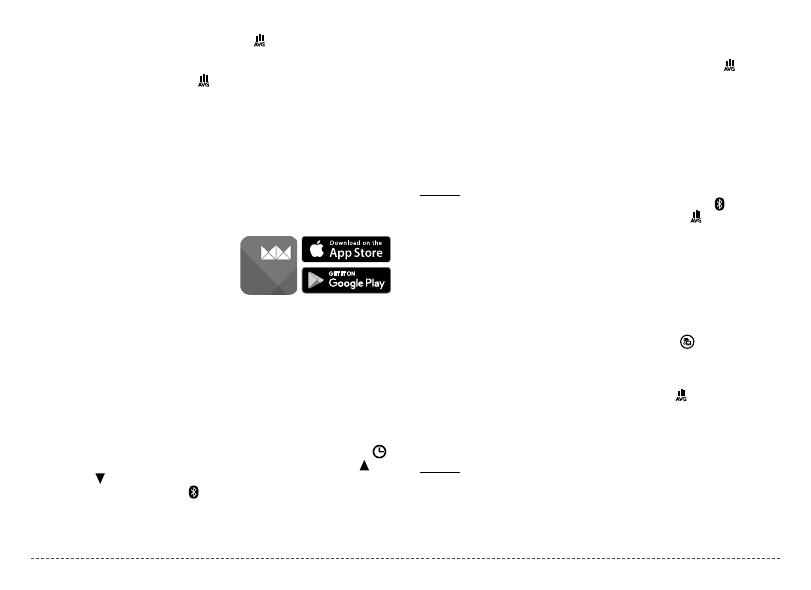
1. Laden Sie auf das Mobilgerät kostenlos
die Applikation MedM Health runter,
die Sie auf Google Play für Telefone mit
dem Operationssystem Android oder
auf App Store iOS nden.
2. Installieren und önen Sie die Applikation.
3. Fahren Sie mit der Registrierung in der Applikation fort. Geben Sie E-Mail
-Adresse und Passwort ein. Diese Angaben dienen als Anmeldedaten.
Sobald Sie sich registriert haben, können Sie mit Hilfe der E-Mail-Adre-
sse und des Passworts, die Sie bei der Registrierung eingegeben haben,
anmelden. Ferner muss das Mobiltelefon mit dem Blutdruckmessgerät ver-
binden. Weiter gehen Sie gemäß folgender Anleitung fort:
1. Vergewissern Sie sich, dass Bluetooth sowohl bei dem Mobilgerät als
auch beim Blutdruckmessgerät aktiviert ist.
2. Zum Aktivieren/Desaktivieren von Bluetooth auf dem Blutdruckmess-
gerät drücken Sie zweimal hintereinander die Taste „Zeiteinstellung“ .
Jetzt sind Sie im Bluetooth-Regime. Mit Hilfe der Taste „aufwärts“ und
„abwärts“ können Sie Bluetooth aktivieren und desaktivieren. Wenn
auf dem Display die Anzeige blinkt, ist Bluetooth aktiviert. Wenn sie
nicht blinkt, ist Bluetooth deaktiviert.
3. Schalten Sie auf dem Telefon die Applikation MedM Health ein und klic-
ken Sie im Angebot der Applikation „Mein Gerät“ an und drücken Sie an-
schließend die Taste „Neue einfügen“. Das Mobiltelefon sucht jetzt nach
dem Blutdruckmessgerät.
4. Drücken Sie auf dem Gerät die Taste „Durchschnittswert“ an. Das
Blutdruckmessgerät sendet jetzt ein Signal Bluetooth.
5. Wenn das Mobiltelefon das Blutdruckmessgerät erfolgreich ndet, ers-
cheint eine Abbildung des Blutdruckmessgeräts und die Aufschrift „BPM
Smart“. Klicken Sie die Meldung an und drücken Sie die Taste „Zum Gerät
hinzufügen“. Er folgt das Pairing des Mobiltelefons mit dem Blutdruc-
kmessgerät.
6. Nach Beendigung des Pairingvorgangs wurde das Blutdruckmessgerät
zu der Applikation hinzugefügt.
Hinweis: Während des Pairings muss das Blutdruckmessgerät in einem
Zustand der Signalsendung gehalten werden. Wenn das Symbol nicht mehr
auf dem Display blinkt, muss die Taste „Durchschnittswert“ erneut gedrückt
werden, um die Signalsendung fortzusetzen.
Jetzt ist das Pairing Ihres Blutdruckmessgeräts mit dem Mobiltelefon ab-
geschlossen. Bei der weiteren Übertragung von gemessenen Werten ge-
hen Sie folgendermaßen vor.
1. Vergewissern Sie sich, dass sich das Mobiltelefon in der Nähe des
Blutdruckmessgeräts bendet. Die maximale Entfernung beträgt 5 m.
2. Aktivieren Sie im Telefon die Applikation MedM Health.
3. Klicken Sie in der Applikation im Mobiltelefon auf der Homepage das
blaue Symbol mit der Aufschrift „Blood Pressure“ an. In dem neu
geöneten Fenster klicken Sie das Blutdruckmessgerät-Symbol und die
Aufschrift „Für die Verbindung drücken“.
4. Vergewissern Sie sich, dass Bluetooth beim Blutdruckmessgerät aktiviert
ist und drücken Sie die Taste „Durchschnittswert“ . Jetzt sind Sie im
Durchschnittswert-Regime.
5. Die gemessenen Werte werden vom Blutdruckmessgerät auf das Mobil-
telefon übertragen. Klicken Sie die Taste „Speichern“ an und die Werte
werden in der Applikation gespeichert.
Hinweis: Wenn die Übertragung der gemessenen Werte fehlschlägt, erscheint
auf dem Display des Blutdruckmessgeräts die Fehlermeldung „E7“. Kontrollie-
ren Sie, ob Bluetooth sowohl beim Mobiltelefon als auch beim Blutdruckmess-
gerät aktiv ist. Danach wiederholen Sie die Übertragung.
13
Hinweis: Das Blutdruckmessgerät wird mit automatisch aktivierten Bluetooth
geliefert. An Orten, an denen die Nutzung von Geräten mit Bluetooth verboten
ist, desaktivieren Sie Bluetooth gemäß der Anleitung.
Hinweis: Die Applikation MedM Health wird von einem Dritten zur Verfügu-
ng gestellt. Die Gesellschaft elem6 s.r.o. übernimmt keine Haftung für die von
Ihnen übermittelten Daten.
Hinweis: Die Applikation ist kein medizinisches Mittel. Sie dient lediglich zum
Speichern gemessener Daten im Mobilgerät. Die gemessenen Daten werden
weder an Ärzte weitergeleitet noch mit Ärzten konsultiert.
Hinweis: Die Applikation ersetzt in keiner Weise Konsultationen mit einem Spe-
zialisten, insbesondere mit einem Arzt, sowie keine medizinische Behandlung.
Sie dient auch nicht zu diagnostischen Zwecken.
Hinweis: Wenn Sie Fragen zu Ihrem Gesundheitszustand haben, wenden Sie
sich stets an Ihren Arzt.
Hinweis: Weder der Anbieter der Applikation MedM Health noch die
Gesellschaft elem6 s.r.o. ist medizinischer Dienstleister bzw. bietet ärztliche
Konsultationen an.
11. UNREGELMÄSSIGER HERZRHYTHMUS
Ein unregelmäßiger Herzrhythmus wird als ein Rhythmus deniert, dessen
Wert um 25 % niedriger oder höher als der durchschnittliche mit dem Ge-
rät während der Blutdruckmessung gemessene Rhythmus ist. Wenn das
Gerät während der Messung einen unregelmäßigen Herzrhythmus zwei-
mal oder öfter detektiert, erscheint auf dem Display bei den gemessenen
Werten die Anzeige für einen unregelmäßigen Herzrhythmus .
Sollte die Anzeige für einen unregelmäßigen Herzrhythmus nach der Mes-
sung öfter erscheinen, so empfehlen wir, Ihren Arzt zu besuchen und Ihren
Gesundheitszustand mit Ihrem Arzt zu konsultieren.
12. TABELLE MIT WERTEN
Unten nden Sie Beispiel-Tabellen mit Blutdruckwerten. Die Tabellen
dienen nicht zum Stellen einer Diagnose. Die Ergebnisse sind immer mit
Ihrem Arzt zu konsultieren.
Diastolisch (mmHg)
Systolisch (mmHg)
Starke Hypertonie
Mittlere Hypertonie
Leichte Hypertonie
Hoch normal
Normal
120
110
100
90
85
80
105
95
130 140 160 180
Bereich der Blutdruckwerte
SBP
mmHg
DBP
mmHg
Optimal < 120 < 80
Normal 120–129 80–84
Noch normal 130–139 85–89
Stufe 1 leichte Hypertonie 140–159 90–99
Stufe 2 mittlere Hypertonie
160–179 100–109
Stufe 3 starke Hypertonie >180 > 110
13. FEHLERMELDUNGEN UND FEHLERBEHEBUNG
Sollte während der Messung eines der unten genannten Probleme auftre-
ten, schauen Sie sich die folgende Tabelle an.
Problem Vermutliche Ursache Fehlerbehebung
Nach dem Einschalten
des Blutdruckmess-
geräts erscheint nichts
auf dem Display.
Die Batterien sind leer. Ersetzen Sie alle Batterien
durch neue Batterien.
Die Batterien wurden
falsch eingelegt.
Kontrollieren Sie die Batterien
und legen Sie die Batterien ggf.
richtig so ein, dass die Polarität
der Markierung im Batteriefach
entspricht.
Fehlermeldung 1
(E1)
Es wurde kein Puls detek-
tiert oder die Manschette
sitzt zu locker.
Legen Sie die Manschette noch
einmal an und befestigen Sie
sie richtig. Die Manschette
sollte sich auf der Herzhöhe
benden.
Fehlermeldung 2
(E2)
Es wurde Bewegung
detektiert. Ihr Arm oder
Ihr Körper war während
der Manschette in
Bewegung.
Wiederholen Sie die Messung.
Bleiben Sie während der
Messung ruhig und sprechen
Sie nicht.
14
Fehlermeldung 3
(E3)
Es wurde kein Blutdruck
detektiert. Die Mans-
chette wurde falsch oder
zu locker angelegt.
Legen Sie die Manschette noch
einmal an und befestigen Sie
sie richtig.
Fehlermeldung 4
(E4)
Das Blutdruckmessgerät
kann den Blutdruck nicht
richtig messen.
Wenn der Puls sehr schwach
oder unregelmäßig ist, kann
das Blutdruckmessgerät
möglicherweise den Blutdruck
nicht messen. Legen Sie die
Manschette noch einmal an
und befestigen Sie sie richtig.
Setzen Sie sich bequem hin,
bleiben Sie ruhig und wieder-
holen Sie die Messung.
Fehlermeldung 5
(E5)
Die Manschette wurde
zu sehr aufgepumpt. Der
Blutdruckwert beträgt
mehr als 300 mmHg.
Wir empfehlen, Ihren Arzt
möglichst bald zu besuchen
und mit ihm Ihren Gesundheit-
szustand zu konsultieren.
Fehlermeldung 6
(E6)
Die Batterien sind
fast leer.
Ersetzen Sie alle Batterien
durch neue Batterien.
Fehlermeldung 7
(E7)
Die Übertragung von
Werten auf das Mobilte-
lefon schlug fehl.
Kontrollieren Sie, ob Bluetooth
sowohl beim Telefon als auch
beim Blutdruckmessgerät
aktiviert ist.
Die Manschette wird
weiter aufgepumpt.
Das System wird
blockiert.
Starten Sie das Blutdruc-
kmessgerät neu – nehmen Sie
die Batterie heraus, warten
Sie 1 Minute und legen Sie
die Batterien wieder ins
Batteriefach.
14. SPEZIFIKATIONEN
Messverfahren Oszillometrisch
Druckmessbereich 30-250 mmHg
Pulsmessbereich 40-180 Pulse/Min
Druckmessgenauigkeit ±3 mmHg
Pulsmessgenauigkeit ± 5 %
Speicher 960 Messergebnisse
Spannungsversorgung 4× AA Batterie DC 6 V oder AC Adapter
Gerätegewicht 805 g (volles Paket)
Geräteabmessungen 136 × 190 × 52 mm (ohne Manschette)
Nutzungsdauer ca. 10.000 Messungen
Betriebstemperatur -25 - 70 °C
Betriebsfeuchtigkeit 10-90 % RH
SICHERHEIT BEI DER BENUTZUNG DES GERÄTS
1. Lesen Sie die beigefügten Sicherheitshinweise durch.
2. Für einen richtigen Umgang mit dem Produkt lesen Sie bitte die aktuelle
Version des Manuals durch, die auf folgender Seite zum Download zur
Verfügung steht: www.truelife.eu.
Druckfehler und Änderungen von Informationen vorbehalten.
Hinweis: Dieses Produkt ist für Benutzung in Haushalten und ähnlicher Umge-
bung bestimmt. Wir erklären, dass im Falle der Benutzung des Produkts TrueLi-
fe Pulse BT als professionelles medizinisches Mittel eine technische Sicherheit-
skontrolle (BTK) in folgenden Zeitabständen durchzuführen ist: 24 Monate
nach dem Kauf des Produkts, danach alle 12 Monate.
Importeur:
elem6 s.r.o., Braškovská 15,
16100 Prague 6, Czech Republic,
Made in P.R.C. REF.: MD4781
0123
EC REP Shanghai International Holding Corp. GmbH (Europe)
Eiestrasse 80, 20537 Hamburg, Germany
Grandway Technology (Shenzhen) Limited, No. 5, the Second Industrial
Zone, Zhukeng Community, Longtian Street, Pingshan District,
Shenzhen, 518118, The People‘s Republic of China
Datum der letzten Revision: 2020-09
15
OBSAH BALENÍ
1× Tlakoměr
1× Pažní manžeta
1× Úložné pouzdro
4× Alkalická baterie AA 1,5V
1× Manuál
1× Bezpečnostní instrukce
Tlakoměr měří pomocí oscilometrické metody krevní tlak (systolický a dia-
stolický) a dále pak i tepovou frekvenci.
1. POPIS PRODUKTU
123
12
10
8
6
4
5
11
9
7
1. Displej
2. Vstup pro hadičku manžety
3. Pažní manžeta
4. Změna uživatele
5. Zapnout/vypnout
6. Nahoru/Dolů
7. Vstup pro síťový adaptér
8. Paměť
9. Průměrná hodnota
10. Nastavení času
11. Budík
12. Hlasitost
Popis displeje
26
24
23
1 29
22
27
28
25
15
19 21
20181716
14
13
12
8
9
10
11
7
6
5
4
3
2
1. Budík 1
2. Datum
3. Čas
4. Těžká hypertenze
5. Střední hypertenze
6. Lehká hypertenze
7. Normální zvýšený tlak
8. Normální tlak
9. Optimální tlak
10. Špatně nasazená manžeta
11. Režim nastavení budíku
12. Režim nastavení data a času
13. Režim průměrné hodnoty
14. Pohyb při měření
15. Paměť
16. Aktuální záznam v paměti
17. Uživatel
18. Celková paměť
19. Symbol nízké baterie
20. Bluetooth
21. Symbol srdečního tepu
22. Indikátor nepravidelného tepu
23. Tepová frekvence
24. Symbol vypouštění vzduchu
25. Diastolický (dolní) krevní tlak
26. Symbol tlakování
27. Systolický (horní) krevní tlak
28. Úroveň hlasitosti
29. Budík 2
CZ – NÁVOD K POUŽITÍ
16
2. INSTALACE BATERIÍ
Odstraňte kryt baterií na zadní straně tlakoměru a vložte 4× baterii AA
1,5V. Ujistěte se, že jsou baterie vložené ve správném směru polarity pod-
le nákresu v prostoru pro baterie. Nepoužívejte baterie po uplynutí data
spotřeby.
Baterie je nutné vyměnit, pokud se po zapnutí tlakoměru objeví na displeji
symbol baterie a nápis „E6“. Symbol společně s nápisem signalizují nízkou
hladinu energie v bateriích. Při kriticky nízké hladině energie v bateriích,
zařízení neprovede měření. Přístroj není vhodný pro používání nabíjecích
baterií.
V případě, že nebudete přístroj delší dobu používat, vyjměte z něho ba-
terie.
3. POUŽITÍ SÍŤOVÉHO ADAPTÉRU
(Síťový adaptér není součástí balení. Lze dokoupit jako volitelné příslušen-
ství.)
a) Připojení
1. Zasuňte konektor adaptéru do DC zdířky na pravé straně tlakoměru.
2. Připojte adaptér do zásuvky 100-240 V.
3. Tlakoměr se zapne.
b) Odpojení
1. Vypojte adaptér ze zásuvky.
2. Vysuňte konektor adaptéru z DC zdířky na straně tlakoměru.
Upozornění: Používejte pouze originální adaptér.
Upozornění: Při použití adaptéru můžete baterie nechat uvnitř přístroje.
4. NASTAVENÍ DATA A ČASU
Po vložení baterií, zapojení síťového adaptéru nebo stisknutí tlačítka „na-
stavení času“ po dobu 5 sekund se dostanete do režimu nastavení data
a času.
1. Na displeji se rozbliká nápis Year“.
2. Pomocí tlačítek „nahoru/dolů“ a nastavte správný rok. Vše potvrdíte
tlačítkem „zapnout/vypnout“ .
3. Pokračujte stejným způsobem pro nastavení měsíce > dne > hodiny >
minuty.
DŮLEŽITÉ UPOZORNĚNÍ: Při první instalaci je potřeba nastavit přesné datum
a čas. Pokud by nebylo správně nastaveno, při přenosu naměřených hodnot
do mobilního zařízení nebudou hodnoty správně propisovány do kalendáře.
Upozornění: Naměřené hodnoty zůstanou při výměně baterií uchovány v pa-
měti. Je však potřeba znovu nastavit datum a čas.
5. NASTAVENÍ HLASITOSTI
Tlakoměr u některých funkcí využívá zvukových upozornění. Jejich hlasi-
tost lze nastavit.
1. Stiskněte tlačítko „hlasitost“ . Dostanete se do režimu nastavení hla-
sitosti.
2. Indikátor hlasitosti začne blikat.
3. Pro zvýšení hlasitosti použijte tlačítko „nahoru“ a pro snížení tlačítko
„dolů“ .
4. Po nastavení požadované hlasitosti stiskněte tlačítko „zapnout/vypnout“
pro potvrzení a ukončení módu.
6. NASTAVENÍ BUDÍKU
Na tlakoměru si můžete nastavit dvě zvuková upozornění – budíky.
1. Stiskněte tlačítko „budík“ . Dostanete se do režimu nastavení budíku.
2. Na displeji se rozbliká ikona budíku. Znovu stiskněte tlačítku „budík“
a vyberte si mezi dvěma budíky ( nebo ).
17
3. Jakmile bliká vámi vybraná ikona, pomocí tlačítek „nahoru“ a „dolů“
můžete přepínat mezi zapnutím budíku a vypnutím budíku
. Pro potvrzení stiskněte a držte tlačítko „budík“ , dokud nepře-
stane ikona budíku blikat.
4. Pokračujte nastavením času budíku. Nejdříve nastavte pomocí tlačítek
„nahoru“ a „dolů“ hodinu a potvrďte tlačítkem „zapnout/vypnout“
.
5. Stejným způsobem pokračujte i pro nastavení minut.
6. Nakonec vše potvrdíte tlačítkem „zapnout/vypnout“ a zároveň tím
ukončíte režim nastavení budíku.
7. V případě že chcete nastavený budík vypnout, postupujte stejně jako při
nastavení budíku a v bodě 3. zvolte ikonu . Vše potvrďte tlačítkem
„zapnout/vypnout“ .
7. MĚŘENÍ KREVNÍHO TLAKU
Při měření krevního tlaku hraje roli několik faktorů. Pokud chcete naměřit
co nejpřesnější hodnoty, je potřeba dodržet následující zásady.
1. Před měřením buďte 5–10 minut v úplném klidu. Pokud před měřením
provádíte těžkou manuální práci, tuto dobu prodlužte na hodinu až ho-
dinu a půl.
2. Nejméně půl hodiny před měřením nekuřte, nepijte nápoje s obsahem
kofeinu nebo alkoholické nápoje a omezte přísun potravin, které by
mohli vyvolat zvýšený nebo snížený krevní tlak.
3. Pokud pociťujete silné nucení močení, neměřte tlak a nejdříve si vy-
prázdněte močový měchýř. Plný močový měchýř může způsobit zvýšení
krevního tlaku až o 10 mmHg.
4. Měření provádějte na holé paži a seďte přitom zpříma a pohodlně.
5. Ruku, na níž je manžeta, mějte volně položenou na podložce. Manžeta by
měla být ve stejné výšce jako je srdce.
6. Měření provádějte vždy na stejné paži – ideálně na levé. Pokud však máte
tlak na pravé ruce vyšší, upřednostňujte měření na této straně.
7. I jakákoliv malá činnost prováděná při samotném měření může zvýšit
tlak o 5 mmHg. Během měření se tedy nehýbejte a nemluvte.
8. Měření opakujte alespoň dvakrát s časovým odstupem minimálně jednu
minutu, aby se tlak v cévách zcela uvolnil pro nové měření.
9. Měření provádějte pravidelně a vždy ve stejnou dobu. Pouze pravidelná
měření ve stejnou denní dobu prováděná po delší časové období umož-
ňují smysluplné posouzení hodnot krevního tlaku.
7.1 Nasazení manžety
Jakákoliv snaha podepřít si ruku v průběhu měření, může zvýšit tlak
a zkreslit tak výsledky měření. Ruku, na které měříte tlak, mějte položenou
tak, aby byla manžeta zhruba na úrovni srdce. Výsledky měření tak budou
nejpřesnější.
1. Navlečte si manžetu na levou
ruku tak, aby hadička směřova-
la směrem dolů a spodní část
manžety aby byla zhruba
1–2 cm nad loktem.
2. Ujistěte se, že manžeta není
utažená příliš těsně. Mezi man-
žetu a paži by měly jít zastrčit
dva prsty.
3. Ruku položte na stůl dlaní směrem nahoru tak, abyste se cítili pohodlně
a zároveň měli manžetu zhruba na úrovni srdce. Hadičku neohýbejte.
Pokud není možné využít pro měření levou ruku, můžete provést měření
i na pravé ruce. Měření by však mělo být prováděné jen na jedné ruce.
7.2 Provedení měření
1. Stiskněte tlačítko zapnout/vypnout“ . Dostanete se do režimu mě-
ření.
2. Na displeji začne blikat ikona právě zvoleného uživatele. Pomocí posuv-
ného tlačítka můžete vybrat mezi uživatelem 1 a uživatelem 2 .
3. Po vybrání uživatele se po chvíli automaticky začne nafukovat manžeta
a začíná měření tlaku.
4. Zároveň s měřením krevního tlaku se začíná měřit i srdeční tep. Na dis-
pleji bliká ve stejné tepové frekvenci jako srdce ikona .
5. Jakmile je měření hotovo, na displeji se zobrazí hodnoty systolického
a diastolického krevního tlaku a pod nimi hodnota tepové frekvence.
Upozornění: Pokud z jakéhokoliv důvodu chcete měření ukončit, stačí stisk-
nout tlačítko „zapnout/vypnout“ .
18
8. ZOBRAZENÍ NAMĚŘENÝCH HODNOT A PRŮMĚRNÉ HODNOTY
Před zobrazením průměrných a dříve naměřených hodnot si nejprve vy-
berte pomocí posuvného tlačítka uživatele, pro kterého chcete hodnoty
zobrazit.
Tlakoměr si dokáže zapamatovat pro každého uživatele 480 naměřených
hodnot. Při překročení kapacity paměti se přemaže nejstarší uchovaný
záznam. Pro zobrazení naměřených hodnot pokračujte dle návodu níže.
1. Stiskněte tlačítko „paměť“ . Dostanete se do režimu paměti.
2. Na displeji se zobrazí naposledy naměřené hodnoty uživatele. Dále je na
displeji vidět datum a čas měření.
3. Pro zobrazení starších hodnot použijte tlačítka „nahoru“ a „dolů“ .
Na tlakoměru si můžete zobrazit průměrné hodnoty. Pokud je chcete zná-
zornit, pokračujte podle návodu níže.
1. Stiskněte tlačítko „průměrná hodnota“ . Dostanete se do režimu prů-
měrná hodnota.
2. Na displeji se zobrazí průměrná hodnota pro poslední tři měření.
3. Použitím tlačítek „nahoru“ a „dolů“ si můžete zobrazit průměrné
hodnoty za posledních 7 dní naměřených v ranních hodinách – AM
(5:00–9:00) a ve večerních hodinách – PM (18:00–20:00).
9. VYMAZÁNÍ ULOŽENÝCH HODNOT
V tlakoměru můžete vymazat buď jednotlivé naměřené hodnoty nebo
všechny naměřené hodnoty vybraného uživatele.
Upozornění: Vždy se ujistěte, že je vybrán správný uživatel a nebudou smazá-
ny nesprávné naměřené hodnoty.
Pro mazání jednotlivých hodnot, pokračujte podle návodu níže.
1. Stiskněte tlačítko „paměť“ . Dostanete se do režimu paměti.
2. Pro výběr hodnoty, kterou chcete smazat, použijte tlačítka „nahoru“
a „dolů“ .
3. Jakmile budete mít hodnotu vybranou, podržte tlačítko „paměť“ do-
kud se na displeji nezobrazí nápis CL --.
4. Po zobrazení nápisu CL – vše potvrďte stiskem tlačítka „paměť“ . Na
displeji se objeví nápis CL 00. V tuto chvíli je hodnota smazána.
Pokud chcete smazat
všechny naměřené hodnoty
vybraného uživatele, pokra-
čujte podle návodu níže.
1. Stiskněte tlačítko „průměrná hodnota“ . Dostanete se do režimu pa-
měti.
2. Podržte tlačítko „průměrná hodnota“ , dokud se na displeji nezobrazí
nápis CL --.
3. Po zobrazení nápisu CL – vše potvrďte stiskem tlačítka „průměrná hodno-
ta“ . Na displeji se objeví nápi CL 00. V tuto chvíli jsou smazány všechny
naměřené hodnoty vybraného uživatele.
10. PŘENOS NAMĚŘENÝCH HODNOT DO MOBILNÍHO ZAŘÍZENÍ
Tlakoměr TrueLife Pulse BT umožňuje naměřené hodnoty přenést do mo-
bilního zařízení a mít je tak neustále u sebe. Níže naleznete návod, jak po-
stupovat při přenosu hodnot.
Nejdříve je nutné si stáhnout aplikaci, nainstalovat a registrovat se do ní.
1. Stáhněte si do mobilního zařízení
zdarma aplikaci MedM Health, kterou
naleznete na Google Play pro telefony
s operačním systémem Android anebo
na App Store pro telefony s operačním
systémem iOS.
2. Aplikaci nainstalujte a otevřete.
3. Pokračujte registrací do aplikace. Vyplňte emailovou adresu a heslo. Tyto
údaje slouží jako přihlašovací údaje.
Jakmile se zaregistrujete, můžete se pomocí emailové adresy a hesla, které
jste zadali při registraci, přihlásit. Dále je potřeba spárovat mobilní telefon
s tlakoměrem. Pokračujte podle návodu níže.
1. Přesvědčte se, že je Bluetooth je zapnuté na mobilním zařízení i na tla-
koměru.
2. Pro zapnutí/vypnutí Bluetooth na tlakoměru stisknete dvakrát za sebou
tlačítko „nastavení času“ . Dostanete se do režimu nastavení Bluetoo-
th. Pomocí tlačítka „nahoru“ a „dolů“ můžete Bluetooth zapnout
19
nebo vypnout. Pokud na displeji bliká ikona Bluetooth je zapnuté.
Pokud ikona nebliká je Bluetooth vypnuté.
3. Zapněte na telefonu aplikaci MedM Health a nabídce aplikace klikněte
na „Moje zařízení“ a dále pak na tlačítko „Vložit nové“. Mobilní telefon za-
čne vyhledávat tlakoměr.
4. Na tlakoměru stiskněte tlačítko „průměrná hodnota“ . Tlakoměr začne
vysílat Bluetooth signál.
5. Pokud mobilní telefon úspěšně nalezne tlakoměr, v aplikaci se zobrazí
obrázek tlakoměru a nápis „BPM Smart“. Klikněte na nápis a dále pak na
tlačítko „Přidat do zařízení“. Telefon se začne s tlakoměrem párovat.
6. Po dokončení párování budete mít tlakoměr přidaný do aplikace.
Upozornění: Po celou dobu párování je potřeba udržovat tlakoměr ve stavu
vysílání signálu. Pokud na displeji tlakoměru přestane blikat ikona , je potře-
ba znovu stisknout tlačítko „průměrná hodnota“ , aby se obnovilo vysílání
signálu.
V tuto chvíli máte tlakoměr spárovaný s mobilním telefon. Pro další přenos
naměřených hodnot pokračujte podle návodu níže.
1. Ujistěte se, že je mobilní telefon v blízkosti tlakoměru. Maximální vzdá-
lenost je 5 metrů.
2. Zapněte na telefonu aplikaci MedM Health.
3. V aplikaci na mobilním telefonu klikněte na úvodní obrazovce na mod-
rou ikonu s nápisem „Blood Pressure“ . V nově otevřeném okně klikně-
te na obrázek tlakoměru a nápis „Stiskněte pro připojení“.
4. Ujistěte se, že je na tlakoměru zapnuté Bluetooth a stiskněte tlačítko
„průměrná hodnota“ . Dostanete se do režimu průměrná hodnota.
5. Naměřené hodnoty se přenesou z tlakoměru do mobilního telefonu.
Klikněte na tlačítko „Uložit“ a hodnoty se uloží do aplikace.
Upozornění: Pokud přenos naměřených hodnot selže, na displeji tlakoměru se
zobrazí chybová hláška „E7“. Zkontrolujte, zda je zapnuté Bluetooth na mobil-
ním telefonu i tlakoměru. Poté přenos opakujte.
Upozornění: Tlakoměr je dodáván s automaticky zapnutým Bluetooth. V mís-
tech, kde je zakázáno používat zařízení s Bluetooth, jej vypněte dle návodu.
Upozornění: Aplikace MedM Health je poskytována třetí stranou. Společnost
elem6 s.r.o. nenese žádnou odpovědnost za vámi poskytnutá data.
Upozornění: Aplikace není zdravotnickým prostředkem. Aplikace slouží pouze
pro uchovávání naměřených dat v mobilním zařízení. Uložená naměřená data
nejsou odesílána ani nikterak konzultována s lékaři.
Upozornění: Aplikace nenahrazuje jakékoli konzultace s odborníkem, pře-
devším lékařem, ani jakoukoli lékařskou péči. Neslouží ani k diagnostickým
účelům.
Upozornění: V případě otázek ohledně vašeho zdravotního stavu se vždy ob-
raťte na svého lékaře.
Upozornění: Poskytovatel aplikace MedM Health ani společnost elem6 s.r.o.
nejsou poskytovatelé zdravotní péče ani lékařských konzultací.
11. NEPRAVIDELNÝ SRDEČNÍ RYTMUS
Nepravidelný srdeční rytmus je denován jako rytmus, který má o 25 %
nižší nebo o 25 % vyšší hodnotu než průměrný rytmus naměřený přístro-
jem během měření krevního tlaku. Pokud zařízení během měření detekuje
nepravidelný srdeční rytmus dvakrát nebo vícekrát, na displeji se při zob-
razení naměřených hodnot objeví indikátor nepravidelného srdečního
rytmu .
Jestliže se indikátor nepravidelného srdečního rytmu zobrazuje po měře-
ní často, doporučujeme navštívit lékaře a konzultovat s ním váš zdravotní
stav.
12. TABULKA HODNOT
Níže naleznete ukázkové tabulky hodnot krevního tlaku. Tabulky neslouží
pro určení diagnózy. Výsledky vždy konzultujte se svým lékařem.
Diastolický (mmHg)
Systolický (mmHg)
Těžká hypertenze
Střední hypertenze
Slabá hypertenze
Vyšší normální tlak
Normální tlak
120
110
100
90
85
80
105
95
130 140 160 180
Úrovně krevního tlaku SBP
mmHg
DBP
mmHg
Optimální < 120 < 80
Normální 120–129 80–84
Vyšší normální 130–139 85–89
První stupeň hypertenze 140–159 90–99
Druhý stupeň hypertenze 160–179 100–109
Třetí stupeň hypertenze >180 > 110
20
13. CHYBOVÁ HLÁŠENÍ A ŘEŠENÍ PROBLÉMŮ
V případě, že se během měření vyskytne některý z níže uvedených problé-
mů, nahlédněte do tabulky níže.
Problém Pravděpodobná příčina Oprava
Po zapnutí tlakoměru
se na displeji nic
nezobrazuje.
Baterie jsou vybité. Vyměňte všechny baterie
za nové.
Baterie jsou špatně
vložené.
Zkontrolujte a případně vložte
baterie správně tak, aby odpo-
vídala jejich polarita s nákresem
v prostoru pro baterie.
Chybová hláška 1
(E1)
Není detekován žádný
puls nebo není manžeta
dobře upevněna.
Znovu nasaďte manžetu
a správně ji upevněte. Manžeta
by měla být v úrovni srdce
Chybová hláška 2
(E2)
Byl detekován pohyb.
Vaše ruka nebo tělo bylo
během měření v pohybu.
Opakujte měření. Zůstaňte při
měření v klidu a nemluvte.
Chybová hláška 3
(E3)
Není detekován žádný
tlak. Manžeta je špatně
upevněna nebo příliš
volně.
Znovu nasaďte manžetu
a správně ji upevněte.
Chybová hláška 4
(E4)
Tlakoměr nemůže správ-
ně změřit tlak.
Je-li srdeční tep velmi slabý
nebo nepravidelný, nemusí
tlakoměr být schopen změřit
krevní tlak. Znovu nasaďte
manžetu a správně ji upevněte.
Pohodlně se usaďte, zůstaňte
v klidu a opakujte měření.
Chybová hláška 5
(E5)
Manžeta je příliš nafouk-
nutá. Krevní tlak je přes
300 mmHg.
Doporučujeme co nejdříve
navštívit lékaře a konzultovat
s ním váš zdravotní stav.
Chybová hláška 6
(E6)
Baterie jsou téměř vybité. Vyměňte všechny baterie
za nové.
Chybová hláška 7
(E7)
Přenos hodnot do mobil-
ního telefonu selhal.
Zkontrolujte, zda je zapnuté
Bluetooth na mobilním telefonu
i tlakoměru.
Manžeta se stále
nafukuje.
Systém je zablokován. Restartujte tlakoměr – vyjměte
baterie, počkejte 1 minutu
a poté baterie opět vraťte.
14. SPECIFIKACE
Metoda měření Oscilometrická
Rozsah měření tlaku 30-250 mmHg
Rozsah měření pulzu 40-180 tepů/min
Přesnost měření tlaku ±3 mmHg
Přesnost měření pulzu ± 5 %
Paměť 960 výsledků měření
Napájení 4× AA baterie DC 6 V nebo AC adaptér
Hmotnost tlakoměru 805 g (celé balení)
Rozměry tlakoměru 136 × 190 × 52 mm (bez manžety)
Životnost cca 10.000 měření
Provozní teplota -25 - 70 °C
Provozní vlhkost 10-90 % RH
BEZPEČNOST PŘI PRÁCI SE ZAŘÍZENÍM
1. Pozorně si přečtěte připojené bezpečnostní pokyny.
2. Pro správné zacházení s produktem si přečtěte nejaktuálnější verzi ma-
nuálu, která je dostupná ke stažení na stránce: www.truelife.eu.
Tiskové chyby a změny informací vyhrazeny.
Upozornění: Tento produkt je určen pro použití v domácnostech a podobném
prostředí. Prohlašujeme, že v případě použití výrobku TrueLife Pulse BT jako
profesionálního zdravotnického prostředku, musí být pravidelně prováděna
bezpečnostně technická kontrola (BTK) v těchto intervalech: 24 měsíců po za-
koupení výrobku, poté dále každých 12 měsíc.
Dovozce:
elem6 s.r.o., Braškovská 15,
16100 Prague 6, Czech Republic,
Made in P.R.C. REF.: MD4781
0123
EC REP Shanghai International Holding Corp. GmbH (Europe)
Eiestrasse 80, 20537 Hamburg, Germany
Grandway Technology (Shenzhen) Limited, No. 5, the Second Industrial
Zone, Zhukeng Community, Longtian Street, Pingshan District,
Shenzhen, 518118, The People‘s Republic of China
Datum poslední revize: 2020-09
  • Page 1 1
  • Page 2 2
  • Page 3 3
  • Page 4 4
  • Page 5 5
  • Page 6 6
  • Page 7 7
  • Page 8 8
  • Page 9 9
  • Page 10 10
  • Page 11 11
  • Page 12 12
  • Page 13 13
  • Page 14 14
  • Page 15 15
  • Page 16 16
  • Page 17 17
  • Page 18 18
  • Page 19 19
  • Page 20 20
  • Page 21 21
  • Page 22 22
  • Page 23 23
  • Page 24 24
  • Page 25 25
  • Page 26 26
  • Page 27 27
  • Page 28 28
  • Page 29 29
  • Page 30 30
  • Page 31 31
  • Page 32 32
  • Page 33 33
  • Page 34 34
  • Page 35 35
  • Page 36 36
  • Page 37 37
  • Page 38 38
  • Page 39 39
  • Page 40 40
  • Page 41 41
  • Page 42 42
  • Page 43 43
  • Page 44 44
  • Page 45 45
  • Page 46 46
  • Page 47 47
  • Page 48 48
  • Page 49 49
  • Page 50 50
  • Page 51 51
  • Page 52 52

Truelife Pulse BT Používateľská príručka

Kategória
Jednotky krvného tlaku
Typ
Používateľská príručka