Philips RQ1131 Používateľská príručka

Kategória
Pánske holiace strojčeky
Typ
Používateľská príručka
Register your product and get support at
www.philips.com/welcome
User manual
Always here to help you
RQ1100 series
1
RQ119x, RQ118x, RQ117x, RQ116x, RQ115x, RQ114x, RQ113x
ENGLISH 4
БЪЛГАРСКИ 26
ČEŠTINA 50
EESTI 72
HRVATSKI 94
MAGYAR 116
ҚАЗАҚША 138
LIETUVIŠKAI 161
LATVIEŠU 183
POLSKI 205
ROMÂNĂ 228
РУССКИЙ 251
SLOVENSKY 274
SLOVENŠČINA 296
SRPSKI 317
УКРАЇНСЬКА 339
4
Introduction
Congratulations on your purchase and welcome to Philips! To fully benet
from the support that Philips offers, register your product at www.philips.
com/welcome. Please read this user manual, as it contains information
about the features of this shaver as well as some tips to make shaving
easier and more enjoyable.
General description (Fig. 1)
A Shaver
1 Display
2 Shaver on/off button
3 Protection cap
4 RQ11 Shaving unit
B CRP331 Trimmer (RQ1197,RQ1185,RQ1180,RQ1160,RQ1155,RQ11
51 only)
C RQ111 Beard Styler attachment (RQ1195,RQ1175 only)
1 Hair length selector
2 Comb of Beard Styler attachment
D Jet Clean System (RQ1197CC,RQ1195CC,RQ1185CC,RQ1180CC,R
Q1175CC,RQ1160CC only)
1 Shaver holder
2 ’Cleaning chamber empty’ symbol
3 Cleaning symbol
4 Drying symbol
5 Jet Clean System on/off button
6 Cleaning chamber release button
E Adapter
F Charger
G Cleaning brush
H HQ200 Cleaning uid (RQ1197CC,RQ1195CC,RQ1185CC,RQ1180
CC,RQ1175CC,RQ1160CC only)
I Pouch (RQ1197,RQ1195,RQ1185,RQ1180,RQ1175,RQ1160,RQ1155,
RQ1151 only)
Important
Read this user manual carefully before you use the shaver and the Jet Clean
System and save it for future reference.
Note: In this user manual the term ‘appliances’ refers to the shaver and the Jet
Clean System. If your shaver does not come with a Jet Clean System, it refers
to the shaver only.
ENGLISH
General
Danger
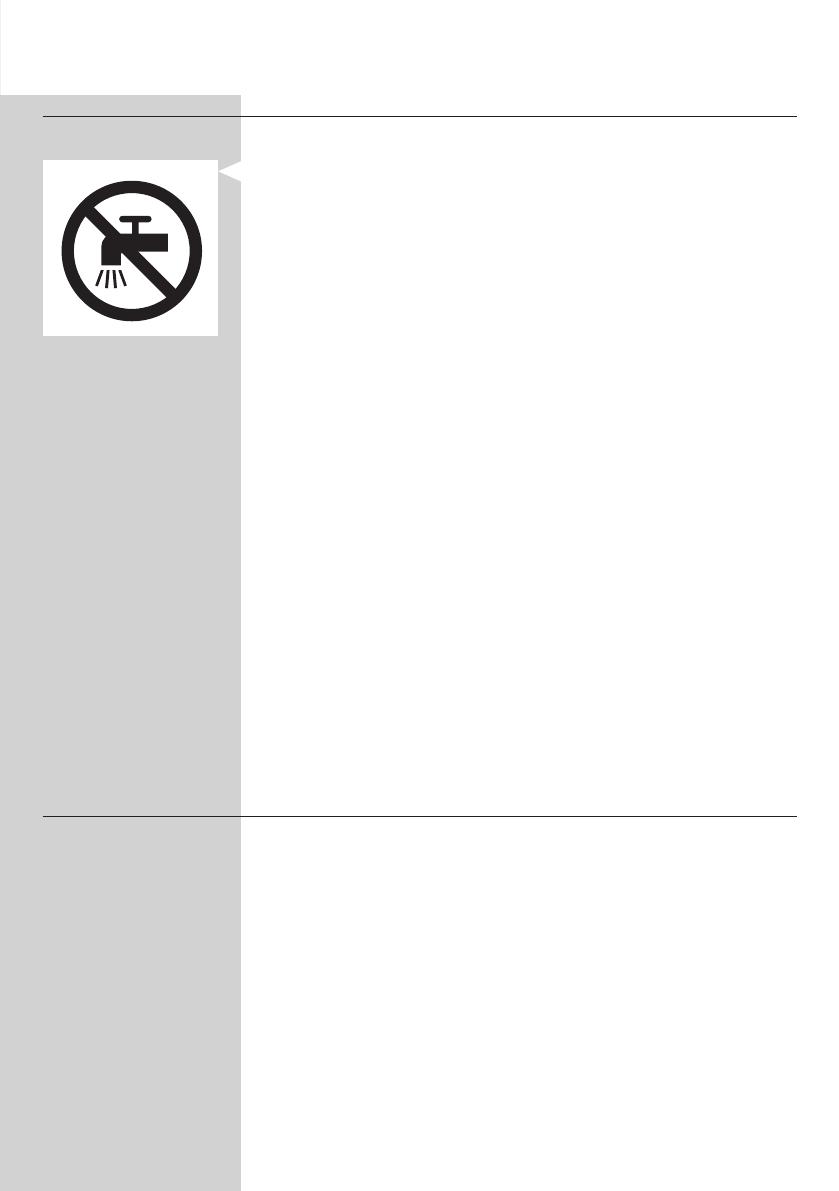
- Make sure the adapter does not get wet.
Warning
- The adapter contains a transformer. Do not cut off the adapter to
replace it with another plug, as this causes a hazardous situation.
- These appliances are not intended for use by persons (including
children) with reduced physical, sensory or mental capabilities, or lack
of experience and knowledge, unless they have been given supervision
or instruction concerning use of these appliances by a person
responsible for their safety.
- Children should be supervised to ensure that they do not play with the
shaver and the Jet Clean System.
- Be careful with hot water when you clean the appliances. Always check
if the water is not too hot, to prevent your hands from getting burnt.
Caution
- Never immerse the Jet Clean System and the charger in water nor
rinse them under the tap.
- The appliances and accessories are not dishwasher-proof.
- Always place and use the appliances on a surface that is uid-resistant.
- Use, charge and store the shaver at a temperature between 5°C and 35°C.
- Only use the accessories supplied with this shaver or that have been
specically developed for this shaver.
- If the adapter or any of the other accessories is damaged, always have it
replaced with one of the original type in order to avoid a hazard.
- The adapter transforms 100-240 volts to a safe low voltage of less than
24 volts.
- Do not use the appliances and accessories if they are damaged.
- Water may leak from the socket at the bottom of the shaver when you
rinse it. This is normal and not dangerous because all electronics are
enclosed in a sealed power unit inside the shaver.
Jet Clean system (RQ1197CC, RQ1195CC, RQ1185CC,
RQ1180CC, RQ1175CC only)
Caution
- Only use the Jet Clean System with the original HQ200 cleaning uid.
- Always place and use the Jet Clean System on a stable, level and
horizontal uid-resistant surface to prevent leakage.
- Never immerse the Jet Clean System in water.
- Empty the cleaning chamber and clean it thoroughly by rinsing it with
hot tap water every 15 days.
- The Jet Clean System thoroughly cleans but does not disinfect your
shaver, therefore do not share the shaver with others.
- The cleaning chamber of the Jet Clean System is not dishwasher-proof.
- When the Jet Clean System is ready for use, do not move it to prevent
leakage of cleaning uid.
ENGLISH 5
6
Beard Styler attachment (RQ1195,RQ1175 only)
Caution
- Only use the Beard Styler attachment to trim facial hair
(beard, moustache and sideburns). Do not use it to trim body parts
below the neckline.
- Only use the Beard Styler attachment in combination with the
following shaver types: RQ12xx,RQ11xx, RQ10xx.
- The Beard Styler attachment is not dishwasher-proof.
Compliance with standards
- This shaver complies with the internationally approved safety
regulations and can be safely used in the bath or shower and cleaned
under the tap.
- These Philips appliances comply comply with all standards regarding
electromagnetic elds (EMF). If handled properly and according to the
instructions in this user manual, the appliances are safe to use based on
scientic evidence available today.
The display
Note: If there is a protective foil on the display, remove it before you use the
shaver for the rst time.
The various shaver types have different displays, which are shown in the
gures below.
- RQ1197,RQ1195,RQ1180,RQ1175
- RQ1185,RQ1167,RQ1160
- RQ1155,RQ1151,RQ1150,RQ1145,RQ1141,RQ1131
ENGLISH
Charging
- Charging takes approx. 1 hour.
RQ1197,RQ1195,RQ1180,RQ1175
- When the shaver is charging, rst the bottom charging light ashes, then
the second charging light, and so on until the shaver is fully charged.
- Quick charge: When the shaver contains enough energy for one shave,
the bottom charging light alternately ashes orange and white.
RQ1185,RQ1167,RQ1160,RQ1155,RQ1151,RQ1150,RQ1145,
RQ1141,RQ1131
Note: The displays of the various shaver types look different, but work in the
same way.
- When the shaver is charging, rst the plug symbol and the battery
symbol ash alternately. After some time, the plug symbol goes out and
the battery symbol continues to ash until the shaver is fully charged.
- Quick charge: When the shaver contains enough energy for one shave,
the alternate ashing of the plug symbol and battery symbol stops and
only the battery symbol ashes.
Battery fully charged
RQ1197,RQ1195,RQ1180,RQ1175
- When the battery is fully charged, all charging lights light up
continuously. After approx. 30 minutes, the display automatically
switches off again.
RQ1185,RQ1167,RQ1160,RQ1155,RQ1151,RQ11510,RQ1145,
RQ1141,RQ1131
Note: The displays of the various shaver types look different, but work in the
same way.
- When the battery is fully charged, the battery symbol lights up
continuously. After approx. 30 minutes, the display automatically
switches off again.
ENGLISH 7
8
Battery low
RQ1197,RQ1195,RQ1180,RQ1175
- When the battery is almost empty (when there are only 5 or fewer
shaving minutes left), the bottom charging light ashes orange.
- When you switch off the shaver, the bottom charging light continues to
ash for a few seconds.
RQ1185,RQ1167,RQ1160,RQ1155,RQ1151,RQ11510,RQ1145,R
Q1141,RQ1131
Note: The displays of the various shaver types look different, but work in the
same way.
- When the battery is almost empty (when there are only 5 or fewer
shaving minutes left), the plug symbol ashes.
- When you switch off the shaver, the plug symbol continues to ash for
a few seconds.
Remaining battery capacity
RQ1197,RQ1195,RQ1180,RQ1175
- The remaining battery capacity is indicated by the number of charging
lights that are on.
Travel lock
You can lock the shaver when you are going to travel. The travel lock
prevents the shaver from being switched on by accident.
Activating the travel lock
1 Press the on/off button for 3 seconds to enter the travel lock mode.
ENGLISH
, The lock symbol lights up on the display.
Note: The displays of the various shaver types look different, but show the
same symbol.
Deactivating the travel lock
1 Press the on/off button for 3 seconds.
, The motor starts running to indicate that the travel lock has been
deactivated.
The shaver is now ready for use again.
Note: When you place the shaver in the plugged-in charger or Jet Clean System,
the travel lock is automatically deactivated.
Replace shaving head holder
Note: The displays of the various shaver types look different, but show the
same symbol.
For maximum shaving performance, we advise you to replace the shaving
head holder every two years.
- To remind you to replace the shaving head holder, the appliance is
equipped with a replacement reminder which is activated automatically
after approx. two years. The replacement reminder is repeated at
9 successive shaves or until you reset the shaver.
Charging
Charging takes approx. 1 hour.
RQ1195, RQ1187, RQ1185, RQ1180, RQ1175, RQ1167, RQ1160,
RQ1155: A fully charged shaver has a shaving time of up to 50 minutes.
RQ1151, RQ1150, RQ1145: A fully charged shaver has a shaving time of up
to 45 minutes. RQ1141, RQ1131: A fully charged shaver has a shaving time
of up to 40 minutes.
Charge the shaver before you use it for the rst time and when the display
indicates that the battery is almost empty (see section ‘Battery low’ in
chapter ‘The display’).
Quick charge
After the shaver has charged for 5 minutes, it contains enough energy for
one shave.
ENGLISH 9
10
Charging in the charger
1 Insert the small plug into the charger.
2 Unfold the charger (‘click’).
3 Put the adapter in the wall socket.
4 Put the shaver in the charger (1) and press it backwards until it locks
into place (2).
, The display shows that the shaver is charging (see section ‘Charging’
in chapter ‘The display’).
Charging in the Jet Clean System (RQ1197CC, RQ1195CC,
RQ1185CC, RQ11801CC, RQ1175CC only)
1 Put the small plug in the Jet Clean System.
2 Put the adapter in the wall socket.
3 Hold the shaver upside down above the holder with the back of the
shaver pointing towards the holder.
Note: RQ1197, RQ1195, RQ1180, RQ1175: when you turn the shaver upside
down, the battery indication on the display is also turned upside down so you
can still see to what level the battery is charged.
4 Place the shaver body in the holder behind the two clips (1)
and press it down until it locks into place (2).
Note: The shaver cannot be placed in the Jet Clean System when the protection
cap is on the shaving unit or when the trimmer is placed on the shaver.
, The display shows that the shaver is charging (see chapter ‘The display’).
ENGLISH
Using the shaver
Shaving
Skin adaptation period
Your rst shaves may not bring you the result you expect and your skin
may even become slightly irritated. This is normal. Your skin and beard need
time to adapt to any new shaving system.
We advise you to shave regularly (at least 3 times a week) for a period of
3 weeks to allow your skin to adapt to the new shaver. During this period,
use your new electric shaver exclusively and do not use other shaving
methods. If you use different shaving methods, it is more difcult for your
skin to adapt to the new shaving system.
1 Press the on/off button once to switch on the shaver.
, RQ1197, RQ1195, RQ1185, RQ1180, RQ1175: The display lights up
for a few seconds.
2 Move the shaving heads over your skin in circular movements.
- Do not make straight movements.
3 Press the on/off button once to switch off the shaver.
, RQ1197, RQ1195, RQ1185, RQ1180, RQ1175: The display lights up
for a few seconds and then shows the remaining battery capacity.
Wet shaving
You can also use this shaver on a wet face with shaving foam or shaving gel.
To shave with shaving foam or shaving gel, follow the steps below:
1 Apply some water to your skin.
2 Apply shaving foam or shaving gel to your skin.
3 Rinse the shaving unit under the tap to ensure that the shaving unit
glides smoothly over your skin.
4 Press the on/off button once to switch on the shaver.
5 Move the shaving heads over your skin in circular movements.
Note: Rinse the shaver under the tap regularly to ensure that it continues to
glide smoothly over your skin.
6 Dry your face and thoroughly clean the shaver after use (see chapter
‘Cleaning and maintenance’).
Note: Make sure you rinse all foam or shaving gel off the shaver.
ENGLISH 11
12
Using the trimmer (RQ1197, RQ1185, RQ1180, RQ1160,
RQ1155, RQ1151 only)
You can use the trimmer to groom your sideburns and moustache.
1 Pull the shaving unit straight off the shaver.
Note: Do not twist the shaving unit while you pull it off the shaver.
2 Insert the lug of the trimmer into the slot in the top of the shaver (1).
Then press down the trimmer (2) to attach it to the shaver (‘click’).
3 Press the on/off button once to switch on the trimmer.
, RQ1180: The display lights up for a few seconds.
4 You can now start trimming.
5 Press the on/off button once to switch off the trimmer.
, RQ1180: The display lights up for a few seconds to show the
remaining battery capacity.
6 Pull the trimmer straight off the shaver.
Note: Do not twist the trimming unit while you pull it off the shaver.
7 Insert the lug of the shaving unit into the slot in the top of the shaver (1).
Then press down the shaving unit (2) to attach it to the shaver (‘click’).
Using the Beard Styler attachment (RQ1195, RQ1175 only)
Note: Only use the Beard Styler attachment to trim facial hair (beard,
moustache and sideburns). Do not use it to trim body parts below the neckline.
1 Make sure the shaver is switched off.
2 Pull the shaving unit straight off the shaver.
Note: Do not twist the shaving unit while you pull it off the shaver.
ENGLISH
3 Insert the lug of the Beard Styler attachment into the slot in the top
of the shaver (1). Then press down the Beard Styler attachment (2)
to attach it to the shaver (‘click’).
Using the Beard Styler attachment with comb
You can use the Beard Styler attachment with the comb attached to style
your beard at one xed setting, but also at different length settings.
The hair length settings on the Beard Styler attachment correspond to the
remaining hair length after cutting and range from 1 to 5mm.
1 Slide the comb straight into the guiding grooves on both sides of the
Beard Styler attachment (‘click’).
2 Press the length selector (1) and then push it to the left or right (2)
to select the desired hair length setting.
3 Press the on/off button on the shaver to switch it on.
4 You can now start styling your beard.
Using the Beard Styler attachment without comb
You can use the Beard Styler attachment without the comb to trim and
contour your beard, moustache or sideburns.
ENGLISH 13
14
1 Pull the comb off the Beard Styler attachment.
Note: Grab the comb in the centre to pull it off the Beard Styler attachment.
Do not pull at the sides of the comb.
2 Press the on/off button to switch on the shaver.
3 You can now start to trim and contour your beard, moustache,
sideburns or neckline.
Beard styles
Below you nd some examples of beard styles you can create.
- A stubble look
- A full beard
ENGLISH
- A moustache
- A goatee
Cleaning and maintenance
Never use scouring pads, abrasive cleaning agents or aggressive liquids
such as petrol or acetone to clean the shaver, its accessories and the
Jet Clean System (RQ1197CC, RQ1195CC, RQ1185CC, RQ1180CC,
RQ1175CC only).
- The best and most hygienic way to clean the shaver is in the Jet
Clean System (RQ1197CC, RQ1195CC, RQ1185CC, RQ1180CC,
RQ1175CC only). You can also rinse the shaver under the tap or clean
it with the brush supplied.
- Clean the shaver after every shave for optimal shaving performance.
- You can clean the outside of the shaver with a damp cloth.
- Regular cleaning guarantees better shaving performance.
Cleaning the shaving unit
Be careful with hot water. Always check if the water is not too hot, to
prevent your hands from getting burnt.
1 Switch off the shaver. Remove it from the charger or remove it
from the Jet Clean System (RQ1197CC, RQ1195CC, RQ1185CC,
RQ1180CC, RQ1175CC only).
2 Rinse the shaving unit under a hot tap for some time.
Note: You can also clean the shaving unit with the cleaning brush supplied.
3 Pull the shaving head holder off the bottom part of the shaving unit
and rinse it under a hot tap for 30 seconds.
Note: You can also clean the shaving head holder with the cleaning brush supplied.
ENGLISH 15
16
4 Carefully shake off excess water and let the shaving head holder dry.
Never dry the shaving unit with a towel or tissue, as this may damage the
shaving heads.
5 Reattach the shaving head holder to the bottom part of the shaving
unit (‘click’).
Cleaning the shaving unit in the Jet Clean System (RQ1197CC,
RQ1195CC, RQ1185CC, RQ1180CC, RQ1175CC only)
The Jet Clean System has an automatic cleaning program. When you press
the on/off button, the Jet Clean System starts cleaning in this automatic
cleaning program.
Preparing the Jet Clean System for use
Fill the cleaning chamber before rst use.
1 Put the small plug in the Jet Clean System.
2 Put the adapter in the wall socket.
, The holder automatically moves to the highest position.
3 Simultaneously press the release buttons on both sides of the
cleaning chamber (1). Then lift the Jet Clean System off the cleaning
chamber (2).
, The cleaning chamber remains behind.
4 UnscrewthecapfromthebottlewithHQ200cleaninguid.
5 FillthecleaningchamberwithHQ200cleaninguidtoalevel
between the two lines.
6 Place the Jet Clean System back onto the cleaning chamber.
Make sure the release buttons click back into place.
Using the Jet Clean System
Note: If you use the shaver with shaving foam or shaving gel, we advise you to
rinse it under the hot tap before you clean it in the Jet Clean System.
This guarantees an optimal lifetime for the cleaning uid.
ENGLISH
1 Hold the shaver upside down above the holder with the back of the
shaver pointing towards the holder.
2 Place the shaver body in the holder behind the two clips (1)
and press it down until it locks into place (2).
, The display shows that the shaver is charging (see chapter
‘The display’).
3 Press the on/off button on the Jet Clean System to start the cleaning
program.
, The shaver display stops showing the charging indication.
, Thecleaninglightstartstoashandtheshaverisautomatically
loweredintothecleaninguid.
, Thecleaninglightashesthroughoutthecleaningprogram,
which takes a few minutes.
, Duringtherstphaseofthecleaningprogram,theshaverautomatically
switches on and off several times and moves up and down.
, During the second phase of the cleaning program, the shaver is
placedinthedryingposition,indicatedbytheashingdryingsymbol.
This phase takes approx. 2 hours. The shaver stays in this position
until the end of the program.
, After the cleaning program, the charging indication appears on the
shaver display (see chapter ‘The display’).
Note: If you press the on/off button of the Jet Clean System during the cleaning
program, the program aborts. In this case, the cleaning or drying light stops
ashing and the holder moves to the highest position.
Note: If you remove the adapter from the wall socket during the cleaning program,
the program aborts. The holder remains in its current position. When you put
the adapter back into the wall socket, the holder moves to the highest position.
ENGLISH 17
18
- When the cleaning uid drops below the minimum level, the ‘cleaning
chamber empty’ symbol starts to ash and the holder returns to its
starting position.
- If you use the Jet Clean System to clean your shaver every day,
you need to rell the cleaning chamber approx. every 15 days.
Cleaning the Jet Clean System
Clean the cleaning chamber every 15 days.
You can wipe the outside of the Jet Clean System with a damp cloth.
1 Simultaneously press the release buttons on both sides of the Jet
Clean System (1). Then lift the Jet Clean System off the cleaning
chamber (2).
, The cleaning chamber remains behind.
2 Pouranyremainingcleaninguidoutofthecleaningchamber.
You can simply pour the cleaning uid down the sink.
3 Rinse the cleaning chamber under the tap.
The cleaning chamber is not dishwasher-proof.
4 FillthecleaningchamberwithHQ200cleaninguidtoalevel
between the two lines.
ENGLISH
5 Place the Jet Clean System back onto the cleaning chamber.
Make sure the release buttons click back into place.
Extra-thorough cleaning method
Make sure the appliance is switched off.
1 Pull the shaving head holder off the bottom part of the shaving unit.
2 Slide the green retaining frame in the direction of the arrows
indicated on the retaining frame.
3 Lift the retaining frame out of the shaving head holder.
4 Remove the cutter from the shaving guard.
Note: Do not clean more than one cutter and shaving guard at a time, since
they are all matching sets. If you accidentally put a cutter in the wrong shaving
guard, it may take several weeks before optimal shaving performance is
restored.
ENGLISH 19
20
5 Clean the cutter with the cleaning brush supplied.
6 Clean the inside of the shaving guard.
7 After cleaning, place the cutter back into the shaving guard with the
cutter legs pointing downwards.
8 Place the retaining frame back onto the shaving head holder.
9 Slide the guard back into place (‘click’).
ENGLISH
  • Page 1 1
  • Page 2 2
  • Page 3 3
  • Page 4 4
  • Page 5 5
  • Page 6 6
  • Page 7 7
  • Page 8 8
  • Page 9 9
  • Page 10 10
  • Page 11 11
  • Page 12 12
  • Page 13 13
  • Page 14 14
  • Page 15 15
  • Page 16 16
  • Page 17 17
  • Page 18 18
  • Page 19 19
  • Page 20 20
  • Page 21 21
  • Page 22 22
  • Page 23 23
  • Page 24 24
  • Page 25 25
  • Page 26 26
  • Page 27 27
  • Page 28 28
  • Page 29 29
  • Page 30 30
  • Page 31 31
  • Page 32 32
  • Page 33 33
  • Page 34 34
  • Page 35 35
  • Page 36 36
  • Page 37 37
  • Page 38 38
  • Page 39 39
  • Page 40 40
  • Page 41 41
  • Page 42 42
  • Page 43 43
  • Page 44 44
  • Page 45 45
  • Page 46 46
  • Page 47 47
  • Page 48 48
  • Page 49 49
  • Page 50 50
  • Page 51 51
  • Page 52 52
  • Page 53 53
  • Page 54 54
  • Page 55 55
  • Page 56 56
  • Page 57 57
  • Page 58 58
  • Page 59 59
  • Page 60 60
  • Page 61 61
  • Page 62 62
  • Page 63 63
  • Page 64 64
  • Page 65 65
  • Page 66 66
  • Page 67 67
  • Page 68 68
  • Page 69 69
  • Page 70 70
  • Page 71 71
  • Page 72 72
  • Page 73 73
  • Page 74 74
  • Page 75 75
  • Page 76 76
  • Page 77 77
  • Page 78 78
  • Page 79 79
  • Page 80 80
  • Page 81 81
  • Page 82 82
  • Page 83 83
  • Page 84 84
  • Page 85 85
  • Page 86 86
  • Page 87 87
  • Page 88 88
  • Page 89 89
  • Page 90 90
  • Page 91 91
  • Page 92 92
  • Page 93 93
  • Page 94 94
  • Page 95 95
  • Page 96 96
  • Page 97 97
  • Page 98 98
  • Page 99 99
  • Page 100 100
  • Page 101 101
  • Page 102 102
  • Page 103 103
  • Page 104 104
  • Page 105 105
  • Page 106 106
  • Page 107 107
  • Page 108 108
  • Page 109 109
  • Page 110 110
  • Page 111 111
  • Page 112 112
  • Page 113 113
  • Page 114 114
  • Page 115 115
  • Page 116 116
  • Page 117 117
  • Page 118 118
  • Page 119 119
  • Page 120 120
  • Page 121 121
  • Page 122 122
  • Page 123 123
  • Page 124 124
  • Page 125 125
  • Page 126 126
  • Page 127 127
  • Page 128 128
  • Page 129 129
  • Page 130 130
  • Page 131 131
  • Page 132 132
  • Page 133 133
  • Page 134 134
  • Page 135 135
  • Page 136 136
  • Page 137 137
  • Page 138 138
  • Page 139 139
  • Page 140 140
  • Page 141 141
  • Page 142 142
  • Page 143 143
  • Page 144 144
  • Page 145 145
  • Page 146 146
  • Page 147 147
  • Page 148 148
  • Page 149 149
  • Page 150 150
  • Page 151 151
  • Page 152 152
  • Page 153 153
  • Page 154 154
  • Page 155 155
  • Page 156 156
  • Page 157 157
  • Page 158 158
  • Page 159 159
  • Page 160 160
  • Page 161 161
  • Page 162 162
  • Page 163 163
  • Page 164 164
  • Page 165 165
  • Page 166 166
  • Page 167 167
  • Page 168 168
  • Page 169 169
  • Page 170 170
  • Page 171 171
  • Page 172 172
  • Page 173 173
  • Page 174 174
  • Page 175 175
  • Page 176 176
  • Page 177 177
  • Page 178 178
  • Page 179 179
  • Page 180 180
  • Page 181 181
  • Page 182 182
  • Page 183 183
  • Page 184 184
  • Page 185 185
  • Page 186 186
  • Page 187 187
  • Page 188 188
  • Page 189 189
  • Page 190 190
  • Page 191 191
  • Page 192 192
  • Page 193 193
  • Page 194 194
  • Page 195 195
  • Page 196 196
  • Page 197 197
  • Page 198 198
  • Page 199 199
  • Page 200 200
  • Page 201 201
  • Page 202 202
  • Page 203 203
  • Page 204 204
  • Page 205 205
  • Page 206 206
  • Page 207 207
  • Page 208 208
  • Page 209 209
  • Page 210 210
  • Page 211 211
  • Page 212 212
  • Page 213 213
  • Page 214 214
  • Page 215 215
  • Page 216 216
  • Page 217 217
  • Page 218 218
  • Page 219 219
  • Page 220 220
  • Page 221 221
  • Page 222 222
  • Page 223 223
  • Page 224 224
  • Page 225 225
  • Page 226 226
  • Page 227 227
  • Page 228 228
  • Page 229 229
  • Page 230 230
  • Page 231 231
  • Page 232 232
  • Page 233 233
  • Page 234 234
  • Page 235 235
  • Page 236 236
  • Page 237 237
  • Page 238 238
  • Page 239 239
  • Page 240 240
  • Page 241 241
  • Page 242 242
  • Page 243 243
  • Page 244 244
  • Page 245 245
  • Page 246 246
  • Page 247 247
  • Page 248 248
  • Page 249 249
  • Page 250 250
  • Page 251 251
  • Page 252 252
  • Page 253 253
  • Page 254 254
  • Page 255 255
  • Page 256 256
  • Page 257 257
  • Page 258 258
  • Page 259 259
  • Page 260 260
  • Page 261 261
  • Page 262 262
  • Page 263 263
  • Page 264 264
  • Page 265 265
  • Page 266 266
  • Page 267 267
  • Page 268 268
  • Page 269 269
  • Page 270 270
  • Page 271 271
  • Page 272 272
  • Page 273 273
  • Page 274 274
  • Page 275 275
  • Page 276 276
  • Page 277 277
  • Page 278 278
  • Page 279 279
  • Page 280 280
  • Page 281 281
  • Page 282 282
  • Page 283 283
  • Page 284 284
  • Page 285 285
  • Page 286 286
  • Page 287 287
  • Page 288 288
  • Page 289 289
  • Page 290 290
  • Page 291 291
  • Page 292 292
  • Page 293 293
  • Page 294 294
  • Page 295 295
  • Page 296 296
  • Page 297 297
  • Page 298 298
  • Page 299 299
  • Page 300 300
  • Page 301 301
  • Page 302 302
  • Page 303 303
  • Page 304 304
  • Page 305 305
  • Page 306 306
  • Page 307 307
  • Page 308 308
  • Page 309 309
  • Page 310 310
  • Page 311 311
  • Page 312 312
  • Page 313 313
  • Page 314 314
  • Page 315 315
  • Page 316 316
  • Page 317 317
  • Page 318 318
  • Page 319 319
  • Page 320 320
  • Page 321 321
  • Page 322 322
  • Page 323 323
  • Page 324 324
  • Page 325 325
  • Page 326 326
  • Page 327 327
  • Page 328 328
  • Page 329 329
  • Page 330 330
  • Page 331 331
  • Page 332 332
  • Page 333 333
  • Page 334 334
  • Page 335 335
  • Page 336 336
  • Page 337 337
  • Page 338 338
  • Page 339 339
  • Page 340 340
  • Page 341 341
  • Page 342 342
  • Page 343 343
  • Page 344 344
  • Page 345 345
  • Page 346 346
  • Page 347 347
  • Page 348 348
  • Page 349 349
  • Page 350 350
  • Page 351 351
  • Page 352 352
  • Page 353 353
  • Page 354 354
  • Page 355 355
  • Page 356 356
  • Page 357 357
  • Page 358 358
  • Page 359 359
  • Page 360 360
  • Page 361 361
  • Page 362 362

Philips RQ1131 Používateľská príručka

Kategória
Pánske holiace strojčeky
Typ
Používateľská príručka