Tefal FE800A38 Používateľská príručka

Typ
Používateľská príručka

Táto príručka je tiež vhodná pre

p. 1- 16
p. 17 - 32
p. 33 - 48
p. 49 - 64
p. 65 - 80
p. 81 - 96
p. 97 - 112
p. 113- 128
p. 129- 143
C4
B1
C5
C1
B4
B3
B7
B2
B5
B6
H
A
B
B
C
C2 C3
D3
D2
D1
D5
F1
F2
F3
F4
F0
F5
E1
E2
E3
E4
E
D
F
G
I
D4
EN
NL
SK
PL
LV
LT
ET
CS
HU
EN
NL
SK
PL
LV
LT
ET
CS
HU
OKOK
“clic” “clic”
1
3
2
D3
D4
2
3
4.1
4.2 4.3
1
“clic”
2
2
1
6
7 8
9
5
10.1
a
b
2
1
2
3
2
11
12 13
14
10.2
D2
D3
D5
D4
!!
1
1
2
15
a
2
3
• This appliance is designed for
indoor household use only and at
an altitude below 2000 m. The
manufacturer shall not accept any
liability and reserves the right to
cancel the warranty in the event of
commercial or inappropriate use
or failure to follow the
instructions.
• This appliance should not be used for
household and similar use (not
covered by the warranty) such as:
- In kitchen work areas in shops,
offices and other professional
environments.
- In kitchen areas reserved for staff
in shops, offices and other
professional environments.
- On farms.
- Use by clients of hotels, motels and
other residential environments.
- in guest room environments.
/?EB1@@<91>3579F5C
?66CD51=G893831>
31EC52EB>C1>4<5
D85<941>4D8531@
G9D8 31ED9?> EC5 1
7<?F5@?D8?<45B5D3
96>535CC1BI1>4<5
D8531@2I9DC35>DB1<
C53D9?>
%5F5B ?@5B1D5 D85 1@@<91>35 96
D85C51<9C>?D@?C9D9?>54?>D85
C51<8?<45B?B96D85C51<8?<45B9C
>?D 1CC5=2<54 ?> D85 <94 D 9C
5CC5>D91<D??@5B1D5D851@@<91>35
G9D8 D85 31@ @?C9D9?>54 9> D85
8?<59>D85<94E><5CCC@5396931<<I
CD1D549>D85B539@5
.)% %51G1B5?6
D85B9C;?69>:EBI9>D85
5F5>D?69>3?BB53DEC5
?6D851@@<91>35
+1;5 31B5 G9D8 D85
;>9F5C?6D85,<DB12<145;>965
1>4D85;>5149>73BEC89>72<145
 G85>I?E1B53<51>9>7 D85=
1>4G85>I?E5=@DID852?G<D85I
1B55HDB5=5<IC81B@531B56E<961
8?D<9AE949C@?EB549>D?D856??4
@B?35CC?B 2531EC5 9D 3?E<4 25
5:53D546B?=D851@@<91>354E5D?
9DCE445><I2?9<9>7
'<135D85,<DB12<14538?@@5B2<145
9>D852?G<16D5BEC5
.)% %531B56E<D?1F?941>I
C@9<<175 ?> D85 3?>>53D?B 4EB9>7
3<51>9>769<<9>7?B@?EB9>7
.)% %/?EB1@@<91>35B5<51C5C
CD51=G893831>31EC52EB>C
.)% % +85 851D9>7 5<5=5>D
CEB6135 9C CE2:53D54 D? B5C94E1<
851D16D5BEC5
5 CEB5 D? D?E38 ?><I D85
81>4<5C ?6 I?EB @B?4E3D <?3;C
 81>4<5 ?6 D85 <94  1>4
81>4<5 ?6 D85 31@  4EB9>7
851D9>7 1>4 E>D9< 3?=@<5D5
3??<9>74?G>
)565B D? D85 9>CDBE3D9?>C 6?B
C5DD9>7D85?@5B1D9>7D9=5C1>4
C@554C5DD9>7C?651381335CC?BI
1>45138@B?7B1==5
)565B D? D85 9>CDBE3D9?>C 6?B
1CC5=2<I 1>4 =?E>D9>7
1335CC?B95CD?D8545F935
)565B D? D85 9>CDBE3D9?>C 6?B
3<51>9>7 1>4 =19>D5>1>35 ?6
I?EB1@@<91>35
<G1IC 6?<<?G D85 3<51>9>7
9>CDBE3D9?>C?>8?GD?3<51>I?EB
1@@<91>35
,>@<E7D851@@<91>35
? >?D 3<51> D85 1@@<91>35
G89<58?D
<51> G9D8 1 41=@ 3<?D8 ?B
C@?>75
%5F5B 9==5BC5 D85 1@@<91>35
9> G1D5B ?B @ED 9D E>45B
BE>>9>7G1D5B
,)&'%$)"+*&%#/
• Keep the appliance and its lead out
of reach of children under 8 years
of age.
Children should not use the
appliance as a toy.
• This appliance may be used by
persons with reduced physical,
sensory or mental capabilities or
whose experience or knowledge is
insufficient, as long as they have
the benefit of supervision or they
have received instructions
regarding safe use of the appliance
and they understand its potential
dangers.
• This appliance may be used by
children of at least 8 years of age,
as long as they are supervised and
have been given instructions about
using the appliance safely and are
fully aware of the dangers involved.
Cleaning and maintenance by the
user should not be carried out by
children without supervision unless
they are at least 8 years of age and
are supervised by an adult.
?>>53D9?>D?D85@?G5BCE@@<I
• The appliance should be plugged in
to an earthed electrical socket.
• The appliance is designed to work
with alternating current only. Check
that the supply voltage indicated on
the rating plate of the appliance
corresponds to that of your
electrical installation.
• Any connection error will cancel the
warranty.
• Never pull on the power lead to
unplug the appliance.
• Do not immerse the appliance,
power cable or plug in any liquid.
• The power lead must never be left
near or in contact with the hot parts
of your appliance, near a source of
heat or on a sharp edge.
>3?BB53DEC5
?>?DD?E38D85<94256?B5D85
1@@<91>35 3?=5C D? 1 3?=@<5D5
CD?@CD?@2EDD?>G19DE>D9<D85
6??4 259>7 =9H54 9C >? <?>75B
B?D1D9>7
• Always pour the solid ingredients
into the bowl first before adding
the liquid ingredients *55 97
, without exceeding the 2.5 L
MAX limit marked inside the bowl
*5597. If the bowl is too
full, boiling water may be ejected.
• Please note, in the steam cooking
programme, keep the level of 0.7
litres water *5597.
• Never put your fingers or any other
object in the bowl while the
appliance is in operation.
• Do not use the bowl as container
(storage, freezing, sterilisation).
• Place the appliance on a stable,
heatproof work surface.
• Do not place the appliance near a
EN
EN
EN
4
5
EN
wall or a cupboard: the steam
produced may damage the
elements.
• Do not place your appliance near a
heat source in operation (hob,
household appliance, etc.).
• Do not cover the lid with a
dishcloth or other item, do not
attempt to block the hole in the lid,
use the steam regulator cap.
• Do not let hair, scarves, ties, etc.
over the bowl while the appliance is
in operation.
• Never put the accessories, bowl and
lid in a microwave.
• Do not use the appliance outdoors.
• Never exceed the maximum
quantity indicated in the
instructions.
• Store the appliance when it has
cooled down.
6D5BC1<5C*5BF935
• For your own safety, do not use
accessories or spare parts other
than those provided by the
approved after-sales centres.
• Any intervention other than
cleaning and usual maintenance by
the customer must be carried out
by an approved service centre.
• Consult the table “What to do if
your appliance does not work" at
the end of the instruction manual.
On reading this instruction manual, you will find recommendations for use, which
will make you see the potential of your appliance: preparation of sauces, soups,
stews, steamed dishes, pastries and desserts.
''# %*) '+ &%
Motor unit
Control panel
: automatic programme selection
buttons
: speed selector
: cooking temperature selector and/or
heating light indicator
 operating time selector
 turbo/pulse selector
 +/- selector
 start/stop/reset button
LCD screen
 speed display
 temperature display
 time display
 programme selection display
 safety indicator display
Bowl assembly
stainless steel bowl
locks
detachable common spindle
seal
spindle locking ring
Lid assembly
steam regulator cap/stopper
lid
seal holder
seal
Accessories:
accessory storage box
ultrablade knife
mixer
whisk
knife for kneading/crushing blade
steam basket
Spatula
Switch 0/1 for cutting off the power
supply to your appliance
Cleaning brush
''# %+% #+
'?G5B 1550W (1000W: heating element / 550W: motor)
+5=@5B1DEB5B1>75 30° to 130°C
adjustable in steps of 5°C.
&@5B1D9>74EB1D9?>B1>75 5 sec to 2 hours
adjustable in steps of 5 sec min to 1 min max.
%E=25B?6C@554C - 2 intermittent speeds:
speed 1 (5 sec On / 20 sec Off).
speed 2 (10 sec On / 10 sec Off).
- 10 progressive continuous speeds
(speeds 3 to 12).
EN
6
EN
7
*. + %&%
Your appliance is fitted with a 0/1 switch, set the switch to 1. *5597
You have the following accessories with your appliance:
Ultrablade knifeMixerWhiskKneading/crushing knifeSteam basket
Cap/
Stopper
Mixing soups
Mixing fruit purees
Chopping vegetables
Chopping meat
Chopping fish
Kneading white bread
dough
Kneading short crust pastry,
biscuit dough, special bread
Kneading risen dough
(brioche, kouglof. etc.)
Mixing light batters (cake
mixture, etc.)
Crushing nuts
Chopping hard products
Crushing ice
Pancake batter, waffle batter
IIt mixes Cooked dishes without damaging the ingredients
Very useful for browning phases before preparations (risottos, soups).
Steam cooking vegetables,
fish or meat
Soup with chunks
Cap/Stopper for regulating steam extraction
Wisking egg whites,
Mayonnaise,
Whipped cream
Sauces,Creams,Dressings
(mashed potatoes, polenta,
etc.)
Browned dishes
Stews
Risottos
Ratatouille, Chutney, Pulses (settings: check the recipe booklet)
5min
45min
15 sec
30 sec
15 sec
40 sec
3min
V9 max
F3
F4
F5
E1
F2
F1
22min
500g
2,5L
1Kg
1Kg
1Kg
1Kg
2,5L
1,5Kg
5/10min
2/5min
2min 30s
2min 30s
to
1min
1min
1Kg
1Kg
1,2Kg
0,8Kg
0,6Kg
1min 0,6Kg
1min 1,5L
40/45min
20/40min 1Kg
2,5L
6 à 10
1min 30s
2min
7
max
0,5L
1/20min 1L
40 sec
3min
max
Do not use this accessory to chop hard products, use the F4 kneading blade/crusher.
- High steam setting (a) = steam cooking.
- Low steam setting (b) = risotto, creamy puddings, sauces, etc.
b
a
These accessories are also fitted with gripping areas to facilitate handling during use while
making a preparation.
/&,)''# %*&')+ %
$&*
ED?=1D93@B?7B1==5=?45
Speed, cooking temperature and duration
are pre-programmed to make sauces,
soups, stews, steamed dishes, pastry and
desserts automatically.
$1>E1<=?45
Customised adjustments of speed
parameters, cooking temperature and
duration for use at your convenience.
%*+## %+&.# +***&) *
%+# **$#/
• Before using for the first time, wash all items
 in warm soapy water, but not the
motor unit . Your bowl  is fitted with a
detachable spindle  to facilitate
cleaning.
• Ensure that all packaging has been removed
before use, particularly the protection
located between the bowl and the motor
unit .
• Place the seal  on the seal holder 
*5597, clip the assembly to the lid 
*5597.
• Position the seal  on the common
spindle . Lock the assembly onto the
base of the bowl with the locking ring 
*5597.
• Position the chosen accessory in the bowl:
- the accessories ?B to
on the common spindle at the bottom of
the bowl *5597,
- the steam basket inside the bowl ,
*55 97  , having taken care
beforehand to fill the 0.7l tank with
liquid preparation (water, sauce…) *55
97.
• Incorporate the ingredients into the bowl or
steam basket.
• Position the lid on the bowl  lining up the
two triangles *55 97 , lock the lid
without pressing by turning it anti clockwise
*5597.
• Position the steam regulator cap  on the
lid; two positions are possible: high steam (a)
or low steam (b).
+85<?GCD51=C5DD9>71<<?GC1
=1H9=E=1=?E>D?63?>45>C1D9?>
D?25B5<51C541>4D85B56?B59D9C
B53?==5>454D?@B5@1B549C85C
1>4C1E35CG9D8125DD5B3?>C9CD5>3IB9
C?DD?3B51=I@E449>7CC1E35C5D3
+858978CD51=C5DD9>71<<?GC1
=1H9=E=1=?E>D?6851D1>4
CD51=D?2E9<4E@9>D852?G<6?B
1<<DI@5C?6CD51=3??;9>7C?E@C
5D3
+89CC5DD9>71<C?@B5F5>DCC@<1C89>74E
B9>7=9H9>7
• Position the bowl  on the motor unit 
until you hear a “click” *5597.
• The appliance only starts up if the bowl and
the lid are correctly positioned and locked
on the motor unit.
Sauces Steam cooking
(in programme ' soft
steam / ' high steam)
Soups
(to Read programme ' Smooth
soup / ' Soup with small
pieces.)
Pastry
(in programme ' bread /
' brioche / ' cake)
Stews
(in programme ' vegetable
casserole / ' stew / ' risotto)
Desserts
>D855F5>D?69>3?BB53D@?C9D9?>9>7?B
9>3?BB53D<?3;9>7?659D85B*5597
1>4  D85 <?7? CD1BDC D? 6<1C8
G85>16E>3D9?>9C13D9F1D54
,* %+&%+)&#'%#
*5<53D9>71>1ED?=1D93@B?7B1==5
EN
8
EN
9
*5<53D9>73ECD?=C5DD9>7C
Selecting the motor speed.
2 intermittent speeds (Speed 1 &
2) and 10 continuous progres-
sive speeds (Speed 3 to 12)
Selecting cooking speed.
From 30° to 130°C.
Heating indicator light: it lights
up when cooking starts and
switches off when the
temperature inside the bowl falls
to below 50°C.
Selecting operating time.
From 5 sec to 2 hours.
Selecting the DEB2? functions
(maximum speed in direct
access) and @E<C5 (intermittent
operation) without using other
settings.
Increase speed, cooking
temperature and duration.
Decrease speed, cooking
temperature and duration.
This button has
6E>3D9?>C
-`-1<941D9?>a of the
choice of your
automatic programme
or your parameters
chosen in the context
of manual use (speed,
cooking temperature,
time).
-`'1EC5a during use,
once the appliance has
been started up.
-`)5C5Da of the
parameters selected on
the appliance by
pressing for 2 seconds.
+9@C6?BEC5
Your appliance is fitted with a microprocessor that controls and analyses its stability. In the
event of instability, the motor rotation speed will be automatically reduced, if this instability
continues, the motor will be stopped and "STOP” will be displayed on the screen.
• Check that the quantity of ingredients is not too large and that the speed used is the correct
one.
• Check that you are using the recommended accessory.
• Then restart your appliance normally.
,* %+''# %
Plug in the appliance, set the switch  to 1, and the LCD screen  displays all settings at
“0” *5597
,+&$+ ')&)$$$&
1- Press the programme of
your choice , a triangle
appears on the screen 
in the selected programme.
In the case of the soups,
stews and pastry
programmes, successive
pressing takes you to the different sub-
programmes.
2- The pre-programmed
settings can be modified for
the time of a recipe
(depending on the chosen
recipe, ingredients and
quantities prepared). Press
the speed selector or
the cooking temperature
selector  or the time
selector , the setting
chosen will flash on the
screen .
3- Adjust the setting(s) using
the +/- selector .
4- When you have finished
modifying all your settings,
press the “start” button 
to start the programme.
When your appliance is
using cooking mode, the
red indicator light
lights up to inform you that cooking has
started.
5- When the programme has ended, the
appliance emits 3 beeps.
6- At the end of the sauce, soup, slow cook
programmes ' and ', steam dishes and
desserts, the appliance automatically
changes to keep warm mode for 45
minutes to maintain the preparation ready
for consumption. In the 'sauces'
programme, ' and ' stews, desserts and
manual mode, the appliance motor
functions at a specific speed, in order to
preserve the preparation and avoid it
sticking to the bottom of the bowl. To stop
keep warm mode, simply press the “stop”
button . If you open the lid, press the
locks or remove the bowl and keep
warm mode will be automatically stopped.
At the end of the sauce programmes, slow cook
P2 and P3 and the creamy pudding; during the
keeping warm function, the motor will continue
to work so that the ingredients do not stick to
the bottom of the bowl.
At the end of kneading in the pastry
programmes ' and ', the appliance
changes to “dough rising” mode at 30°C for
40 minutes to give your dough more
volume. If you open the lid, press the locks
 or remove the bowl, the appliance
changes to pause mode and you have the
possibility of restarting it by pressing “start”
again.
If you wish to stop this mode, press and
hold the “stop” button for 2 seconds.
7- Press the locks  and then remove the
bowl assembly *5597.
When the automatic programme is started up,
you have the possibility of stopping the
appliance at any time by pressing the “stop”
button. The automatic programme is then in
pause mode, you have the possibility of
restarting by pressing the "start” button
again. If you have chosen the wrong
programme and if you want to cancel it, press
and hold the "stop" button for 2 seconds.
EN
10
EN
11
 *&-)+,+&$+ ')&)$$*- ##
*1E35 *?E@' *?E@' *D5G' *D5G' *D5G'
Automatic
programmes
"Default"
speed
14:ECD12<5
V6
-D?-
10 Pulses
and V12 for
2 min.
10 Pulses V3 V1 V2
"Default"
temperature
14:ECD12<5
70°C
Z
D?Z
100°C
Z
D?Z
100°C
Z
D?Z
130°C
>?>
14:ECD12<5
95°C
Z
D?Z
95°C
Z
D?Z
Time
speed
14:ECD12<5
8 min
=9>
D?=9>
40 min
=9>
D?=9>
45 min
=9>
D?=9>
5 min
=9>
D?=9>
45 min
=9>
D?8B
20 min
=9>
D?8B
Keep warm 'default
function' at the end
of the programme
45 min 45 min 45 min 45 min 45 min
Motor speed at
keep-warm level
V4
5s ON at V3
/ 20s OFF
10s ON at V3
/ 10s OFF
*D51=54
49C85C'
*D51=54
49C85C'
'1CDBI' '1CDBI' '1CDBI' 5CC5BD
Automatic
programmes
"Default"
speed
14:ECD12<5
V5 for 2 min
30 sec
V5 for 1 min
30 sec then V6
for 2 min
V3 for 40 sec
then V9 for 3 min
V4
(V2 to V8)
"Default"
temperature
14:ECD12<5
100°C
>?>
14:ECD12<5)
100°C
>?>
14:ECD12<5)
90°C
(50°C to
110°C)
Time
speed
14:ECD12<5
30 min
=9>
D?=9>
35 min
=9>
D?=9>
2 min 30 sec
C53D?
=9>C53
3 min 30 sec
C53D?
=9>C53
3 min 40 sec
=9>C53
D?=9>C53
15 min
=9>
D?=9>
Keep warm 'default
function' at the end
of the programme
45 min 45 min 45 min
Motor speed at
keep-warm level
V4
Raise the dough 30°
'default function' at
the end of the
programme
40 min 40 min
,* %+*+$*"+
Cooking times are for information purposes
only; in most cases the food will be properly
cooked.
However, certain conditions may affect the
cooking time:
- size of the vegetables (cut or uncut)
- quantity of ingredients in the basket
- type of vegetables, their ripeness
- quantity of water in the bowl, which
corresponds to the measurement (0.7l).
Remember to use the steam cap with ”maxi
steam“ 1 facing towards you.
If the food is not properly cooked, you can set
an additional cooking time.
*D51=3??;9>7D9=5
>7B5495>DC (E1>D9D95C=1H
CD9=1D543??;9>7
D9=5C
)53?==5>454CD51=
@B?7B1==5
Courgettes 800 g 20 min P1
Parsnips 800 g 25 min P1
White part of the leek 800 g 25 min P1
Broccoli 500 g 20 min P1
Fish
600 g
(with baking parchment)
15 min P1
Potatoes 1 kg 30 min P2
Carrots 1 kg 30 min P2
Green beans 800 g 30 min P2
White meat
600 g
(with baking parchment)
20 min P2
You can also use the manual mode by selecting a temperature of 130°C and the cooking time
according to the quantity and type of ingredients: see table below.
*?=5 B539@5C =1I 31EC5 E>5H@53D54 ?F5B6<?G 4E5 D? D85 1@@51B1>35 ?6 2E22<5C
@1BD93E<1B<IG85>EC9>76B?J5>F575D12<5C >D89C31C5I?EC8?E<4B54E35D85F?<E=5C
133?B49>7<I
EN
12
EN
13
$%,#$&
• The appliance should not be immersed.
Never put the motor unit  under running
water.
Once you have finished using it, disconnect
the appliance.
• Clean the bowl immediately after use.
• Press the locks  then lift the bowl
assembly .
• Place the bowl on a flat surface.
• Unlock the lid by rotating one quarter of a
turn clockwise. Carefully remove the lid.
• When the parts have cooled, unclip the seal
holder from the lid with help of the spatula
*5597.
+1;5 31B5 G9D8 D85 ;>9F5C ?6 D85
E<DB12<145;>9651>4D85;>5149>7
3BEC89>7;>965G85>I?E1B53<51>9>7
D85=1>4G85>I?E5=@DID852?G<D85I
1B55HDB5=5<IC81B@
• When the parts have cooled down:
- dismantle the common spindle , the seal
 and the locking ring  *5597.
- clean the bowl , the common spindle
, the seal , the locking ring ,
the accessories ,
the steam regulator cap , the lid ,
the seal holder  and the seal 
using a sponge and some soapy water.
• Rinse these different parts under running
water.
• For baked-on food, let the bowl soak for
several hours in water and dishwashing
#% %/&,)''# %
/?EB 1@@<91>35 9C
5AE9@@541CCD1>41B4
G9D8 5<53DB?>93 =?D?B
@B?D53D9?>D?7E1B1>D55
9DC <?>75F9DI +89C
5<53DB?>93 C53EB9DI
C1657E1B4C 1719>CD
9>3?BB53D EC5 9> D89C
G1ID85=?D?B9C@B?@5B<I@B?D53D54
In cases of extreme use which disregard the
recommendations in the instructions (see
paragraph ‘FIRST USE’: potentially excessively
large quantities and/or abnormally long use
and/or preparing different recipes at short
intervals), the electronic protection will be
triggered to preserve the motor; in this case,
the appliance will stop functioning and the
message ‘SECU’ will be displayed on the LCD
screen of the control panel to indicate that the
appliance is temporarily out of service.
6b*,c9C49C@<1I54?>D853?>DB?<@1>5<
1>4I?EB1@@<91>35CD?@CG?B;9>7@B?3554
133?B49>7<I
• Leave your appliance plugged in, do not
press the ‘0/1’ switch.
• Please refer to the recommendations in the
instructions and readapt your use of the
appliance (see paragraph FIRST USE’:
amount of ingredients/recipe preparation
time/temperature/type of accessories).
• Allow the motor to cool down for half an
hour.
• Restart the appliance by clicking on the
‘Start /Stop/Reset’ button for two seconds
(see B7 in the instructions).
Your appliance is now ready to be used again.
For further information, customer service de-
partment is at your disposal (see details in the
guarantee booklet).
$'&)+%+b$" %/&,)''# %*,)c %*+),+ &%*b*,c
1-Press directly on the
selector representing the
parameter you have chosen
to adjust, i.e. the speed
selector  or the cooking
temperature selector 
or the time selector ,
the chosen parameter
flashes on the screen 
.
2- Then adjust the setting(s)
using the +/- selector
. For safety reasons, it
is not possible to set a
temperature without
setting a cooking time.
3- When you have finished
entering all your
parameters, press the
`CD1BDa button . When
your appliance is using
cooking mode, the red
indicator light lights
up to inform you that
cooking has started. When
the programme has
started, you have the
possibility of stopping the
appliance at any time by
pressing the `CD?@a
button.
The programme is then in pause mode and
you
have the possibility of restarting by pressing
`CD1BDa again. If you have chosen the wrong
programme and if you want to cancel it, press
and hold the CD?@ button for 2 seconds.
4- When the programme has ended, the
appliance emits 3 beeps.
5- Press the locks  and then remove the
bowl assembly *5597.
+EB2?'E<C56E>3D9?>C
1- Use the control panel  to directly access
the “turbo” and “pulse” functions . To
use in turbo mode (maximum speed in
direct access), simply press and hold the
“turbo” selector. The LCD screen then
displays the time in use  to help you.
To use the pulse (intermittent operation),
activate and stop the function by simply
pressing the `@E<C5aselector. Here too, the
LCD screen helps you by indicating the
time in use. When the function has started
up, you have the possibility of stopping the
appliance at any time by pressing the
`CD?@a button. The function is then in
pause mode, you have the possibility of
restarting by pressing the CD1BDa button
again.
detergent and scrape, if necessary, with a
spatula  or with the abrasive side of a
sponge.
• If there is a build up of limescale in the bowl,
use a damp sponge and, if necessary, white
vinegar.
• To clean the motor unit , use a damp
cloth. Dry carefully.
• To help you with cleaning, the bowl, lid
assembly and accessories are dishwasher
safe, with the exception of the common
spindle
1>4 and its locking ring *55
97.
• The accessories, the detachable common
spindle and the parts of the lid may become
slightly discoloured with certain ingredients
such as curry, carrot juice, etc; this does not
represent any danger for your health or for
the operation of your appliance. To avoid
this, clean these parts immediately after use.
• Before using your bowl set (D), make sure
that the electrical contacts under the bowl
are clean and dry.
EN
14
EN
15
.++&& /&,)''# %&*%&+.&)"
')&#$* ,** *&#,+ &%*
Leak through lid.
Volume of ingredients too high.
Reduce the quantity of ingredients
processed.
T
he lid is not correctly positioned or
locked.
Lock the lid correctly on the bowl.
The seal is not present.
Position the seal on the seal holder and
clip the assembly to the lid.
The seal is cut or damaged.
Change the seal, contact an approved
service centre.
Accessory error.
Check that you are using the
recommended accessory.
Leak through the bowl
spindle.
The seal is not correctly positioned. Position the seal correctly.
The seal is damaged. Contact an approved service centre.
The locking ring is not locked
correctly.
Lock the ring correctly .
The blades do not ro-
tate easily.
Pieces of food that are too big or too
hard.
Reduce the size or quantity of the in-
gredients processed. Add some liquid.
Smell from motor.
On using the appliance for the first time,
or in the event of overload of the motor
caused by too large a quantity of
ingredients or by pieces that are too hard
or too big.
Allow the motor to cool down (about
30 minutes) and reduce the number of
ingredients in the bowl.
“STOP” is displayed.
The appliance has detected too many
vibrations and has changed to the sa-
fety position.
Check that you are at the right speed
and that you are using the recommen-
ded accessory.
“SECU” is displayed.
Motor overload caused by too many
ingredients or pieces which are too
hard or too large or overuse without
sufficient cooling down time.
Allow the motor to cool down (about
30 minutes) and reduce the number of
ingredients in the bowl.
“SECU is displayed +
red indicator light is
flashing.
Overheating of temperature sensors. Contact an approved service centre.
“Err1” is displayed.
+ red indicator light is
flashing.
The heating element is not working.
Check that the power pins under the
bowl
are not clogged. If this is the case,
clean them and try again.
If that still does not work, contact an
approved service centre.
“Err2” is displayed. Electronic fault. Contact an approved service centre.
“Err3” is displayed. Speed fault. Contact an approved service centre.
“Err4” is displayed.
Communication fault with chopper
electronic card.
Contact an approved service centre.
“ntc1” is displayed.
+ red indicator light is
flashing.
Temperature sensor 1 is no longer
working.
Contact an approved service centre.
“ntc2” is displayed.
+ red indicator light is
flashing.
Temperature sensor 2 is no longer
working.
Contact an approved service centre.
')&#$* ,** *&#,+ &%*
Problems when steam
cooking.
The steam regulator cap is not
properly attached.
Set the steam cap to 'high steam' (turn
towards you); this setting allows a
maximum amount of steam to build up
in the bowl for all types of steam
cooking (soups, etc.), so there will be
more steam in the bowl and the cooking
process will be more efficient.
The 'low steam' position allows a
maximum amount of heat and steam to
be dispersed into the bowl for all steam
cooking (soups, etc.). This position also
helps to avoid splashing during cooking.
The 'high steam' position allows a
maximum amount of condensation to
escape and results in dishes or sauces
with a better consistency (risotto, cream
desserts, sauces, etc.).
Insufficient cooking time
Cooking times are for information purposes
only; in most cases it ensures that the food is
properly cooked.
However, certain conditions may affect the
cooking time:
- size of the vegetables (cut or uncut)
- quantity of ingredients in the basket
- type of vegetables, their ripeness
- quantity of water in the bowl, which
corresponds to the measurement (0.7l).
If the food is not properly cooked, you can set
an additional cooking time.
You can also use the manual mode by
selecting a temperature of 130°C and the
cooking time according to the quantity and
type of ingredients.
The appliance does not
work.
It is not plugged in.
Plug the appliance into an electrical
socket.
The switch  is in position 0. Move the switch to position 1.
The bowl or the lid are not correctly
positioned or locked.
Check that the bowl or the lid are cor-
rectly positioned and locked according
to the diagrams in the instruction ma-
nual.
The lid does not lock. The lid is not fully assembled.
Check that the seal is correctly assembled
on the seal holder and that the seal holder
is correctly assembled on the lid.
Excessive vibration.
The appliance is not positioned on a
flat surface, the appliance is not
stable.
Place the appliance on a flat surface.
Volume of ingredients too high.
Reduce the quantity of ingredients pro-
cessed.
Accessory error.
Check that you are using the recom-
mended accessory.
NL
16
17
• Elimination of packaging and appliance materials.
The packaging exclusively contains materials that are not dangerous to the
environment, which can be disposed of in accordance with the recycling regulations
in force.
To dispose of your appliance, ask the appropriate department of your local authority.
• End-of-life electronic or electrical appliances:
>F9B?>=5>D1<@B?D53D9?>69BCD
Your appliance contains numerous materials that can be recovered or recycled.
Take it to a collection point for processing.
)/# %
+5> 11>J95> F1> 45 @5BC??><9:;5
F59<978594
Lees de gebruiksaanwijzing
aandachtig voor het eerste gebruik en
bewaar ze zorgvuldig: Niet-naleving
ontheft de fabrikant van alle
aansprakelijkheid.
• Trek de stekker van het apparaat
uit het stopcontact wanneer u het
apparaat zonder toezicht laat en
voordat u het monteert,
demonteert, of schoonmaakt. Laat
kinderen dit apparaat niet zonder
toezicht gebruiken.
• Bewaar dit apparaat en het snoer
buiten het bereik van kinderen.
• Dit apparaat mag niet worden
gebruikt door personen (of
kinderen) met verminderde,
fysieke, zintuiglijke of mentale
capaciteiten, of personen die te
weinig ervaring of kennis hebben
tenzij ze onder de supervisie staan
van een persoon die voor hen
verantwoordelijk is of als ze
genoeg richtlijnen gekregen
hebben om het apparaat correct te
hanteren.
Er moet toezicht op kinderen zijn,
zodat zij niet met het apparaat
kunnen spelen.
• Houd uw apparaat buiten het bereik
van kinderen.
• Tijdens het gebruik
van het apparaat
kunnen bepaalde
onderdelen zeer warm
worden
(wand van de roestvrijstalen kom,
afneembare aandrijfas, doorzichtige
delen van het deksel en de dop,
metalen delen onder de kom, mand).
Ze kunnen brandwonden
veroorzaken. Houd het apparaat vast
aan de koude, plastic onderdelen
(handvatten, motorblok). Het rode
controlelampje geeft aan dat er gevaar
voor verbranding bestaat.
• De toegankelijke oppervlakken van
het apparaat kunnen zeer warm
worden tijdens het gebruik.
• Het apparaat is niet ontworpen om
met een externe timer of
afstandsbediening te worden
bestuurd.
• Gebruik uw apparaat niet als het niet
correct werkt of als het apparaat,
het netsnoer of de stekker is
beschadigd. Om gevaarlijke
situaties te voorkomen, dient u het
netsnoer door een erkend service
center te laten vervangen (zie
bijgevoegde lijst).
• Houd het apparaat nooit onder de
kraan. Houd het motorblok  niet
onder stromend water.
Dit apparaat is uitsluitend geschikt
voor huishoudelijk gebruik
binnenshuis en op een hoogte van
minder dan 2000 m. De fabrikant is
niet verantwoordelijk en behoudt
zich het recht voor de garantie te
annuleren in geval van commercieel
of oneigenlijk gebruik of niet-
naleving van de instructies.
• Dit apparaat is niet bedoeld voor
gebruik in huishoudelijke of analoge
toepassingen (gebruik dat niet
- #  *-&&)*) +%
CI?EB1@@<91>35CD9<<>?DG?B;9>7
Contact an approved service centre (see list in service booklet).
EN
NL
19
18
NL
, +*#, +%-&&),)&'*
$)"+
• Bewaar het apparaat en het snoer
buiten het bereik van kinderen
jonger dan 8 jaar.
Kinderen mogen niet met het
apparaat spelen.
• Dit apparaat mag worden gebruikt
door personen met verminderde
fysieke, mentale of zintuiglijke
capaciteiten of personen die te
weinig ervaring of kennis hebben
als ze onder toezicht staan of als ze
richtlijnen hebben gekregen om het
apparaat veilig te kunnen hanteren
en de risico's kennen.
• Dit apparaat mag worden gebruikt
door kinderen vanaf 8 jaar als ze
onder toezicht staan of als ze
richtlijnen hebben gekregen om het
apparaat veilig te kunnen hanteren
en de risico's kennen. De
reinigings- en
onderhoudswerkzaamheden
mogen niet door kinderen zonder
toezicht worden uitgevoerd tenzij
ze ouder zijn dan 8 jaar en onder
toezicht staan van een volwassene.
+5> 11>J95> F1> 45 5<5;DB9C385
11>C<E9D9>7
• U moet de stekker van het apparaat
in een geaard stopcontact steken.
Het apparaat is uitsluitend geschikt
om op wisselstroom te werken.
Controleer of de voedingsspanning
op de gegevensplaat van het
apparaat overeenkomt met de
spanning van uw elektrische
installatie.
• Als u het apparaat niet correct
aansluit, vervalt de garantie.
• Trek nooit aan het snoer om de
stekker van het apparaat uit het
stopcontact te trekken.
• Dompel het apparaat, het snoer of
de stekker nooit in vloeistof.
• Laat het netsnoer niet in aanraking
komen met of in de buurt hangen
van de warme onderdelen van het
apparaat of van een warmtebron of
over scherpe randen hangen.
+5>11>J95>F1>55>C<538D752BE9;
)11;85D45;C5<>95D11>F??B41D
85D 1@@1B11D F?<<5497 D?D
CD9<CD1>4 9C 75;?=5> CD?@
;>?@ G138D D?D 45 75=9HD5
9>7B549R>D5> D?D CD9<CD1>4 J9:>
75;?=5>
• Doe altijd eerst de vaste
ingrediënten in de kom en voeg
daarna de vloeibare ingrediënten
toe 697. Respecteer altijd
de aanduiding 2,5 L MAX aan de
binnenkant van de kom 6 97
. Als de kom te vol is, kan er
kokend water uit spuiten.
• Let op. Respecteer het niveau van
0,7 liter water dat wordt
aangegeven in het
stoomkookprogramma 6 97
.
• Steek nooit uw vingers of andere
voorwerpen in de kom wanneer het
apparaat in werking is.
• Gebruik de kom niet om
ingrediënten te bewaren, in te
vriezen, te steriliseren…
• Zet het apparaat op een stabiel,
hittebestendig, schoon en droog
werkvlak.
onder de garantie valt) zoals
- in keukens van winkels, kantoren
en andere werkomgevingen.
- in personeelskeukens van winkels,
kantoren en andere
werkomgevingen.
- door de gasten van hotels, motels
of andere verblijfsvormen.
,G 1@@1B11D 7556D
85D5 CD??= 16 495
2B1>4G?>45> ;1>
F5B??BJ1;5> 1
F??BJ938D97 ?= =5D
85D 45;C5< 5> 45 4?@ 752BE9;
9>495>>?49755>81>4C38?5>55>
@1>>5><1@?E4454?@F1CD
11>85D=9445<CD575455<D5
52BE9;85D1@@1B11D>??9D1<C45
164938D9>7CB9>7 >95D ?@ 45
164938D9>7CB9>78?E45B 5> 45
164938D9>7CB9>78?E45B >95D ?@
85D45;C5<9C75@<11DCD,=?5D45
4?@?@45?@5>9>79>85D45;C5<
@<11DC5> F??B 752BE9; D5>J9:
1>45BCF5B=5<49>85DB535@D
.)*,. %  <5D
?@F??BF5BG?>49>75>
4??B C<538D 752BE9;
F1>85D1@@1B11D
.55C F??BJ938D97
G1>>55B E 45 =5CC5> F1> 85D
E<DB12<145 81;=5C
 5> F1>
85D
=5C
?= D5 ;>545>81;;5>

C38??>=11;D5>45;?=<557D5
=5CC5>J9:>J55BC385B@
.55C F??BJ938D97 G1>>55B E 55>
G1B=5 F<?59CD?6 9> 45
;5E;5>=1389>5 795D 5 F<?59CD?6
;1> E9D 85D 1@@1B11D C@E9D5>
G1>>55B 811B ;??;@E>D G?B4D
25B59;D
5B785DE<DB12<14581;=5C?@
9>45;?=>15<;752BE9;
.)*,. %1F??BJ938D97D5
G5B;1<CE85D1@@1B11D81>D55BD
B59>975>FE<<5>5>E9D795D5>J?B7
5BF??B41D5B755>F<?59CD?6?@45
3?>D13D5>D5B538D;?=D
.)*,. % ,G 1@@1B11D
7556D CD??= 16 495 2B1>4G?>45>
;1>F5B??BJ1;5>
.)*,. % 5D ?@@5BF<1;
F1>85DF5BG1B=9>7C5<5=5>D2<9:6D
>1752BE9;>?75F5>G1B=
)11;D9:45>C85D?@G1B=5>5>D?D
1<<5CF?<<54979C1675;?5<45>;5<45
81>47B5@5> F1> EG @B?4E3D 11>
DB5;;5BC  81>47B55@ F1> 85D
45;C5<5>F1>45CD??=B575<4?@

)114@<55745752BE9;C11>G9:J9>7
F??B 85D 9>CD5<<5> F1> 45
G5B;9>7CC>5<85945>D9:4F1>5<;
1335CC?9B55>5<;@B?7B1==1
)114@<55745752BE9;C11>G9:J9>7
F??B85D=?>D5B5>5>45=?>D5B5>
F1>451335CC?9B5C?@85D1@@1B11D
)114@<55745752BE9;C11>G9:J9>7
F??B85DB59>975>5>?>45B8?E45>
F1>EG1@@1B11D
-?<7 F??B 45 B59>979>7 F1> EG
1@@1B11D CD554C 45
B59>979>7C9>CDBE3D95C
[5D1@@1B11DE9DC381;5<5>
[%95D B59>975> 1<C 85D 1@@1B11D
>?7G1B=9C
[)59>975>=5D55>F?38D9754?5;
?6C@?>C
[5D 1@@1B11D >??9D 9> G1D5B
?>45B4?=@5<5>?6?>45BCDB?=5>4
G1D5B8?E45>
NL
21
20
NL
• Zet het apparaat niet naast een
muur of kast: de geproduceerde
stoom kan de elementen
beschadigen.
• Plaats uw apparaat niet in de buurt
van een ingeschakelde warmtebron
(kookplaat, huishoudapparaat ...).
• Bedek uw deksel niet met een doek
of een ander voorwerp, stop de
opening in het deksel niet dicht,
gebruik de stoomregelknop.
• Zorg ervoor dat er geen lang haar,
sjaals, stropdassen ... boven de
kom hangen wanneer het apparaat
in werking is.
• Plaats de accessoires nooit in de
magnetron.
• Het apparaat niet in de open lucht
gebruiken.
• Overschrijd nooit de maximale
hoeveelheid die wordt aangegeven
in de gebruiksaanwijzing.
• Berg het apparaat op wanneer het
is afgekoeld.
*-
• Voor uw eigen veiligheid dient u
geen andere accessoires of
onderdelen te gebruiken dan die
door de erkende service centers
worden geleverd.
• Elke handeling anders dan gewone
onderhouds- of schoonmaakwerk-
zaamheden dient door een erkend
service center te worden uitgevoerd.
• Raadpleeg de tabel "Uw apparaat
werkt niet. Wat nu? ” aan het einde
van de gebruiksaanwijzing.
In deze handleiding vindt u enkele gebruikstips om optimaal van de mogelijkheden
van uw apparaat gebruik te maken: sauzen, soepen, stoofschotels,
stoombereidingen, deeg en desserten.
*) !- %-%+'')+
Motorblok
Bedieningspaneel
: automatische
programmakeuzeknoppen
: snelheidsschakelaar
: temperatuurschakelaar en/of
verwarmingscontrolelampje
: werkingsduur-schakelaar
: 'turbo/pulse'-schakelaar
: '+/-'-schakelaar
: 'start/stop/reset'-knop
LCD-scherm
: display snelheid
: display temperatuur
: display tijd
: display programmaselectie
: display
beveiligingscontrolelampje
Kom
: roestvrijstalen kom
: trekkers
: afneembare aandrijfas
: afdichtingsring
: vergrendelingsring
Deksel
: stoomregeldop
: deksel
: afdichtingsringhouder
: afdichtingsring
Accessoires:
: opbergdoos voor accessoires
: ultrablade hakmes
: menger
: garde
: mes om te kneden/hakken
: stoommand
Spatel
'0/1'-schakelaar om de stroomtoevoer af
te sluiten
Schoonmaakborstel
+% *-%*-%+'')+
-5B=?75> 1550W (1000W : verwarmingsweerstand / 550W :
motor )
+5=@5B1DEEB25B59; van 30° tot 130°C
regelbaar per 5°C.
.5B;9>7C4EEB25B59; van 5 s tot 2 uur
regelbaar per 5 s min en 1 min max.
1>D1<C>5<8545> - 2 intermitterende snelheden:
snelheid 1 ( 5 s On / 20 s Off ).
snelheid 2 ( 10 s On / 10 s Off ).
- 10 continue, progressieve snelheden
(snelheden 3 tot 12).
NL
23
22
NL
%), "%$
Uw apparaat is voorzien van een '0/1'-schakelaar, schuif de schakelaar naar stand 1.
697Uw apparaat is voorzien van de volgende accessoires:
HAKMESMENGERGARDEMES OM TE KNEDEN/HAKKENSTOOMMANDDOP
Soepen mixen
Compotes mixen
Groenten hakken
Vlees hakken
Vis hakken
Witbrooddeeg kneden
Kruimeldeeg, zout deeg,
speciaal brooddeeg kneden
Het gistdeeg kneden
(brioche, kouglof…)
Licht deeg mengen
(cake…)
Noten verpulveren
Harde ingrediënten hakken
Hakken van harde producten
Ijs crushen
Pannenkoekenbeslag , wafelbeslag
Mengt de Bereide schotels zonder de ingrediënten te beschadigen,
Zeer nuttig voor de bruinbakfase van bepaalde gerechten (risotto, soepen).
Stoombereidingen van
groenten, vis of vlees
Soepen met stukjes
Stoomregeldop
Eiwitten
Mayonaise,
Slagroom
Sauzen, Crèmes, Garnering
(aardappelpuree, polenta …)
Braadschotels
Stoofschotels
Risotto
Ratatouille, Chutneys, Peulvruchten (Instellingen: zie kookboek)
5min
45min
15s
30s
15s
40s
3min
V9 max.
F3
F4
F5
E1
F2
F1
22min
500g
2,5L
1Kg
1Kg
1Kg
1Kg
2,5L
1,5Kg
5/10min
2/5min
2min 30s
2min 30s
tot
1min
1min
1Kg
1Kg
1,2Kg
0,8Kg
0,6Kg
1min 0,6Kg
1min 1,5L
40/45min
20/40min 1Kg
2,5L
6 tot 10
1min 30s
2min
7
max.
0,5L
1/20min 1L
40s
3min
max
- Stoomstand maxi (a) = stoomkoken.
- Stoomstand mini (b) = risotto, roomdesserts, sauzen enz.
Gebruik dit accessoire niet om harde producten fijn te hakken, gebruik het kneed-/hakmes F4.
b
a
Deze accessoires zijn eveneens voorzien van handgrepen zodat u ze gemakkelijker kunt
vasthouden tijdens het koken.
,.'')+ *-&&)0 %-%
.)" %*$& 
ED?=1D9C385=?4EC
Snelheid, kooktemperatuur en -tijd zijn
automatisch voorgeprogrammeerd om
sauzen, soepen, stoofschotels,
stoombereidingen, deeg en desserts te
maken.
1>4=1D975=?4EC
Persoonlijke instellingen van de parameters
snelheid, kooktemperatuur en -tijd voor een
gebruik dat aangepast is aan uw
voorkeuren.
$&%+-%"&$**& )*
%+"*#
• Maak alle elementen    ,
uitgezonderd het motorblok , met warm
zeepwater schoon voor het eerste gebruik.
Uw kom  is voorzien van een afneembare
aandrijfas  om het schoonmaken te
vergemakkelijken.
• Vóór het eerste gebruik controleert u of al
het verpakkingsmateriaal is verwijderd.
Vergeet de bescherming tussen de kom 
en het motorblok  niet.
• Plaats de afdichtingsring  op de
afdichtingsringhouder 697, klik
het geheel op het deksel 697.
• Plaats de afdichtingsring  op de aandrijfas
. Vergrendel het geheel op de bodem van
de kom met de vergrendelingsring 6
97.
• Plaats het gekozen accessoire op de kom:
- de accessoires ?6 op FR
de aandrijfas op de bodem van de kom
697,
- de stoommand in de kom , 697
, vergeet niet op voorhand de bak met
0,7 l vloeibare bereiding (water, saus …) te
vullen 697.
• Doe de ingrediënten in de kom of
stoommand.
• Zet de twee driehoeken op één lijn en plaats
het deksel op de kom 697, draai
het deksel in de richting van de pijl om het
te vergrendelen zonder erop te duwen 6
97.
• Plaats de stoomregelknop  op het deksel,
er zijn 2 mogelijkheden: stoomstand maxi (a)
of stoomstand mini (b).
$5D45CD??=CD1>4=9>9;E>D E
55> =1H9=1<5 8?5F55<8594
3?>45>C1D95 <1D5> ?>DC>1@@5>
G11B4??BEG75B538D5>?6C1EJ5>
55> 25D5B5 3?>C9CD5>D95 ;B9:75> B9C?DD?
B??=45CC5BDCC1EJ5>5>J
$5D45CD??=CD1>4=1H9=11;DE
F??B 1< EG CD??=75B538D5>
C?5@5>5>J?@D9=11<752BE9;F1>
G1B=D55>CD??=9>45;?=
1>;J9:45J5CD1>4F5B=9:4DE??;C@1DD5>
D9:45>C85D=9H5>
• Plaats de kom  op het motorblok . tot
u 'klik' hoort 697.
• Het apparaat werkt alleen als de kom en het
deksel correct zijn geplaatst en zijn
vergrendeld op het motorblok.
Sauzen Stoomkoker
(programma ' zachte
stoom / ' intense
stoom)
Soepen
(programma ' crèmes /
' purees)
Deeg
(programma ' brood /
' brioche / ' cake)
Stoofschotels
(programma '
groentestoofsels / '
stoofschotels/ ' risotto)
Desserten
.1>>55BQQ>F1>25945?>45B45<5>>95D
3?BB53D9C75@<11DCD?6F5B7B5>45<46
975>2579>D85D<?7? D5
;>9@@5B5> G1>>55B G5 55> 6E>3D95
13D9F5B5>
GEBRUIK VAN HET BEDIENINGSPANEEL (B)
Keuze van een automatisch programma:
NL
25
24
NL
"5EJ5F1>4575@5BC?>1<9C55B45@1B1=5D5BC
Keuze van de motorsnelheid.
2 intermitterende snelheden en
10 continue, progressieve
snelheden.
Keuze van de kooktemperatuur.
Van 30° tot 130°C
Verwarmingscontrolelampje: dit
lampje licht op wanneer de
bereiding start en dooft wanneer
de temperatuur in de kom onder
de 50°C zakt.
Keuze van de kooktijd.
van 5 s tot 2 uur
Keuze van de functies DEB2?
(maximumsnelheid) en @E<C5
(intermitterende werking)
zonder rekening te houden met
andere regelparameters.
Verhoging van de snel-
heid, de kooktemperatuur
en -tijd.
Verlaging van de snelheid,
de kooktemperatuur en -
tijd.
Deze knop heeft
6E>3D95C:
- `5F5CD979>7a van de
keuze van uw
automatisch programma
of van uw gekozen
parameters in de
handmatige modus (de
snelheid, de
kooktemperatuur en -
tijd).
- `'1EJ5a tijdens het
gebruik, wanneer de
bereiding is gestart.
- `5B9>9D91<9C5B9>7a van
de gekozen parameters
van het apparaat door de
knop 2 seconden
ingedrukt te houden.
52BE9;CD9@
Uw apparaat is voorzien van een microprocessor die de stabiliteit analyseert en controleert.
Bij instabiliteit wordt de rotatiesnelheid van de motor automatisch verlaagd, als de instabiliteit
blijft voortduren, wordt de motor gestopt en verschijnt er 'STOP' op uw scherm.
• Controleer of de hoeveelheden van de ingrediënten niet te groot zijn en of de gebruikte
snelheid de geschikte is.
• Controleer of u het correcte accessoire gebruikt.
• Zet uw apparaat opnieuw aan.
), "-%+'')+
Steek de stekker van het apparaat in het stopcontact en schuif de schakelaar  naar stand
1. Alle parameters op het LCD scherm  staat op "0" 697
,+&$+ *$&,*
1- Druk op een programma
naar keuze . Er
verschijnt een driehoek 
op het scherm onder het
gekozen programma. Als u
voor een programma voor
soepen, stoofschotels of
deeg
kiest, moet u enkele keren op de knop drukken
om één van de verschillende subprogramma's te
kunnen selecteren.
2- De voorgeprogrammeerde
parameters kunnen
worden gewijzigd tijdens
de bereiding van een
recept (in functie van het
gekozen recept, de
ingrediënten en de
hoeveelheden). Druk op de
snelheidsschakelaar , de
temperatuurschakelaar  of de
tijdschakelaar , de gekozen parameter
begint te knipperen op het scherm 
.
3- Regel de parameter(s) met
behulp van de '+/-'-
schakelaar .
4- Wanneer u al uw
parameters heeft
gewijzigd, drukt u op de
'start'-knop  om het
programma te starten.
Wanneer uw apparaat in
werking is getreden, licht
het
rode controlelampje  op om aan te geven
dat de bereiding is gestart.
5- Wanneer het programma stopt, klinken er
3 pieptonen.
6- Na afloop van de programma's voor
sauzen, soepen, stoofschotels P2 en P3,
stoombereidingen en dessertroom,
schakelt het apparaat automatisch over
naar de warmhoudmodus om de bereiding
serveerklaar te houden. Deze fase duurt 45
minuten. In het programma sauzen,
stoofschotels P2 en P3, dessert en in
manuele modus werkt de motor van het
apparaat met een specifieke snelheid om
de bereiding zo intact mogelijk te houden
en te voorkomen dat ze aan de bodem van
de kom kleeft. Druk op de 'stop'-knop' 
om de warmhoudmodus uit te schakelen.
Als u het deksel opent, op de trekkers 
drukt of de kom verwijdert, wordt de
warmhoudmodus automatisch
uitgeschakeld.
Wanneer de programma's voor stoven P2 en
P3 en het bereiden van sauzen en roomdesserts
zijn afgelopen, blijft de motor draaien tijdens
het warmhouden om te vermijden dat de be-
reiding aan de bodem van de kom blijft kleven.
Na de kneedfase van de deegprogramma's
P1 en P2, schakelt het apparaat over naar
de “rijsmodus” op 30°C om uw deeg meer
volume te geven. Deze fase duurt 40
minuten. Als u het deksel opent, op de
trekkers  drukt of de kom verwijdert,
schakelt het apparaat over naar de
"pauzemodus". Druk opnieuw op 'start' om
de bereiding voort te zetten.
Houd de 'stop'-knop 2 seconden ingedrukt
om deze modus uit te schakelen.
7- Druk op de trekkers  en verwijder de
kom 697.
Wanneer het automatische programma is
gestart, kunt u het programma op elk moment
onderbreken door op de 'stop'-knop te
drukken. Het automatische programma
schakelt over naar de pauzemodus. Druk
opnieuw op 'start' om de bereiding voort te
zetten. Als u het verkeerde programma heeft
gekozen en u het programma wilt annuleren,
houdt u de 'stop'-knop 2 seconden ingedrukt-
.
NL
27
26
NL
&%+"-&&)*+#,+&$+ *')&)$$*
*1EC *?5@' *?5@'
*D??6C38?D5<
'
*D??6C38?D5<
'
*D??6C38?D5<
'
Automatische
programma's
Snelheid
“standaard”
9>CD5<211B
V6
-D?D-
10 impulsen
en V12 gedu-
rende 2 min.
10 Impulsen V3 V1 V2
Standaard
temperatuur
9>CD5<211B
70°C
Z
D?DZ
100°C
Z
D?DZ
100°C
Z
D?DZ
130°C
>95D9>CD5<
211B
95°C
Z
D?DZ
95°C
Z
D?DZ
Tijd
“standaard”
9>CD5<211B
8 min
=9>
D?D=9>
40 min
=9>
D?D=9>
45 min
=9>
D?D=9>
5 min
=9>
D?D =9>
45 min
=9>
D?D8
20 min
=9>
D?D8
"Standaard"-duur
voor warmhouden na
afloop van het
programma
45 min 45 min 45 min 45 min 45 min
Motortoerental tijdens
het warmhouden
V4
5s ON in V3 /
20s OFF
10s ON in V3
/ 10s OFF
5B5949>7
CD??='
5B5949>7
CD??='
557' 557' 557' 5CC5BD
Automatische
programma's
Snelheid
“standaard”
9>CD5<211B
V5 gedu-
rende 2 min
30 s
V5 gedurende
1 min 30 s
vervolgens V6
gedurende 2
min
V3 gedurende 40
s vervolgens V9
gedurende
3 min
V4
(V2 tot V8)
Standaard
temperatuur
9>CD5<211B
100°C
>95D
9>CD5<211B
100°C
>95D
9>CD5<211B
90°C
(50°C tot
110°C)
Tijd
“standaard”
9>CD5<211B
30 min
=9>
D?D=9>
35 min
=9>
D?D=9>
2 min 30 s
CD?D
=9>C
3 min 30 s
CD?D
=9>C
3 min 40 s
=9>C
D?D=9>C
15 min
=9>
D?D=9>
"Standaard"-duur
voor warmhouden
na afloop van het
programma
45 min 45 min 45 min
Motortoerental
tijdens het
warmhouden
V4
"Standaard"-duur
voor het rijzen van
het deeg (3C) na
afloop van het
programma
40 min 40 min
), "-%+*+&&$$%!
De kooktijden zijn ter indicatie gegeven, ze
bieden doorgaans voldoende tijd voor een
geslaagde bereiding.
Toch zullen bepaalde omstandigheden de
kooktijd beïnvloeden:
- de grootte van de groenten (gesneden of
niet gesneden)
- de hoeveelheid ingrediënten in het mandje
- de variëteit van de groenten, hun rijpheid
- de hoeveelheid water in de kom, die moet
overeenstemmen met de graadverdeling
(0,7 l).
Vergeet niet om de stoomregeldop naar u toe te
draaien tot in de hoge stoomstand 1.
Als de kooktijd onvoldoende blijkt, kunt u nog
wat extra tijd toevoegen.
,;E>D45=1>E5<5=?4EC??;752BE9;5>4??B45D5=@5B1DEEBF1>\Z5>45;??;D9:4
D5;95J5>?@21C9CF1>458?5F55<85945>85DDI@59>7B549R>D5>J95D125<895B>1
+9:45>C25@11<4525B5949>75>G?B45><E38D25<<5D:5C75F?B=45>;1>45;?=?F5B<?@5>
.55CF??B1<F??BJ938D971<CE495@FB95C7B?5>D5>752BE9;D52BE9;;<59>5B58?5F55<8545>
?=?F5B<?@5>D5F??B;?=5>
"??;D9:4CD?=5>
>7B549R>D5> ?5F55<8545>=1H 5C381DD5;??;D9:4
1>25F?<5>
CD??=@B?7B1==1
Courgettes 800 g 20 min P1
Pastinaak 800 g 25 min P1
Preiwit 800 g 25 min P1
Broccoli 500 g 20 min P1
Vis 600 g (met bakpapier) 15 min P1
Aardappelen 1 kg 30 min P2
Wortelen 1 kg 30 min P2
Prinsessenbonen 800 g 30 min P2
Wit vlees 600 g (met bakpapier) 20 min P2
NL
29
28
NL
%$+ $&,*
1- Druk op de schakelaar van
de parameter die u wilt
instellen (de
snelheidsschakelaar ,
de temperatuurschakelaar
 of de tijdschakelaar
. De gekozen
parameter knippert op het
scherm .
2- Regel vervolgens de
parameter(s) met behulp
van de '+/-'- schakelaar
. Om
veiligheidsredenen kunt u
de temperatuur niet
regelen zonder eerst een
kooktijd in te stellen.
3- Wanneer u al uw
parameters heeft
ingesteld, drukt u op de
'start'-knop . Wanneer
uw apparaat in werking is
getreden, licht het rode
controlelampje  op om
aan te geven dat de bereiding is gestart.
Wanneer het programma is gestart, kunt u het
op elk moment onderbreken door op de
'stop'-knop te drukken.
Het programma schakelt over naar de
pauzemodus.
Druk opnieuw op 'start' om de bereiding voort
te zetten. Als u het verkeerde programma
heeft gekozen en u het programma wilt
annuleren, houdt u de 'stop'-knop 2 seconden
ingedrukt-.
4- Wanneer het programma stopt, klinken er
3 pieptonen.
5- Druk op de trekkers  en verwijder de
kom 697.
E>3D95C+EB2?'E<C5
1- U heeft directe toegang tot de functies
'turbo' en 'pulse'  via uw
bedieningspaneel . Houd de 'turbo'-
knop ingedrukt om de DEB2?=?4EC
(maximumsnelheid) te activeren. Op het
LCD-scherm verschijnt de gebruiksduur
 om u verder te helpen. Als u de
@E<C5=?4EC (intermitterende werking)
gebruikt, drukt u op de 'pulse'-schakelaar
om de functie te activeren en te
deactiveren. Het LCD-scherm helpt u
verder en toont de gebruiksduur. Wanneer
de functie is geactiveerd, kunt u deze op
elk moment uitschakelen door op de
'stop'-knop te drukken. De functie schakelt
over naar de pauzemodus. Druk opnieuw
op 'start' om de functie te reactiveren.
• Houd het apparaat nooit onder de kraan.
Houd het motorblok  niet onder
stromend water.
Trek de stekker van het apparaat uit het
stopcontact na gebruik.
• Maak de kom onmiddellijk schoon na
gebruik.
• Druk op de trekkers  en verwijder de
kom .
• Zet de kom op een vlak werkblad.
• Draai het deksel een kwartslag in wijzerzin
om het te ontgrendelen. Verwijder het
deksel voorzichtig.
• Wanneer de onderdelen zijn afgekoeld,
maakt u de afdichtingsringhouder los met
de spatel 697.
.55CF??BJ938D97G1>>55BE45=5CC5>
F1>85DE<DB12<14581;=5C5>F1>85D
=5C ?= D5 ;>545>81;;5> 
C38??>=11;D5>45;?=<557D5=5CC5>
J9:>J55BC385B@
• Wanneer de onderdelen zijn afgekoeld:
- demonteert u de aandrijfas , de
afdichtingsring  en de
vergrendelingsring 697.
- maakt u de kom , de aandrijfas , de
afdichtingsring , de
vergrendelingsring , de accessoires
, , , , , de
stoomregelknop , het deksel , de
afdichtingsringhouder  en de
afdichtingsring  schoon met een spons
+'')+*&&%$"%
#
%
)
!
"
%
-
,
#
#
%
&
'
%
#
%
-
&
&
)
-
#
%
%
+
'
'
)
+
`
*
,
a
5 =?D?B F1> EG
1@@1B11D9CCD1>411B4
5<5;DB?>9C3825F59<974
?= 5BF??B D5 J?B75>
41D E 85D J? <1>7
=?75<9:; ;1>
752BE9;5> 1>;J9:
45J5 5<5;DB?>9C385
25F59<979>7 25>D E 25C385B=4 D575>
16G9:;5>4752BE9;F1>85D1@@1B11D?@495
=1>95B9C45=?D?B@5B653D25F59<974
In bepaalde buitengewone
gebruiksomstandigheden, wanneer de
richtlijnen van de gebruikshandleiding niet
worden gevolgd (zie hiervoor ook de
paragraaf "EERSTE GEBRUIK": bijvoorbeeld als
er te grote hoeveelheden worden gebruikt
en/of het apparaat ongewoon lang moet
functioneren en/of de recepten te snel na
elkaar worden gekozen), treedt er een
elektronische beveiliging in werking om de
motor te sparen. In dat geval wordt het
apparaat uitgeschakeld en verschijnt de
melding "SECU" op het lcd-scherm van het
bedieningspaneel om aan te geven dat het
apparaat tijdelijk niet kan worden gebruikt.
<CEG1@@1B11DG?B4DE9D75C381;5<45>E
45 =5<49>7 *, J95D ?@ 85D
25495>9>7C@1>55<>55=41>?>45BCD11>45
CD1@@5>
• Zorg ervoor dat uw apparaat ingeschakeld
blijft, druk niet op de "0/1"-schakelaar.
• Raadpleeg de richtlijnen van de
gebruikshandleiding om uw bereiding aan te
passen (zie de paragraaf "EERSTE GEBRUIK":
hoeveelheid
ingrediënten/bereidingstijd/temperatuur/ty
pe accessoires).
• Wacht een half uur om de motor te laten
afkoelen.
Voer een reset uit van het apparaat door 2
seconden de knop "Start/Stop/Reset"
ingedrukt te houden (punt B7 in de
gebruikshandleiding).
Uw apparaat is nu opnieuw helemaal klaar
voor gebruik.
Met mogelijke vragen kan u terecht bij de
klantendienst (Bekijk de details in het
garantieboekje).
en warm zeepwater.
• Spoel de verschillende elementen onder
stromend water.
• Als het apparaat zeer vuil is, laat u het
onderdeel enkele uren in zeepwater weken
en krabt u het, indien nodig, met een spatel
 of met een schuursponsje schoon.
• Bij kalkaanslag kunt u een schuurspons
gebruiken, eventueel gedrenkt in azijn.
• Gebruik een vochtige doek om het
motorblok  schoon te maken. Droog het
daarna zorgvuldig af.
• De kom, het deksel en de accessoires zijn
vaatwasbestendig. De aandrijfas 5>
en de vergrendelingsring  mogen niet in
de vaatwasser worden schoongemaakt 6
97.
• De accessoires, de afneembare aandrijfas en
de elementen van het deksel kunnen licht
verkleuren als u bepaalde ingrediënten
gebruikt zoals curry, wortelsap… De
verkleuring is niet schadelijk voor uw
gezondheid en heeft geen invloed op de
werking van uw apparaat. Maak de
elementen snel schoon na gebruik om dit te
voorkomen.
• Controleer voordat u uw komset (D) opnieuw
gebruikt altijd of de elektrische contacten
onder de kom schoon en droog zijn.
NL
31
30
NL
,.'')+.)"+% +.+%,
')&#$% &&)0"% &'#&** %%
Problemen bij stomen.
Stoomregeldop slecht
gepositioneerd.
Draai de stoomknop naar u toe op
de stoomstand "maxi". Met deze
stoomstand kunt u voor al uw
stoomgerechten (soepen enz.)
optimaal gebruikmaken van
warmte en stoom in de
kom,waardoor er dus meer stoom
in de kom blijft, wat efficiënter is
om te koken.
Met de positie "mini stoomstand"
kunt u voor alle
stoombereidingen (soepen enz.)
een maximale hoeveelheid
warmte en stoom in de kom
bereiken. Met deze positie
vermijdt u ook dat de bereiding
tijdens het mixen gaat spatten.
Met de positie "veel stoom" kunt u
een maximale hoeveelheid
condensatie laten ontsnappen en
dus gerechten of sauzen met een
betere consistentie verkrijgen
(risotto, roomdesserts, sauzen
enz.).
Onvoldoende kooktijd.
De kooktijden zijn ter indicatie
gegeven, ze bieden doorgaans
voldoende tijd voor een geslaagde
bereiding.
Toch zullen bepaalde
omstandigheden de kooktijd
beïnvloeden:
- de grootte van de groenten
(gesneden of niet gesneden)
- de hoeveelheid ingrediënten in
het mandje
- de variëteit van de groenten,
hun rijpheid
- de hoeveelheid water in de kom,
die moet overeenstemmen met
de graadverdeling (0,7 l).
- Als de kooktijd onvoldoende
blijkt, kunt u nog wat
tijdtoevoegen.
U kunt de manuele modus ook
gebruiken door de temperatuur
van 130 °C en de kooktijd te
kiezen op basis van de
hoeveelheid en
het type ingrediënten.
')&#$% &&)0"% &'#&** %%
Het apparaat werkt niet.
De stekker zit niet in het
stopcontact.
Steek de stekker van het apparaat
in het stopcontact.
De schakelaar  staat in de stand 0. Schuif de schakelaar naar stand 1.
De kom of het deksel zijn niet
correct geplaatst of vergrendeld.
Controleer of de kom en het
deksel correct zijn geplaatst en
vergrendeld volgens de schema's
in de gebruiksaanwijzing.
Het deksel kan niet worden ver-
grendeld.
H
et deksel is niet volledig.
C
ontroleer of de afdichtingsring
correct is geplaatst op de afdich-
tingsringhouder en dat de afdich-
tingsringhouder correct is
gemonteerd op de het deksel.
Overmatige trillingen.
Het apparaat staat niet op een
vlakke en stabiele ondergrond.
Zet het apparaat op een vlakke
ondergrond.
De hoeveelheid ingrediënten is te
groot.
Verminder de hoeveelheid
ingrediënten.
Storing accessoires. Controleer of u het correcte
accessoire gebruikt.
Het deksel lekt.
De hoeveelheid ingrediënten is te
groot.
Verminder de hoeveelheid
ingrediënten.
Het deksel is niet correct
geplaatst of vergrendeld.
Vergrendel het deksel correct op
de kom.
De afdichtingsring is niet
geplaatst.
Plaats de afdichtingsring op de
afdichtingsringhouder en klik het
geheel op het deksel.
De afdichtingsring is gebarsten of
versleten.
Vervang de afdichtingsring. Neem
contact op met een erkend
service.
Storing accessoires. Controleer of u het correcte
accessoire gebruikt.
De aandrijfas van de kom lekt.
De afdichtingsring is niet correct
geplaatst.
Plaats de afdichtingsring goed.
De afdichtingsring is versleten. Neem contact op met een Erkend
Center.
De vergrendelingsring  is niet
goed vergrendeld.
Vergrendel de ring goed .
De messen draaien niet vrij rond. De stukjes zijn te groot of te
hard.
Maak kleinere stukjes of verminder
de hoeveelheden. Voeg vloeistof
toe.
Motorgeur. Tijdens het eerste gebruik of
wanneer de motor wordt overbelast
door een te grote hoeveelheid
ingrednten of te harde of te grote
stukjes.
Laat de motor afkoelen (ongeveer
30 minuten) en doe een kleinere
hoeveelheid ingrediënten in de
kom.
'STOP' verschijnt op het scherm. Het apparaat heeft trillingen
gedetecteerd en is overgescha-
keld naar de veiligheidsstand.
Controleer of u de aanbevolen
snelheid en het aanbevolen
accessoire gebruikt.
'SECU' verschijnt op het scherm. Overbelaste motor veroorzaakt
door een te grote hoeveelheid
ingrediënten, te harde of te grote
stukken of een te snelle
opeenvolging van bereidingen
zonder voldoende afkoelingstijd
Laat de motor afkoelen (ongeveer
30 minuten) en doe een kleinere
hoeveelheid ingrediënten in de
kom.
SK
33
32
NL
')&#$% &&)0"% &'#&** %%
'SECU' verschijnt op het scherm +
rode controlelampje knippert.
Oververhitting van de
temperatuursensoren.
Neem contact op met een erkend
center.
'Err1' verschijnt op het scherm.
+ rode controlelampje knippert.
De verwarmingsweerstand werkt
niet.
Zorg ervoor dat de voedingspin-
nen onder de kom niet verzadigd
zijn. Maak ze schoon als ze ver-
zadigd zijn en probeer opnieuw.
Als het probleem zich blijft
voordoen, neemt u contact op
met een erkend center.
'Err2' verschijnt op het scherm. Elektronische storing. Neem contact op met een erkend
center.
'Err3' verschijnt op het scherm. Storing snelheid. Neem contact op met een erkend
center.
'Err4' verschijnt op het scherm. Storing communicatie met de
elektronische kaart - chopper.
Neem contact op met een erkend
center.
'Ntc1' verschijnt op het scherm.
+ rode controlelampje knippert.
De temperatuursensor 1 werkt
niet meer.
Neem contact op met een erkend
center.
'Ntc2' verschijnt op het scherm.
+ rode controlelampje knippert.
De temperatuursensor 2 werkt
niet meer.
Neem contact op met een erkend
center.
,G1@@1B11DG5B;D>?7CD554C>95D
Ga naar een erkend service center (zie bijgevoegde lijst).
• Vernietiging van de verpakking en het apparaat
De verpakking bestaat voor 100% uit milieuvriendelijk materiaal dat in
overeenstemming met de bepalingen omtrent afvalverwerking kan worden vernietigd.
Breng het apparaat naar een gemeentelijk afvalinzamelpunt.
• Elektrisch of elektronisch product aan het eind van de levenscyclus:
5C385B=85D=9<95E
Uw apparaat bevat verschillende materialen die geschikt zijn voor terugwinning of
recycling.
Breng het apparaat naar een afvalinzamelpunt voor een correcte verwerking.
-#-).)" %
5J@5u>?C•?CU2
• Pred prvým použitím zariadenia si
pozorne prečítajte pokyny na
používanie a odložte si ich na
bezpečné miesto. Výrobca nebude
akceptovať žiadnu zodpovednosť v
prípade, že sa prístroj bude
používať na iné účely, ktoré nie v
súlade s týmto vodom.
Zariadenie vždy odpojte od zdroja
napätia, ak ho chcete nechať bez
dozoru alebo pred zmontovaním,
rozobratím alebo čistením.
Nedovoľte deťom, aby používali
spotrebič bez dohľadu.
Spotrebič nesmú používať malé
deti. Spotrebič a jeho kábel
umiestnite mimo dosahu detí.
Tento spotrebič by nemali používať
deti a osoby so zníženými
fyzickými, zmyslovými alebo
duševnými schopnosťami alebo s
nedostatkom skúseností a znalostí,
pokiaľ nie pod dohľadom
zodpovednej osoby, alebo od
takejto osoby nedostali pokyny
týkajúce sa správneho používania
spotreba. Je potrebdohliadať na
deti, aby sa zabezpečilo, že sa s
týmto prístrojom nebudú hrať.
Prístroj uchovávajte mimo dosahu
detí.
Počas používania
vášho prístroja môžu
niektoré časti dosiahnuť
vysoké teploty (stena
alebo misa z nehrdzavejúcej ocele,
odpojiteľný spoločný hriadeľ,
priehľadné časti na veku a kryte,
kovové časti pod misou, kôš). Hrozí
nebezpečenstvo popálenia. S
prístrojom manipulujte pomocou
chladných plastových častí (rukote,
blok motora). Červený ukazovateľ
zohrievania ukazuje, že hrozí riziko
popálenia.
Počas činnosti rúry môže prístupný
povrch rúry dosiahnuť vysokú
teplotu.
Tento prístroj nie je určený na
používanie s vonkaím časovom
alebo samostatným diaľkovým
ovládaním.
Prístroj nepoužívajte, ak správne
nefunguje, ak je poškodený alebo
ak je poškodený napájací kábel
alebo zástrčka. S cieľom zabrániť
akémukvek nebezpenstvu musí
tento kábel vymeniť servisné
stredisko (pozri zoznam v servisnej
knižke).
Zariadenie sa nemá ponárať do
vody. Blok motora (a) nikdy
nedávajte pod tečúcu vodu.
Tento prístroj je určený iba pre
vnútorné poitie v domácnosti a v
nadmorskej výške do 2 000 m.
Výrobca nenesie žiadnu
zodpovednosť a vyhradzuje si právo
zrušiť záruku v prípade
komerčného alebo nevhodného
použitia alebo nedodržania
pokynov.
0't%&*+%L'&"/%/
Tento prístroj je určený iba na
domáce používanie.
Prístroj nie je urče na používanie
v nasleducich prípadoch, na kto
sa takti nevzťahuje záruka:
- v kuchynských kútoch
vyhradených pre personál v
obchodoch, kanceláriách a v
iných profesionálnych
priestoroch,
- na farch,
- ak ho používajú klienti hotelov,
motelov a iných priestorov, ktoré
majú ubytovacharakter,
- v priestoroch typu „hosťovské
izby“.
-Om @BSCDB?:
@B?4E;E:5@1BE;D?BO
=Uo5 J1@BSu9>9
@?@O<5>95 * F5;?= 1
;BID?= =1>9@E<E:D5
?@1DB>5 F @BS@145 @?DB52I C
BE;1F931=94Bo91;?=8B>311Dz*
;BID?==1>9@E<E:D5F:58?CDB54>5:
u1CD9
[ %9;4I >5@?EoSF1:D5 @BSCDB?: 1;
D5C>5>95 >95 :5 E=95CD>5>Q F
4Bo91;ED5C>5>911<52?F@BS@145
o5 4Bo91; D5C>5>91 >95 :5
>1=?>D?F1>q>1F5;E!54U<5o9DQ
@?EoSF1 @BSCDB?: C ;BID?=
E=95CD>5>q=F?DF?B5F5;1@?;91Š
D?>95:5FqC<?F>5EF545>Q9>1;F
B535@D5
-)&-% %5J12X41:D5 >1 B9J9;?
@?B1>5>91 F @BS@145 >5C@BOF>58?
@?EoSF1>91@BSCDB?:1
'B9 =1>9@E<O399 C u5@5Š1=9 >?o1
,<DB12<145  1 =95C9139=9 1
4BF9139=9>?o=9@B9938u9CD5>S1
FI@BOJ4Ž?F1>S =9CI 4OF1:D5 @?J?B
@B5D?o5 CX F5Š=9 ?CDBQ OF1:D5
@?J?B1;C14?;E38I>C;Q8?B?2?D1
1<52?=9HQB1>1<95F18?BX31D5;ED9>1
@B5D?o5 J 4UF?4E @BE4;Q8? F1BE
=Uo5FICDB5;>XJ?C@?DB529u1
'?@?Eo9DS41:D5C5;13S>Uo,<DB12<145
4?=9CI
-)&-% OF1:D5 @?J?B 12I
>54?m<?;FI<91D9E>1;?>5;D?B5@B9
u9CD5>S@<>5>S1<52?>1<95F1>S
-)&-% -Om@BSCDB?:@B?4E;E:5
@1BE;D?BO=Uo5J1@BSu9>9@?@O<5>95
-)&-% '?FB38 FI;EB?F135:
:54>?D;I =Uo5 @? @?EoSF1>S
J14Bo91F1J?CD1D;?FQD5@<?
OF1:D5 @?J?B 12I CD5 C1 @B9
J18B95F1>S 1 1o 4? X@<>Q8?
?38<145>914?Dq;1<9921BE;?FPDS
CF?:8? @B?4E;DE EJOF5BI 
BE;?FP•F5;11BE;?FP•;BIDE

[ '?CDE@E:D5 @?4Š1 @?;I>?F @B5
>1CD1F5>95 @B5FO4J;?F5: 4?2I 1
>1CD1F5>95 Bq38<?CD9 :54>?D<9Fq38
;?=@?>5>D?F @BSC<Em5>CDF1 1
;1o4Q8?@B?7B1=E
[ '?CDE@E:D5 @?4Š1 @?;I>?F @B5
=?>DOo1E@5F>5>95@BSC<Em5>CDF1
;@BSCDB?:E
[ '?CDE@E:D5 @?1 @?;I>?F >1
u9CD5>951X4Bo2EFOm8?@BSCDB?:1
[ -o4I 4?4Bo91F1:D5 @?;I>I >1
u9CD5>95FOm8?@BSCDB?:1
'BSCDB?:?4@?:D5J5<5;DB93;5:C95D5
'BSCDB?: >5E=qF1:D5 @?;q= :5
8?BX39
,=qF1:D5F<8;?E81>4B?E1<52?
m@?>79?E
'BSCDB?: >9;4I >5@?>OB1:D5 4?
F?4I1>98?>54OF1:D5@?4D5uX3E
F?4E
SK
35
34
SK
#%'),)g'*"+)/
• Prístroj a jeho kábel uskladnite
mimo dosahu demladších ako 8
rokov.
Deti sa s prístrojom nesmú hrať.
Tento prístroj žu použív
osoby s fyzickým, zmyslovým
alebo duševným postihnutím, aj
osoby, kto nemajú dostatočné
skúsenosti a vedomosti, pod
podmienkou, že je zabezpečený
dohľad nad nimi a pokiaľ boli
pouče o bezpečnom poíva
prístroja a uvedomujú si
nebezpečenstvá.
Tento prístroj môžu používať deti
staie ako 8 rokov, ak je
zabezpečený dohľad nad nimi a
pokiaľ boli poučené o bezpečnom
používaní prístroja a v plnej miere
si uvedomujú súvisiace
nebezpečenstvá. Prístroj nemajú
čistiť ani udiav deti, pokiaľ
nemajú 8 rokov a nie je
zabezpečený dohľad dospelej
osoby.
'B9@?:5>95;4?4OF;55<5;DB9>I
• Prístroj by mal byť zapoje do
uzemnenej elektrickej zásuvky.
Prístroj je určený len na napájanie
striedavým prúdom. Skontrolujte,
či napätie uvedené na popisnom
štítku prístroja zodpovedá napätiu
vašej elektrickej siete.
Pri akejkoľvek chybe napájania
záruka stráca platnosť.
Pri odpájaní spotrebiča od
elektrickej siete neťahajte za
napájací kábel.
Prístroj, bel ani strčku
neponárajte do žiadnej tekutiny.
Sieťo kábel nikdy nesmie byť v
blízkosti alebo v kontakte s
horúcimi časťami vášho zariadenia,
pri zdroji tepla alebo na ostrej
hrane.
%5C@BOF>5@?Eo9D95
%54?Dq;1:D5 C1 F5;1 @?;q= C1
@BSCDB?:X@<>5>5J1CD1FSD<1u94<?
*D?@ '?u;1:D5 @?;q= C1
=95m1>Q @?DB1F9>I >5@B5CD1>X
?DOu1•
• Vždy nalievajte pevné psady do
misy ako prvé pred pridaním
tekutých prísad @?JB9D5 C9 ?2B
 tak, aby ste neprekročili limit
MAX. 2,5 l označený vnútri misy
@?JB9D5C9?2B. V prípade, že
misa je príliš plný, môže vriaca
voda vyšplechnúť.
Upozorňujeme, že v rámci
programu varenia v pare je
potrebné udržiavať hladinu vody
0,7 l @?JB9D5C9?2B.
Nikdy nevajte prsty alebo iné
predmety do misy, kje prístroj
spustený.
Nepoužívajte misu ako nádobu (na
skladovanie, zmrazenie,
sterilizáciu).
Prístroj klte na pevnú,
žiaruvzdornú pracovnú plochu.
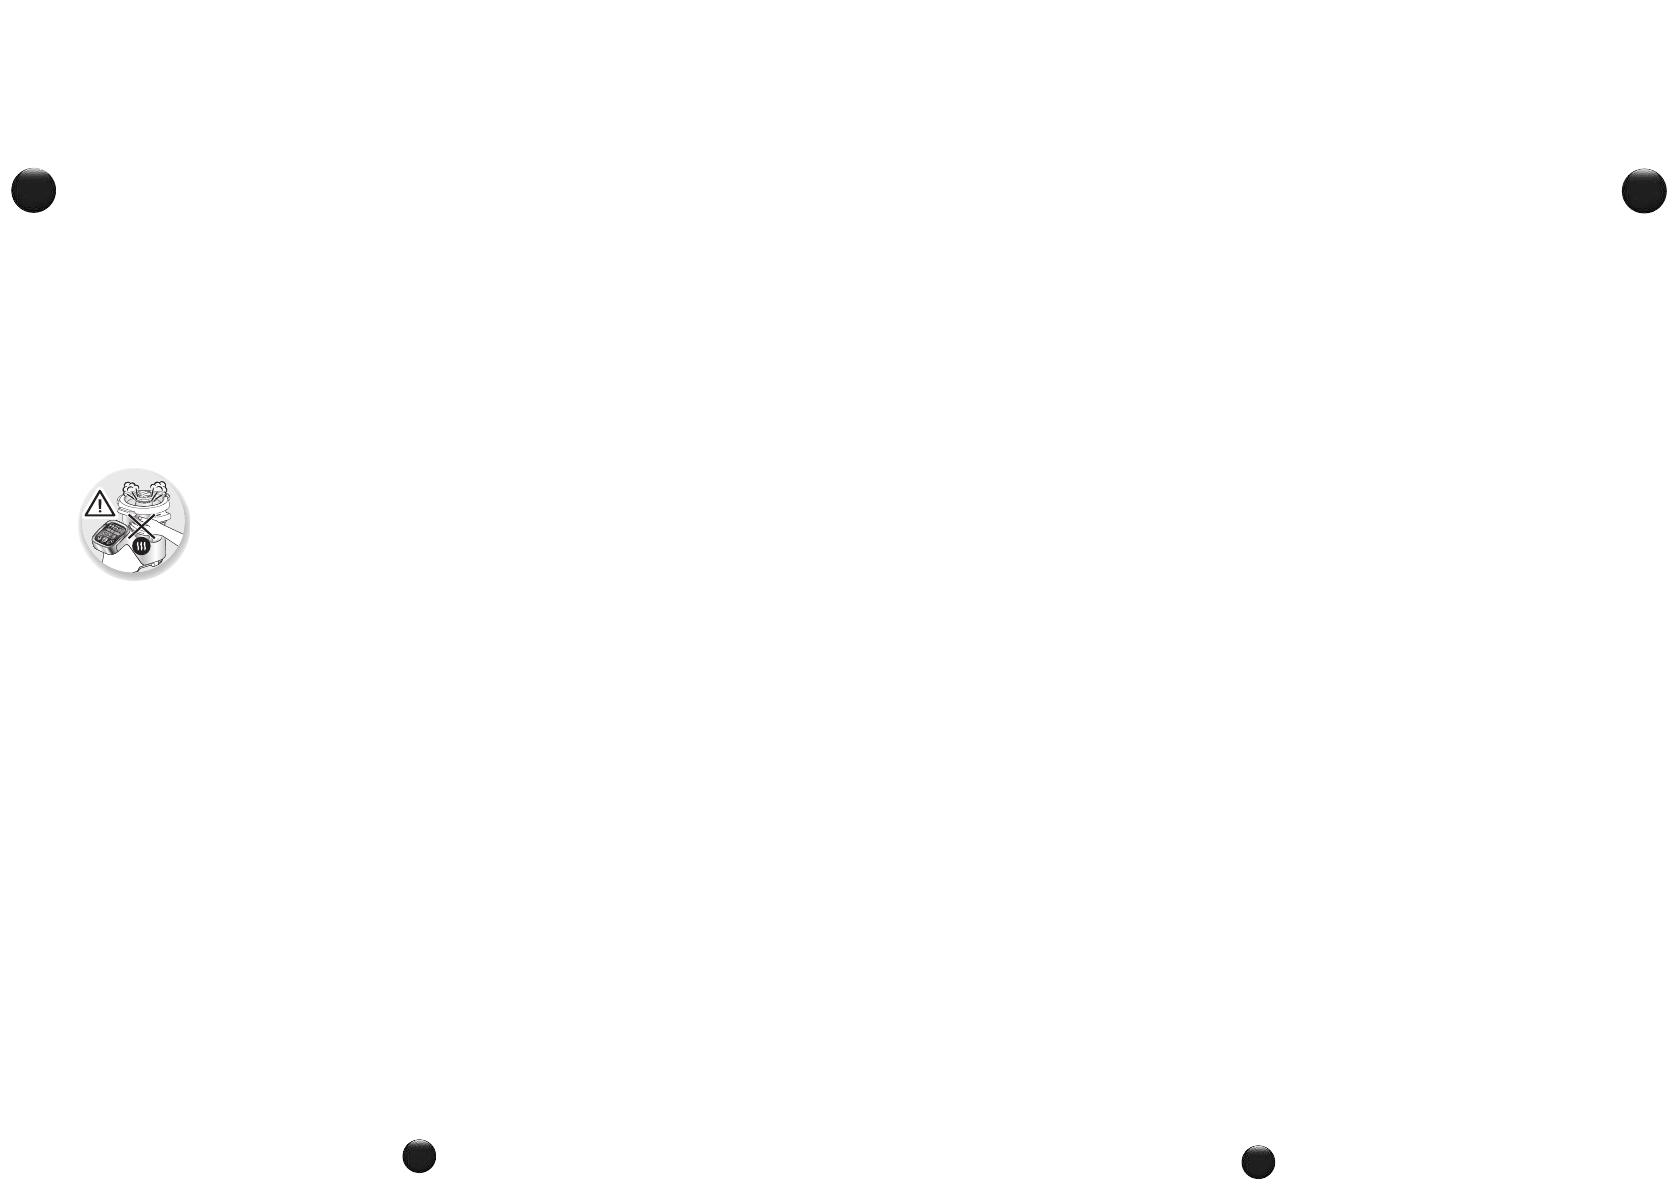
Neklaďte prístroj do blízkosti múru
alebo skrine: para že spôsobiť
poškodenie prvkov.
Neumiestňujte prístroj do blízkosti
zdroja tepla v prevádzke (var
doska, domáce spotrebiče atď.).
Nezakrývajte veko utierkou ani
  • Page 1 1
  • Page 2 2
  • Page 3 3
  • Page 4 4
  • Page 5 5
  • Page 6 6
  • Page 7 7
  • Page 8 8
  • Page 9 9
  • Page 10 10
  • Page 11 11
  • Page 12 12
  • Page 13 13
  • Page 14 14
  • Page 15 15
  • Page 16 16
  • Page 17 17
  • Page 18 18
  • Page 19 19
  • Page 20 20
  • Page 21 21
  • Page 22 22
  • Page 23 23
  • Page 24 24
  • Page 25 25
  • Page 26 26
  • Page 27 27
  • Page 28 28
  • Page 29 29
  • Page 30 30
  • Page 31 31
  • Page 32 32
  • Page 33 33
  • Page 34 34
  • Page 35 35
  • Page 36 36
  • Page 37 37
  • Page 38 38
  • Page 39 39
  • Page 40 40
  • Page 41 41
  • Page 42 42
  • Page 43 43
  • Page 44 44
  • Page 45 45
  • Page 46 46
  • Page 47 47
  • Page 48 48
  • Page 49 49
  • Page 50 50
  • Page 51 51
  • Page 52 52
  • Page 53 53
  • Page 54 54
  • Page 55 55
  • Page 56 56
  • Page 57 57
  • Page 58 58
  • Page 59 59
  • Page 60 60
  • Page 61 61
  • Page 62 62
  • Page 63 63
  • Page 64 64
  • Page 65 65
  • Page 66 66
  • Page 67 67
  • Page 68 68
  • Page 69 69
  • Page 70 70
  • Page 71 71
  • Page 72 72
  • Page 73 73
  • Page 74 74
  • Page 75 75
  • Page 76 76
  • Page 77 77
  • Page 78 78

Tefal FE800A38 Používateľská príručka

Typ
Používateľská príručka
Táto príručka je tiež vhodná pre