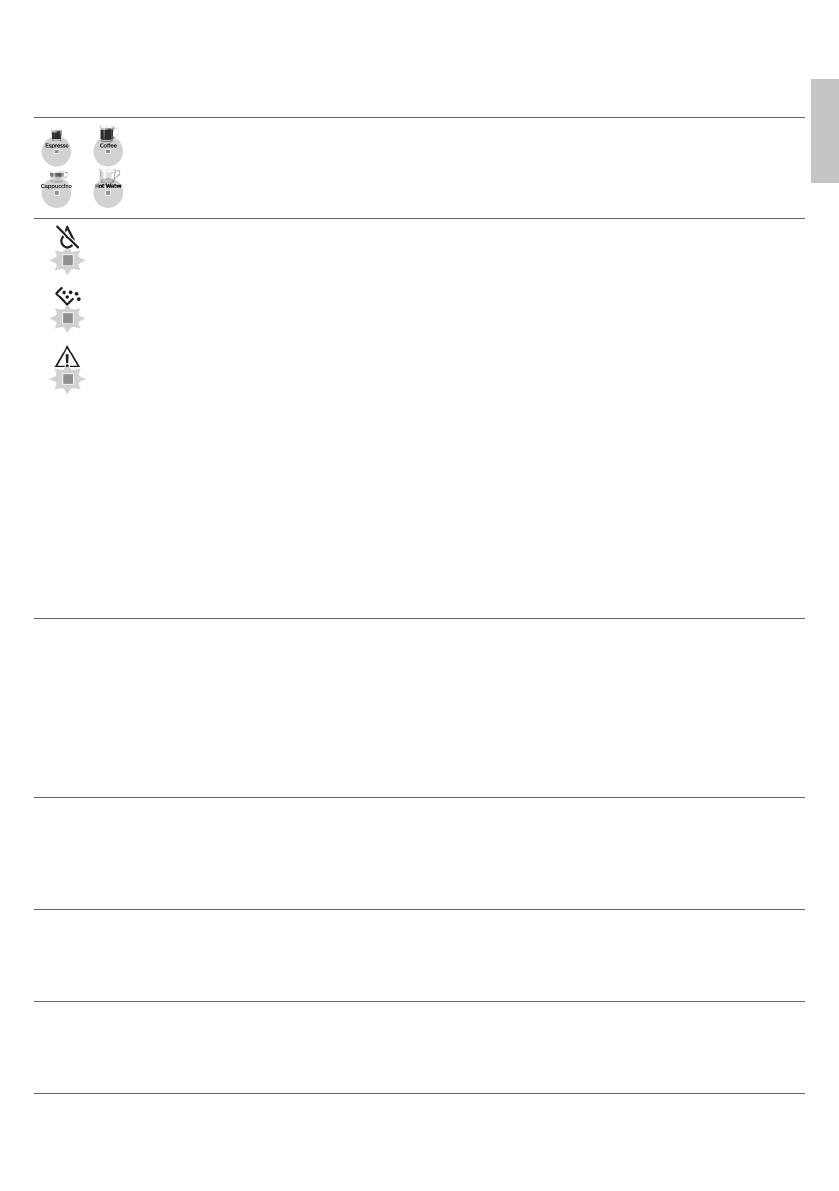
Philips EP3343/50 Používateľská príručka

Kategória
Kávovary
Typ
Používateľská príručka
Fully automatic
espresso machine
2300 series
3300 series
EN USER MANUAL
DA BRUGERVEJLEDNING
DE BENUTZERHANDBUCH
ES MANUAL DEL USUARIO
FR MODE D’EMPLOI
IT MANUALE UTENTE
NL GEBRUIKSAANWIJZING
NO BRUKERHÅNDBOK
PT MANUAL DO UTILIZADOR
FIYTTÖOPAS
SV ANVÄNDARHANDBOK
EL ΕΓΧΕΙΡΙΔΙΟΧΡΉΣΉΣ
TR KULLANIM KILAVUZU
BG РЪКОВОДСТВОЗА
ПОТРЕБИТЕЛЯ
CS UŽIVATELSKÁPŘÍRUČKA
ET KASUTUSJUHEND
HE מדריךשימוש
HR KORISNIČKIPRIRUČNIK
HU FELHASZNÁLÓIKÉZIKÖNYV
LV LIETOT JA ROKASGR MATA
LT NAUDOTOJO VADOVAS
MKКОРИСНИЧКОУПАТСТВО
PL INSTRUKCJAOBSŁUGI
RO MANUAL DE UTILIZARE
SL UPORABNIŠKIPRIROČNIK
SK VODNAPOUŽITIE
SR УПУТСТВОЗАКОРИШЋЕЊЕ
SQ MANUALI I PËRDORIMIT
UK ПОСІБНИККОРИСТУВАЧА
3300 Series3300 Series2300 Series
www.philips.com/coee-care
My Coffee Choice
A2A1 A3 A4
A14
A6 A8A7
A9
A12
A13
A10
A11
A5
A17
A15
A
B1 B2 B3 B4 B5
B10B11
B7B6 B8 B9
B
A19A18
A16
A20 A21 A22 A24A23
Classic Milk Frother
2300 series
3300 series
EP3321
EP3323
EP3324
EP3326
EP3329
EP2330
EP2331
EP2333
EP2334
EP2336
EP2339
EP3341
EP3343
EP3347
EP3349
LatteGo
A19 A20 A21 A22 A23 A24
A17A18 A16 A14 A24 A23 A21 A15 A9 A4 A12
C
D
English
4English
Contents
Machine overview (Fig. A) __________________________________________________________________ 4
Control panel (Fig. B) ______________________________________________________________________ 4
Introduction _____________________________________________________________________________ 5
Before first use ___________________________________________________________________________ 5
Brewing drinks ___________________________________________________________________________ 7
Adjusting machine settings_________________________________________________________________ 9
Removing and inserting the brew group _____________________________________________________ 11
Cleaning and maintenance_________________________________________________________________ 12
AquaClean water filter ____________________________________________________________________ 14
Setting the water hardness ________________________________________________________________ 16
Descaling procedure (30 min.) ______________________________________________________________ 16
Ordering accessories ______________________________________________________________________ 17
Troubleshooting __________________________________________________________________________ 17
Technical specifications ____________________________________________________________________ 23
Machine overview (Fig. A)
A1 Control panel A10 Service door
A2 Cup holder A11 Data label with type number
A3 Pre-ground coffee compartment A12 Water tank
A4 Lid of bean hopper A13 Hot water spout
A5 Adjustable coffee spout A14 Coffee grounds container
A6 Mains plug A15 Front panel of coffee grounds container
A7 Grind setting knob A16 Drip tray cover
A8 Coffee bean hopper A17 Drip tray
A9 Brew group A18 'Drip tray full' indicator
Accessories
A19 Grease tube A22 Water hardness test strip
A20 AquaClean water filter A23 Classic milk frother (specific types only)
A21 Measuring scoop A24 LatteGo (milk container) (specific types
only)
Control panel (Fig. B)
Refer to figure B for an overview of all buttons and icons. Below you find the description.
Some of the buttons/icons are for specific types only.
5
English
English
B1 On/off button B7 Warning icons
B2 Drink icons* B8 Start light
B3 Aroma strength/pre-ground coffee icon B9 Start/stop button
B4 Drink quantity icon B10 Calc / Clean icon
B5 Milk quantity icon (specific types only) B11 AquaClean icon
B6 Coffee temperature icon (specific types only)
* Drink icons (specific types only): espresso, espresso lungo, coffee, iced coffee, cappuccino, latte macchiato,
hot water, steam
Introduction
Congratulations on your purchase of a Philips fully automatic coffee machine! To fully benefit from the
support that we offer, please register your product at www.philips.com/welcome.
Read the separate safety booklet carefully before you use the machine for the first time and save it for
future reference.
To help you get started and to get the best out of your machine, we offer support in multiple ways. In the
box you can find:
1The quick start guide with picture-based usage instructions and information on cleaning and
maintenance.
2The separate safety booklet with instructions on how to use the machine in a safe way.
3For online support (this extended user manual, frequently asked questions, videos, etc.), scan the QR
code on the cover of this booklet to download the Coffee+ app, or visit www.philips.com/coffee-care.
There are multiple versions of this espresso machine, which all have different features. Each version has
its own type number. You can find the type number on the data label on the inside of the service door (see
fig A11).
This machine has been tested with coffee. Although it has been carefully cleaned, there may be some
coffee residues left. We guarantee, however, that the machine is absolutely new.
The machine automatically adjusts the amount of ground coffee that is used to make the best-tasting
coffee. You should brew 5 coffees initially to allow the machine to complete its self-adjustment.
Make sure you rinse the LatteGo (milk container) or the classic milk frother before first use.
Before first use
1. Setting up the machine
After you have switched on the machine, some water may be dispensed from the hot water spout or coffee
spout. This is normal.
6English
2. Activating the AquaClean water filter (5 min.)
For more information see chapter 'AquaClean water filter'.
3. Setting the water hardness
See chapter 'Setting the water hardness' for step-by-step instructions. The default water hardness setting
is 4: hard water.
4. Assembling LatteGo (specific types only)
5. Assembling the classic milk frother (specific types only)
7
English
English
Brewing drinks
General steps
1Fill the water tank with tap water and fill the bean hopper with beans.
2Place the lid (A4) on the coffee bean hopper (A8).
3Press the on/off button to switch on the machine.
-The machine starts heating up and performs the automatic rinsing cycle. During heating up, the lights
in the drinks icons light up and go out slowly one by one.
-When all lights in the drink icons light up continuously, the machine is ready for use.
4Place a cup under the coffee dispensing spout. Slide the coffee dispensing spout up or down to adjust its
height to the size of the cup or glass you are using (Fig. 1).
Personalizing drinks
This machine allows you to adjust the settings of a drink to your own preference. After selecting a drink you
can:
1Adjust the aroma strength by tapping the aroma strength icon (Fig. 2). There are 3 strengths, the lowest
is the mildest and the highest is the strongest.
2Adjust the drink quantity by tapping the drink quantity (Fig. 3) and/or the milk quantity icon (specific
types only). There are 3 quantities: low, medium and high.
You can also adjust the coffee temperature to your own preference (see 'Adjusting the coffee
temperature').
Brewing coffee with beans
1To brew a coffee, tap the drink icon of your choice.
-The aroma strength and quantity lights go on and show the previously selected setting.
-You can now adjust the drink to your preferred taste (see 'Personalizing drinks').
2Press the start/stop button.
-The light in the drink icon flashes while the drink is being dispensed.
3To stop dispensing coffee before the machine is finished, press the start/stop button again.
To brew 2 coffees at the same time, tap the drink icon twice. The 2x light lights up.
Brewing milk-based drinks with LatteGo (milk container)
LatteGo consists of a milk container, a frame and a storage lid. To avoid leakage, make sure the frame
and the milk container are properly assembled before you fill the milk container.
1To assemble LatteGo, first insert the top of the milk container under the hook at the top of the frame
(Fig. 4). Then press the bottom part of the container. You hear a click when it locks into place (Fig. 5).
Note: Make sure that the milk container and the frame are clean before you connect them.
2Slightly tilt LatteGo and put it on the hot water spout (Fig. 6). Then press it home until it locks into place
(Fig. 7).
3Fill LatteGo with milk up to the level indicated on the milk container for the drink you are brewing (Fig.
8). Do not fill the milk container beyond the maximum indication.
8English
If you have personalized the milk quantity, you may need to fill the milk container with more or less
milk than indicated for this drink on LatteGo.
Always use milk coming directly from the fridge for optimal results.
4Place a cup on the drip tray.
5Tap the milk-based drink icon of your choice.
-You can now adjust the drink to your own preference (see 'Personalizing drinks').
6Press the start/stop button.
-The light in the drink icon flashes while the drink is being dispensed. When you brew a cappuccino or
latte macchiato, the machine first dispenses milk and then coffee.
-To stop dispensing milk before the machine has dispensed the preset amount, press the start/stop
button.
7To stop dispensing the complete drink (milk and coffee) before the machine is finished, press and hold
the start/stop button.
Frothing milk with classic milk frother
Always use milk coming directly from the fridge for the best foam quality.
1Tilt the black silicone handle on the machine to the left and slide the milk frother onto it (Fig. 9).
2Fill a milk jug with with approx. 100 ml milk for cappuccino and approx. 150 ml milk for latte macchiato.
3Insert the milk frother approx. 1 cm into the milk.
4Tap the steam icon (Fig. 10).
-The light in the steam icon goes on and the start light starts pulsing.
5Turn the knob on the classic milk frother to the milk frothing icon (Fig. 11) if you want to froth milk. Turn
the knob on the classic milk frother to the flat milk icon (Fig. 12) if you want heat up milk.
6Make sure that the icon on the knob of the classic milk frother is aligned with the black arrow.
7Press the start/stop button to froth the milk (Fig. 13).
-The machine starts heating up, steam is forced into the milk and the milk is frothed.
8When the milk foam in the milk jug has reached the required volume, press the start/stop button
again to stop frothing milk.
Never froth milk longer than 90 seconds. The frothing automatically stops after 90 seconds.
You do not have to move the milk jug during milk frothing to get the best milk froth quality.
Brewing coffee with pre-ground coffee
You can choose to use pre-ground coffee instead of beans, for example if you prefer a different coffee
variety or decaffeinated coffee.
1Press the on/off button to switch on the machine and wait until it is ready for use.
2Open the lid of the pre-ground coffee compartment and pour one leveled measuring scoop of pre-
ground coffee into it (Fig. 14). Then close the lid.
3Place a cup under the coffee dispensing spout.
4Select a single drink.
5Press the aroma strength icon for 3 seconds (Fig. 15).
-The pre-ground coffee light goes on and the start light starts pulsing.
6Press the start/stop button.
7To stop dispensing coffee before the machine is finished, press the start/stop button again.
9
English
English
With pre-ground coffee you can only brew one coffee at a time.
Pre-ground coffee is not a setting that is saved as a previous selected strength setting. Each time you
want to use pre-ground coffee, you need to press the aroma strength icon for 3 seconds.
When you select pre-ground coffee, you cannot select a different aroma strength.
Brewing iced coffee (specific types only)
The coffee is brewed with warm water. Brew over ice cubes for optimal results.
1Take a glass and fill it two-thirds with ice cubes.
2Place the glass under the coffee dispensing spout.
3Tap the iced coffee icon.
-The aroma strength and quantity lights go on.
-You can now adjust the drink to your preferred taste.
We recommend using aroma strength 3.
4Press the start/stop button.
5To stop dispensing coffee before the machine is finished, press the start/stop button again.
6For a special iced coffee treat, top it up with cold milk.
Dispensing hot water
1If attached, remove LatteGo or the milk frother.
2Tap the hot water icon.
-The drink quantity lights go on and show the previous selected drink setting for hot water.
3Adjust the hot water quantity to your preference by tapping the drink quantity icon (Fig. 3).
4Press the start/stop button.
-The light in the hot water icon flashes and hot water is dispensed from the hot water spout (Fig. 18).
5To stop dispensing hot water before the machine is finished, press the start/stop button again.
Adjusting machine settings
Adjusting the stand-by time
1Press the on/off button to switch off the machine.
2When the machine is switched off: press and hold the Calc / Clean icon (Fig. 19) until the Calc / Clean
light and the Aroma strength lights go on (Fig. 20).
3Tap the Aroma strength icon to select the required stand-by time: 15, 30, 60 or 180 minutes. Respectively
1, 2, 3 or 4 lights of the Aroma strength icon light up.
4When you have finished setting the stand-by time, press the start/stop button. The machine switches off.
5Press the on/off button to switch on the machine again.
Adjusting the highest default setting of your drinks
The machine has 3 default settings for each drink: low, medium, high. You can only adjust the quantity of
the highest setting. The new quantity can be stored as soon as the start light starts to pulse.
10 English
Before you start programming the quantity of a milk drink, assemble LatteGo and pour milk in it.
1To adjust the highest quantity setting, press and hold the icon of the drink you want to adjust for 3
seconds.
-The upper light of the drinks quantity icon and the upper light of the milk quantity icon (specific types
only) starts to pulse and the start/stop button starts to pulse, indicating that you are in
programming mode.
2Press the start/stop button. The machine starts to brew the selected beverage.
-The start light lights up continuously at first. When the machine is ready to store the adjusted volume,
the start/stop light starts to pulse.
3Press the start/stop button again when the cup contains the desired quantity of coffee or milk.
-In case of cappuccino or latte macchiato, first the milk will be dispensed. Press the start/stop button
when the cup contains the desired milk quantity. The machine automatically starts dispensing the
coffee. Press the start/stop button again when the cup contains the desired quantity.
After you have programmed the new highest default quantity for a drink, the machine will dispense this
new amount each time you select the highest quantity of this drink.
You can only adjust the highest default quantity level.
If you want to go back to the default quantity settings, see ' Restoring factory settings'.
Adjusting the coffee temperature
Machines without temperature icon
1Press the on/off button to switch off the machine.
2When the machine is switched off: press and hold the coffee quantity icon until the lights in this icon go
on (Fig. 21).
3Tap the quantity icon to select the required temperature: normal, high or max.
-Respectively 1, 2 or 3 lights are on.
4When you have finished setting the coffee temperature, press the start/stop button.
5Press the on/off button to switch on the machine again.
If you do not switch off the machine yourself, it will switch off automatically after some time.
Machines with temperature icon (EP3300 only)
1Select the drink of your choice.
2Tap the coffee temperature icon repeatedly to select the desired temperature.
Restoring factory settings
The machine offers you the possibility to restore the drinks default settings at any moment.
You can only restore the default settings when the machine is switched off.
1Press the on/off button to switch the machine off.
2Press and hold the espresso icon for 3 seconds.
-The middle lights in the drink setting icons light up. The start/stop light starts to pulse, indicating that the
settings are ready to be restored.
3Press the start/stop button to confirm you want to restore the settings.
4Press the on/off button to switch on the machine again.
11
English
English
Adjusting grinder settings
You can change the coffee strength with the grind setting knob inside the bean container. The lower the
grind setting, the finer the coffee beans are ground and the stronger the coffee. There are 12 different grind
settings you can choose from.
The machine has been set up to get the best taste out of your coffee beans. Therefore we advise you not to
adjust the grind setting until you have brewed 100-150 cups (approx. 1 month of use).
You can only adjust the grind settings when the machine is grinding coffee beans. You need to brew 2 to
3 drinks before you can taste the full difference.
Do not turn the grind setting knob more than one notch at a time to prevent damage to the grinder.
1Place a cup under the coffee dispensing spout.
2Open the lid of the coffee bean hopper.
3Tap the espresso icon and then press the start/stop button.
4When the grinder starts grinding, press down the grind setting knob and turn it to the left or right. (Fig.
22)
Deactivate the beeps of the control panel
1Press the on/off button to switch off the machine.
2When the machine is switched off, tap and hold the coffee icon until the light in the icon goes on. The
start light starts flashing.
3Tap the coffee icon again to deactivate the beeps of the control panel. The light in the coffee icon goes
out.
4Press the start/stop button to confirm your choice.
5Press the on/off button to switch on the machine again. The beeps of the control panel have now been
deactivated.
Note: If the light in the coffee icon does not go on after tapping and holding the icon, this means that the
beeps of the control panel already have been deactivated. To activate them again, tap the icon again and
confirm by pressing the start/stop button.
The beeps in the on/off button and in the start/stop button cannot be deactivated.
Removing and inserting the brew group
Go to www.philips.com/coffee-care for detailed video instructions on how to remove, insert and clean the
brew group.
Removing the brew group from the machine
1Switch off the machine.
2Remove the water tank and open the service door (Fig. 23).
3Press the PUSH handle (Fig. 24) and pull at the grip of the brew group to remove it from the machine
(Fig. 25).
Reinserting the brew group
Before you slide the brew group back into the machine, make sure it is in the correct position.
12 English
1Check if the brew group is in the correct position. The arrow on the yellow cylinder on the side of the
brew group has to be aligned with the black arrow and N (Fig. 26).
-If they are not aligned, push down the lever until it is in contact with the base of the brew group (Fig.
27).
2Slide the brew group back into the machine along the guiding rails on the sides (Fig. 28) until it locks into
position with a click (Fig. 29). Do not press the PUSH button.
3Close the service door and place back the water tank.
Cleaning and maintenance
Regular cleaning and maintenance keeps your machine in top condition and ensures good-tasting coffee
for a long time with a steady coffee flow.
Consult the table below for a detailed description on when and how to clean all detachable parts of the
machine. You can find more detailed information and video instructions in the Coffee+ app and on
www.philips.com/coffee-care. See figure D for an overview of which parts can be cleaned in the
dishwasher.
Detachable
parts When to clean How to clean
Brew group Weekly Remove the brew group from the machine (see
'Removing and inserting the brew group'). Rinse it
under the tap (see 'Cleaning the brew group under
the tap').
Monthly Clean the brew group with the Philips coffee oil
remover tablet (see 'Cleaning the brew group with
the coffee oil remover tablets').
Classic milk frother After every use First dispense hot water with the milk frother
attached to the machine for thorough cleaning.
Then remove the milk frother from the machine and
disassemble it. Clean all parts under the tap or in the
dishwasher.
Pre-ground coffee
compartment Check the pre-ground coffee
compartment weekly to see if
it is clogged.
Unplug the machine and remove the brew group.
Open the lid of the pre-ground coffee compartment
and insert the spoon handle into it. Move the
handle up and down until the clogged ground
coffee falls down (Fig. 30). Scan the QR code to
download the Coffee+ app for detailed video
instructions, or go to www.philips.com/coffee-
care
Coffee grounds
container Empty the coffee grounds
container when prompted by
the machine. Clean it weekly.
Remove the coffee grounds container while the
machine is switched on. Rinse it under the tap with
some washing-up liquid or clean it in the
dishwasher. The front panel of the coffee grounds
container is not dishwasher-safe.
Drip tray Empty the drip tray daily or as
soon as the red 'drip tray full'
indicator pops up through the
drip tray (Fig. 31). Clean the
drip tray weekly.
Remove the drip tray (Fig. 32) and rinse it under the
tap with some washing-up liquid. You can also clean
the drip tray in the dishwasher. The front panel of
the coffee grounds container (fig. A15) is not
dishwasher-safe.
13
English
English
Detachable
parts When to clean How to clean
LatteGo After every use Rinse LatteGo under the tap or clean it in the
dishwasher.
Lubrication of the
brew group Every 2 months Consult the lubrication table and lubricate the brew
group with the Philips grease (see 'Lubricating the
brew group').
Water tank Weekly Rinse the water tank under the tap
Cleaning the brew group
Regular cleaning of the brew group prevents coffee residues from clogging up the internal circuits. Scan the
QR code on the cover of this booklet for support videos on how to remove, insert and clean the brew group,
or visit www.philips.com/coffee-care
Cleaning the brew group under the tap
1Remove the brew group (see 'Removing and inserting the brew group').
2Rinse the brew group thoroughly with water. Carefully clean the upper filter (Fig. 33) of the brew group.
3Let the brew group air-dry before you place it back. Do not dry the brew group with a cloth to prevent
fibers from collecting inside the brew group.
Cleaning the brew group with the coffee oil remover tablets
Only use Philips coffee oil remover tablets.
1Put a cup under the coffee spout. Fill the water tank with fresh water.
2Put a coffee oil remover tablet in the pre-ground coffee compartment.
3Tap the coffee icon and then press the aroma strength icon for 3 seconds to select the pre-ground coffee
function (Fig. 2).
4Do not add pre-ground coffee. Press the the start/stop button to start the brewing cycle. When half a
cup of water has been brewed, unplug the machine.
5Let the coffee oil remover solution act for at least 15 minutes.
6Insert the mains plug back into a wall socket and switch on the machine to complete the brewing cycle.
Empty the cup.
7Remove the water tank and open the service door. Remove the brew group (see 'Removing the brew
group from the machine') and rinse it thoroughly under the tap.
8Reinsert the brew group and water tank and place a cup under the coffee spout.
9Tap the coffee icon and then press the aroma strength icon for 3 seconds to select the pre-ground coffee
function (Fig. 2). Do not add pre-ground coffee. Press the start/stop button to start the brewing cycle.
Repeat this twice. Empty the cup.
Lubricating the brew group
Lubricate the brew group every 2 months, to ensure that the moving parts continue to move smoothly.
1Apply a thin layer of grease on the piston (grey part) of the brew group (Fig. 34).
2Apply a thin layer of grease around the shaft (grey part) in the bottom of the brew group (Fig. 35).
3Apply a thin layer of grease to the rails on both sides (Fig. 36).
14 English
Cleaning LatteGo (milk container)
Cleaning LatteGo after every use
1Remove LatteGo from the machine (Fig. 37).
2Pour out any remaining milk.
3Press the release button and remove the milk container from the frame of LatteGo (Fig. 38).
4Clean all parts in the dishwasher or under the tap with lukewarm water and some washing-up liquid.
Cleaning the classic milk frother
Cleaning the classic milk frother after every use
Clean the milk frother each time you use it for hygiene reasons and to avoid the build-up of milk residues.
1Place a cup under the milk frother.
2Tap the steam icon and then press the start/stop button to start dispensing steam and to remove any
milk that may be left inside the milk frother.
3To stop dispensing steam after a few seconds, press the start/stop button again.
4Clean the milk frother with a damp cloth.
Daily cleaning of the classic milk frother
1Let the milk frother cool down completely.
2Tilt the milk frother to the left and remove the metal part and the silicone part (Fig. 39).
3Disassemble the three parts (Fig. 40) and rinse them with fresh water or clean them in the dishwasher.
4Let the three milk frother parts air dry, reassemble the parts and reattach the milk frother to the machine.
AquaClean water filter
Your machine is AquaClean enabled. You can place the AquaClean water filter in the water tank to preserve
the taste of your coffee. It also diminishes the need for descaling by reducing limescale build-up in your
machine. You can purchase an AquaClean water filter from your local retailer, from authorized service
centers or online at www.philips.com/parts-and-accessories.
AquaClean icon and light
Your machine is equipped with an AquaClean water filter light (Fig. 41) to indicate the status of the filter.
Use the table below to see what actions are required when the light is on or when it is flashing.
When you use the machine for the first time, the AquaClean light starts flashing
orange. This indicates that you can start using the AquaClean water filter. If you do not
activate an AquaClean water filter, the light will switch off automatically after a while.
Once you have installed the filter and activated it with the AquaClean icon, the
AquaClean light turns blue to confirm that the AquaClean water filter is active.
When the filter is exhausted, the AquaClean light starts flashing orange again to
remind you to replace the filter with a new one.
When the orange AquaClean light is off, you can still activate an AquaClean filter, you
will need to descale the machine first.
15
English
English
Activating the AquaClean water filter (5 min.)
The machine does not automatically detect that a filter has been placed in the water tank. Therefore you
need to activate each new AquaClean water filter that you install with the AquaClean icon.
When the orange AquaClean light is off, you can still activate an AquaClean water filter, but you will need
to descale the machine first.
Your machine has to be completely limescale-free before you start to use the AquaClean water filter.
Before activating the AquaClean water filter, it has to be prepared by soaking it in water as described below.
If you don't do this, air might be drawn into the machine instead of water, which makes a lot of noise and
prevents the machine from being able to brew coffee.
1Make sure that the machine is switched on.
2Shake the filter for about 5 seconds (Fig. 42).
3Immerse the filter upside down in a jug with cold water and shake/press it (Fig. 43).
4The filter is now prepared for use and can be inserted into the water tank.
5Insert the filter vertically onto the filter connection in the water tank. Press it down to the lowest possible
point (Fig. 44).
6Fill the water tank with fresh water and place it back into the machine.
7If attached, remove the LatteGo.
8Place a bowl under the hot water spout/milk frother.
9Press the AquaClean icon for 3 seconds (Fig. 45). The start light starts to pulse.
10 Press the start/stop button to start the activation process.
11 Hot water will be dispensed from the hot water spout/milk frother (3 min.).
12 When the activation process is finished, the blue AquaClean light goes on to confirm that the AquaClean
water filter has been activated correctly.
Replacing the AquaClean water filter (5 min.)
After 95 liters of water have flowed through the filter, the filter will cease to work. The AquaClean light
turns orange and starts to flash to remind you to replace the filter. As long as it flashes, you can replace the
filter without having to descale the machine first. If you do not replace the AquaClean water filter, the
orange light will go out eventually. In that case you can still replace the filter but you first need to descale
the machine.
When the orange AquaClean light flashes:
1Take out the old AquaClean water filter.
2Install a new filter and activate it as described in chapter 'Activating the AquaClean water filter (5 min.)'.
Replace the AquaClean water filter at least every 3 months, even if the machine does not yet indicate that
replacement is required.
Deactivating the AquaClean reminder
If you do not want to use Philips AquaClean water filters anymore, you can always deactivate the AquaClean
reminders (AquaClean light flashing orange):
1Press the on/off button to switch off the machine.
2When the machine is switched off, press and hold the AquaClean icon until the light in this icon goes on.
The start light starts flashing.
3Tap the AquaClean icon again to deactivate the reminders. The light in the AquaClean icon goes off.
4Press the start/stop button to confirm your choice.
16 English
5Press the on/off button to switch on the machine again. The AquaClean reminders are now deactivated.
Note: The activation of a new AquaClean filter will automatically re-activate the AquaClean reminders.
Setting the water hardness
We advise you to adjust the water hardness to the water hardness in your region for optimal
performance and a longer lifetime of the machine. This also prevents you from having to descale the
machine too often. The default water hardness setting is 4: hard water.
Use the water hardness test strip supplied in the box to determine the water hardness
in your region:
1Immerse the water hardness test strip in tap water or hold it under the tap for 1 second (Fig. 46).
2Wait 1 minute. The number of squares on the test strip that turn red indicate the water hardness (Fig.
47).
Set the machine to the correct water hardness:
1Press the on/off button to switch off the machine.
2When the machine is switched off, tap and hold the aroma strength icon until all lights in the icon go on
(Fig. 2).
3Tap the aroma strength icon 1, 2, 3 or 4 times. The number of lights that are on should be the same as
the number of red squares on the test strip (Fig. 48). When there are no red squares on the test strip (so
all squares are green) please select 1 light.
4When you have set the correct water hardness, press the start/stop button.
Since you only set the water hardness once, the aroma strength function is used to select the water
hardness. This does not affect the aroma strength of the drinks you make afterwards.
Descaling procedure (30 min.)
Please use Philips descaler only. Under no circumstances should you use a descaler based on sulfuric acid,
hydrochloric acid, sulfamic or acetic acid (vinegar) as this may damage the water circuit in your machine and
not dissolve the limescale properly. Not using the Philips descaler will void your warranty. Failure to descale
the appliance will also void your warranty. You can buy Philips descaling solution in the online shop at
www.philips.com/coffee-care.
When the Calc / Clean light switches on, you need to descale the machine.
1Make sure that the machine is switched on.
2If attached remove LatteGo or milk frother.
3Remove the drip tray and the coffee grounds container, empty them and put them back into place.
4Remove the water tank and empty it. Then remove the AquaClean water filter.
5Pour the whole bottle of Philips descaler in the water tank and then fill it with water up to the Calc /
Clean indication (Fig. 49). Then place it back into the machine.
6Place a large container (1.5 l) under the coffee dispensing spout and the water spout.
7Press the Calc / Clean icon for 3 sec. and then press the start/stop button.
8The first phase of the descaling procedure starts. The descaling procedure lasts approx. 30 minutes and
consists of a descaling cycle and a rinsing cycle. During the descaling cycle the Calc / Clean light flashes to
show that the descaling phase is in progress.
9Let the machine dispense the descaling solution until the display reminds you that the water tank is
empty.
17
English
English
10 Empty the water tank, rinse it and then refill it with fresh water up to the Calc / Clean indication.
11 Empty the container and place it back under the coffee dispensing spout and the water spout. Press the
start/stop button again.
12 The second phase of the descaling cycle, the rinsing phase, starts and lasts 3 minutes. During this phase
the lights on the control panel go on and off to show that the rinsing phase is in progress.
13 Wait until the machine stops dispensing water. The descaling procedure is finished when the machine
stops dispensing water.
14 The machine will now heat up again. When the lights in the drink icons light up continuously, the
machine is ready for use again.
15 Install and activate a new AquaClean water filter in the water tank (see 'Activating the AquaClean water
filter (5 min.)').
-When the descaling procedure is finished, the AquaClean light flashes for a while to remind you to
install a new AquaClean water filter.
Tip: Using the AquaClean filter reduces the need for descaling!
What to do if the descaling procedure is interrupted
You can exit the descaling procedure by pressing the on/off button on the control panel. If the descaling
procedure is interrupted before it is completely finished, do the following:
1Empty and rinse the water tank thoroughly.
2Fill the water tank with fresh water up to the Calc / Clean level indication and switch the machine back
on. The machine will heat up and perform an automatic rinsing cycle.
3Before brewing any drinks, perform a manual rinsing cycle. To perform a manual rinsing cycle, first
dispense half a water tank of hot water by repeatedly tapping the hot water icon and then brew 2 cups
of pre-ground coffee without adding ground coffee.
If the descaling procedure was not completed, the machine will require another descaling procedure as
soon as possible.
Ordering accessories
To clean and descale the machine, only use the Philips maintenance products. These products can be
purchased from your local retailer, from the authorized service centers or online at
www.philips.com/parts-and-accessories. To find a full list of spare parts online, enter the model number
of your machine. You can find the model number on the inside of the service door.
Maintenance products and type numbers:
-Descaling solution CA6700
-AquaClean water filter CA6903
-Brew group grease HD5061
-Coffee oil remover tablets CA6704
Troubleshooting
This chapter summarizes the most common problems you could encounter with the machine. For support,
download the Coffee+ app through your app store, or by scanning the QR code on the cover of this booklet.
Support videos and a complete list of frequently asked questions are available on
www.philips.com/coffee-care. If you are unable to solve the problem, contact the Consumer Care Center
in your country.
18 English
Warning icons
Warning
icon Solution
The 'water tank empty' light is on
-The water tank is almost empty. Fill the water tank with fresh water to the maximum
level indication.
-The water tank is not in place. Place back the water tank.
The 'empty coffee grounds container' light is on
-The coffee grounds container is full. Remove and empty the coffee grounds container
while the machine is switched on. Wait at least 5 seconds before you reinsert the
container.
The alarm light is on
-The coffee grounds container and/or the drip tray is not in place or not placed
correctly. Place back the coffee grounds container and/or the drip tray and make sure
they are in the correct position.
-The service door is open. Remove the water tank and make sure the service door is
closed.
The alarm light is flashing
-The brew group is not in place or not placed correctly. Remove the brew group and
make sure it is locked into place. See chapter 'Removing and inserting the brew
group' for step-by-step instructions.
-The brew group is blocked. Remove the brew group and rinse it with water under the
tap. Then lubricate the brew group and place it back into the machine. See chapter
'Cleaning and maintenance' for step-by-step instructions.
The alarm light is on and the start light flashes.
Some air is trapped inside the machine. To release the air from the machine, fill the water
tank with water, place a cup under the classic milk frother and press the flashing
start/stop button.
Be careful: small jets of hot water will be dispensed from the classic milk frother to
release the air.
AquaClean light is flashing: place or replace the AquaClean water filter and activate it. See
chapter 'AquaClean water filter' for step-by-step instructions.
Descaling light is on continuously: Descale the machine.
19
English
English
Warning
icon Solution
The lights in the drink icons light up and go out one by one.
The machine is heating up and/or trying to release the air that was drawn into the
machine. Wait until all drink lights light up continuously.
The lights of all warning icons are flashing.
Reset the machine by unplugging it and plugging it back in. Before switching the machine
back on, follow these steps:
-Remove the AquaClean water filter from the water tank.
-Place back the water tank. Push it into the machine as far as possible to make sure it is
in the right position.
-Open the lid of the pre-ground coffee compartment and check if this is clogged with
coffee powder. To clean it, insert a spoon handle into the pre-ground coffee
compartment and move the handle up and down until the clogged ground coffee
falls down (Fig. 30). Remove the brew group and remove all ground coffee that has
fallen down. Place back the clean brew group.
-Switch the machine back on.
If the problem is solved the AquaClean filter was not prepared well. Prepare the
AquaClean filter before placing it back by following steps 1 and 2 in chapter 'Activating
the AquaClean water filter (5 min).
If the lights continue to flash, the machine could be overheated. Switch the machine off,
wait 30 minutes and switch it on again. If the lights are still flashing, contact the
Consumer Care Center in your country. For contact details, see the international warranty
leaflet.
Troubleshooting table
This chapter summarizes the most common problems you could encounter with the machine. Support
videos and a complete list of frequently asked questions are available on www.philips.com/coffee-care. If
you are unable to solve the problem, contact the Consumer Care Center in your country. For contact details,
see the warranty leaflet.
Problem Cause Solution
The drip tray fills up
quickly. This is normal. The machine uses
water to rinse the internal circuit
and brew group. Some water
flows through the internal system
directly into the drip tray.
Empty the drip tray daily or as soon as the
red 'drip tray full' indicator pops up
through the drip tray cover. Tip: place a
cup under the dispensing spout to collect
rinsing water that comes out of it.
The 'empty coffee
grounds container' light
remains on.
You emptied the coffee grounds
container while the machine was
switched off.
Always empty the coffee grounds
container while the machine is switched
on. Remove the coffee grounds container,
wait at least 5 sec. and then insert it again.
The machine prompts to
empty the coffee grounds
container even though
the container is not full.
The machine did not reset the
counter the last time you emptied
the coffee grounds container.
Always wait approx. 5 seconds when you
place back the coffee grounds container.
In this way the coffee grounds counter will
be reset to zero.
  • Page 1 1
  • Page 2 2
  • Page 3 3
  • Page 4 4
  • Page 5 5
  • Page 6 6
  • Page 7 7
  • Page 8 8
  • Page 9 9
  • Page 10 10
  • Page 11 11
  • Page 12 12
  • Page 13 13
  • Page 14 14
  • Page 15 15
  • Page 16 16
  • Page 17 17
  • Page 18 18
  • Page 19 19
  • Page 20 20
  • Page 21 21
  • Page 22 22
  • Page 23 23
  • Page 24 24
  • Page 25 25
  • Page 26 26
  • Page 27 27
  • Page 28 28
  • Page 29 29
  • Page 30 30
  • Page 31 31
  • Page 32 32
  • Page 33 33
  • Page 34 34
  • Page 35 35
  • Page 36 36
  • Page 37 37
  • Page 38 38
  • Page 39 39
  • Page 40 40
  • Page 41 41
  • Page 42 42
  • Page 43 43
  • Page 44 44
  • Page 45 45
  • Page 46 46
  • Page 47 47
  • Page 48 48
  • Page 49 49
  • Page 50 50
  • Page 51 51
  • Page 52 52
  • Page 53 53
  • Page 54 54
  • Page 55 55
  • Page 56 56
  • Page 57 57
  • Page 58 58
  • Page 59 59
  • Page 60 60
  • Page 61 61
  • Page 62 62
  • Page 63 63
  • Page 64 64
  • Page 65 65
  • Page 66 66
  • Page 67 67
  • Page 68 68
  • Page 69 69
  • Page 70 70
  • Page 71 71
  • Page 72 72
  • Page 73 73
  • Page 74 74
  • Page 75 75
  • Page 76 76
  • Page 77 77
  • Page 78 78
  • Page 79 79
  • Page 80 80
  • Page 81 81
  • Page 82 82
  • Page 83 83
  • Page 84 84
  • Page 85 85
  • Page 86 86
  • Page 87 87
  • Page 88 88
  • Page 89 89
  • Page 90 90
  • Page 91 91
  • Page 92 92
  • Page 93 93
  • Page 94 94
  • Page 95 95
  • Page 96 96
  • Page 97 97
  • Page 98 98
  • Page 99 99
  • Page 100 100
  • Page 101 101
  • Page 102 102
  • Page 103 103
  • Page 104 104
  • Page 105 105
  • Page 106 106
  • Page 107 107
  • Page 108 108
  • Page 109 109
  • Page 110 110
  • Page 111 111
  • Page 112 112
  • Page 113 113
  • Page 114 114
  • Page 115 115
  • Page 116 116
  • Page 117 117
  • Page 118 118
  • Page 119 119
  • Page 120 120
  • Page 121 121
  • Page 122 122
  • Page 123 123
  • Page 124 124
  • Page 125 125
  • Page 126 126
  • Page 127 127
  • Page 128 128
  • Page 129 129
  • Page 130 130
  • Page 131 131
  • Page 132 132
  • Page 133 133
  • Page 134 134
  • Page 135 135
  • Page 136 136
  • Page 137 137
  • Page 138 138
  • Page 139 139
  • Page 140 140
  • Page 141 141
  • Page 142 142
  • Page 143 143
  • Page 144 144
  • Page 145 145
  • Page 146 146
  • Page 147 147
  • Page 148 148
  • Page 149 149
  • Page 150 150
  • Page 151 151
  • Page 152 152
  • Page 153 153
  • Page 154 154
  • Page 155 155
  • Page 156 156
  • Page 157 157
  • Page 158 158
  • Page 159 159
  • Page 160 160
  • Page 161 161
  • Page 162 162
  • Page 163 163
  • Page 164 164
  • Page 165 165
  • Page 166 166
  • Page 167 167
  • Page 168 168
  • Page 169 169
  • Page 170 170
  • Page 171 171
  • Page 172 172
  • Page 173 173
  • Page 174 174
  • Page 175 175
  • Page 176 176
  • Page 177 177
  • Page 178 178
  • Page 179 179
  • Page 180 180
  • Page 181 181
  • Page 182 182
  • Page 183 183
  • Page 184 184
  • Page 185 185
  • Page 186 186
  • Page 187 187
  • Page 188 188
  • Page 189 189
  • Page 190 190
  • Page 191 191
  • Page 192 192
  • Page 193 193
  • Page 194 194
  • Page 195 195
  • Page 196 196
  • Page 197 197
  • Page 198 198
  • Page 199 199
  • Page 200 200
  • Page 201 201
  • Page 202 202
  • Page 203 203
  • Page 204 204
  • Page 205 205
  • Page 206 206
  • Page 207 207
  • Page 208 208
  • Page 209 209
  • Page 210 210
  • Page 211 211
  • Page 212 212
  • Page 213 213
  • Page 214 214
  • Page 215 215
  • Page 216 216
  • Page 217 217
  • Page 218 218
  • Page 219 219
  • Page 220 220
  • Page 221 221
  • Page 222 222
  • Page 223 223
  • Page 224 224
  • Page 225 225
  • Page 226 226
  • Page 227 227
  • Page 228 228
  • Page 229 229
  • Page 230 230
  • Page 231 231
  • Page 232 232
  • Page 233 233
  • Page 234 234
  • Page 235 235
  • Page 236 236
  • Page 237 237
  • Page 238 238
  • Page 239 239
  • Page 240 240
  • Page 241 241
  • Page 242 242
  • Page 243 243
  • Page 244 244
  • Page 245 245
  • Page 246 246
  • Page 247 247
  • Page 248 248
  • Page 249 249
  • Page 250 250
  • Page 251 251
  • Page 252 252
  • Page 253 253
  • Page 254 254
  • Page 255 255
  • Page 256 256
  • Page 257 257
  • Page 258 258
  • Page 259 259
  • Page 260 260
  • Page 261 261
  • Page 262 262
  • Page 263 263
  • Page 264 264
  • Page 265 265
  • Page 266 266
  • Page 267 267
  • Page 268 268
  • Page 269 269
  • Page 270 270
  • Page 271 271
  • Page 272 272
  • Page 273 273
  • Page 274 274
  • Page 275 275
  • Page 276 276
  • Page 277 277
  • Page 278 278
  • Page 279 279
  • Page 280 280
  • Page 281 281
  • Page 282 282
  • Page 283 283
  • Page 284 284
  • Page 285 285
  • Page 286 286
  • Page 287 287
  • Page 288 288
  • Page 289 289
  • Page 290 290
  • Page 291 291
  • Page 292 292
  • Page 293 293
  • Page 294 294
  • Page 295 295
  • Page 296 296
  • Page 297 297
  • Page 298 298
  • Page 299 299
  • Page 300 300
  • Page 301 301
  • Page 302 302
  • Page 303 303
  • Page 304 304
  • Page 305 305
  • Page 306 306
  • Page 307 307
  • Page 308 308
  • Page 309 309
  • Page 310 310
  • Page 311 311
  • Page 312 312
  • Page 313 313
  • Page 314 314
  • Page 315 315
  • Page 316 316
  • Page 317 317
  • Page 318 318
  • Page 319 319
  • Page 320 320
  • Page 321 321
  • Page 322 322
  • Page 323 323
  • Page 324 324
  • Page 325 325
  • Page 326 326
  • Page 327 327
  • Page 328 328
  • Page 329 329
  • Page 330 330
  • Page 331 331
  • Page 332 332
  • Page 333 333
  • Page 334 334
  • Page 335 335
  • Page 336 336
  • Page 337 337
  • Page 338 338
  • Page 339 339
  • Page 340 340
  • Page 341 341
  • Page 342 342
  • Page 343 343
  • Page 344 344
  • Page 345 345
  • Page 346 346
  • Page 347 347
  • Page 348 348
  • Page 349 349
  • Page 350 350
  • Page 351 351
  • Page 352 352
  • Page 353 353
  • Page 354 354
  • Page 355 355
  • Page 356 356
  • Page 357 357
  • Page 358 358
  • Page 359 359
  • Page 360 360
  • Page 361 361
  • Page 362 362
  • Page 363 363
  • Page 364 364
  • Page 365 365
  • Page 366 366
  • Page 367 367
  • Page 368 368
  • Page 369 369
  • Page 370 370
  • Page 371 371
  • Page 372 372
  • Page 373 373
  • Page 374 374
  • Page 375 375
  • Page 376 376
  • Page 377 377
  • Page 378 378
  • Page 379 379
  • Page 380 380
  • Page 381 381
  • Page 382 382
  • Page 383 383
  • Page 384 384
  • Page 385 385
  • Page 386 386
  • Page 387 387
  • Page 388 388
  • Page 389 389
  • Page 390 390
  • Page 391 391
  • Page 392 392
  • Page 393 393
  • Page 394 394
  • Page 395 395
  • Page 396 396
  • Page 397 397
  • Page 398 398
  • Page 399 399
  • Page 400 400
  • Page 401 401
  • Page 402 402
  • Page 403 403
  • Page 404 404
  • Page 405 405
  • Page 406 406
  • Page 407 407
  • Page 408 408
  • Page 409 409
  • Page 410 410
  • Page 411 411
  • Page 412 412
  • Page 413 413
  • Page 414 414
  • Page 415 415
  • Page 416 416
  • Page 417 417
  • Page 418 418
  • Page 419 419
  • Page 420 420
  • Page 421 421
  • Page 422 422
  • Page 423 423
  • Page 424 424
  • Page 425 425
  • Page 426 426
  • Page 427 427
  • Page 428 428
  • Page 429 429
  • Page 430 430
  • Page 431 431
  • Page 432 432
  • Page 433 433
  • Page 434 434
  • Page 435 435
  • Page 436 436
  • Page 437 437
  • Page 438 438
  • Page 439 439
  • Page 440 440
  • Page 441 441
  • Page 442 442
  • Page 443 443
  • Page 444 444
  • Page 445 445
  • Page 446 446
  • Page 447 447
  • Page 448 448
  • Page 449 449
  • Page 450 450
  • Page 451 451
  • Page 452 452
  • Page 453 453
  • Page 454 454
  • Page 455 455
  • Page 456 456
  • Page 457 457
  • Page 458 458
  • Page 459 459
  • Page 460 460
  • Page 461 461
  • Page 462 462
  • Page 463 463
  • Page 464 464
  • Page 465 465
  • Page 466 466
  • Page 467 467
  • Page 468 468
  • Page 469 469
  • Page 470 470
  • Page 471 471
  • Page 472 472
  • Page 473 473
  • Page 474 474
  • Page 475 475
  • Page 476 476
  • Page 477 477
  • Page 478 478
  • Page 479 479
  • Page 480 480
  • Page 481 481
  • Page 482 482
  • Page 483 483
  • Page 484 484
  • Page 485 485
  • Page 486 486
  • Page 487 487
  • Page 488 488
  • Page 489 489
  • Page 490 490
  • Page 491 491
  • Page 492 492
  • Page 493 493
  • Page 494 494
  • Page 495 495
  • Page 496 496
  • Page 497 497
  • Page 498 498
  • Page 499 499
  • Page 500 500
  • Page 501 501
  • Page 502 502
  • Page 503 503
  • Page 504 504
  • Page 505 505
  • Page 506 506
  • Page 507 507
  • Page 508 508
  • Page 509 509
  • Page 510 510
  • Page 511 511
  • Page 512 512
  • Page 513 513
  • Page 514 514
  • Page 515 515
  • Page 516 516
  • Page 517 517
  • Page 518 518
  • Page 519 519
  • Page 520 520
  • Page 521 521
  • Page 522 522
  • Page 523 523
  • Page 524 524
  • Page 525 525
  • Page 526 526
  • Page 527 527
  • Page 528 528
  • Page 529 529
  • Page 530 530
  • Page 531 531
  • Page 532 532
  • Page 533 533
  • Page 534 534
  • Page 535 535
  • Page 536 536
  • Page 537 537
  • Page 538 538
  • Page 539 539
  • Page 540 540
  • Page 541 541
  • Page 542 542
  • Page 543 543
  • Page 544 544
  • Page 545 545
  • Page 546 546
  • Page 547 547
  • Page 548 548
  • Page 549 549
  • Page 550 550
  • Page 551 551
  • Page 552 552
  • Page 553 553
  • Page 554 554
  • Page 555 555
  • Page 556 556
  • Page 557 557
  • Page 558 558
  • Page 559 559
  • Page 560 560
  • Page 561 561
  • Page 562 562
  • Page 563 563
  • Page 564 564
  • Page 565 565
  • Page 566 566
  • Page 567 567
  • Page 568 568
  • Page 569 569
  • Page 570 570
  • Page 571 571
  • Page 572 572
  • Page 573 573
  • Page 574 574
  • Page 575 575
  • Page 576 576
  • Page 577 577
  • Page 578 578
  • Page 579 579
  • Page 580 580
  • Page 581 581
  • Page 582 582
  • Page 583 583
  • Page 584 584
  • Page 585 585
  • Page 586 586
  • Page 587 587
  • Page 588 588
  • Page 589 589
  • Page 590 590
  • Page 591 591
  • Page 592 592
  • Page 593 593
  • Page 594 594
  • Page 595 595
  • Page 596 596
  • Page 597 597
  • Page 598 598
  • Page 599 599
  • Page 600 600
  • Page 601 601
  • Page 602 602
  • Page 603 603
  • Page 604 604
  • Page 605 605
  • Page 606 606
  • Page 607 607
  • Page 608 608
  • Page 609 609
  • Page 610 610
  • Page 611 611
  • Page 612 612
  • Page 613 613
  • Page 614 614
  • Page 615 615
  • Page 616 616
  • Page 617 617
  • Page 618 618
  • Page 619 619
  • Page 620 620
  • Page 621 621
  • Page 622 622
  • Page 623 623
  • Page 624 624
  • Page 625 625
  • Page 626 626
  • Page 627 627
  • Page 628 628
  • Page 629 629
  • Page 630 630
  • Page 631 631
  • Page 632 632
  • Page 633 633
  • Page 634 634
  • Page 635 635
  • Page 636 636
  • Page 637 637
  • Page 638 638

Philips EP3343/50 Používateľská príručka

Kategória
Kávovary
Typ
Používateľská príručka

V iných jazykoch