Haier HWD100-B14979 Používateľská príručka

Kategória
Práčky
Typ
Používateľská príručka

Táto príručka je tiež vhodná pre

EN
HWD80-B14979
HWD100-B14979
HWD120-B14979
User manual
Washer-dryer
EN
Thank you
2
Legend
Warning – Important Safety information
General information and tips
Environmental information
Disposal
Help protect the environment and human health. Put
the packaging in applicable containers to recycle it.
Help to recycle waste of electrical and electronic ap-
pliances. Do not dispose appliances marked with this
symbol with the household waste. Return the product
to your local recycling facility or contact your municipal
offi ce.
Thank you for purchasing a Haier Product.
Please read these instructions carefully before using this appliance. The instructions con-
tain important information which will help you get the best out of the appliance and ensure
safe and proper installation, use and maintenance.
Keep this manual in a convenient place so you can always refer to it for the safe and proper
use of the appliance.
If you sell the appliance, give it away, or leave it behind when you move house, make sure
you also pass this manual so that the new owner can become familiar with the appliance
and safety warnings.
WARNING!
Risk of injury or suff ocation!
Disconnect the appliance from the mains supply. Cut off the mains cable and dispose
of it. Remove the door catch to prevent children and pets to get closed in the appliance.
WARNING!
The appliance must not be supplied through an external switching device, such as a
timer, or connected to a circuit that is regularly switched on and off by a utility.
EN
Content
3
1-Safety information ......................................................................................................................... 4
2-Product description ...................................................................................................................... 8
3-Control panel .................................................................................................................................. 9
4-Programmes .................................................................................................................................13
5-Consumption ................................................................................................................................14
6-Daily use .........................................................................................................................................15
7-Eco-friendly washing ..................................................................................................................20
8-Care and cleaning ........................................................................................................................21
9-Troubleshooting ...........................................................................................................................24
10-Installation ...................................................................................................................................28
11-Technical data .............................................................................................................................32
12-Customer service ......................................................................................................................34
1-Safety information
EN
4
Before switching on the appliance for the rst time read the follow-
ing safety hints!:
WARNING!
Before fi rst use
Make sure there is no transport damage.
Make sure all transport bolts are removed.
Remove all packaging and keep out of children´s reach.
Handle the appliance always with at least two persons because it
is heavy.
Daily use
This appliance can be used by children aged from 8 years and
above and persons with reduced physical, sensory or mental ca-
pabilities or lack of experience and knowledge if they have been
given supervision or instruction concerning use of the appliance
in a safe way and understand the hazards involved.
Keep away children under 3 years of age from the appliance un-
less they are constantly supervised.
Children shall not play with the appliance.
Do not let children or pets come close to the appliance when the
door is open.
Store washing agents out of reach of children.
Pull up zips, fi x loose threads and take care for small items to
prevent laundry from being entangled. If necessary, use an ap-
propriate bag or net.
Do not touch or use the appliance when barefoot or with wet or
damp hands or feet.
Do not cover or encase the appliance during operation or after-
wards to allow any moisture or dampness to evaporate.
Do not place heavy objects or sources of heat or damp on top of
the appliance.
Do not use or store flammable detergent or dry cleaning agent
in close vicinity to the appliance..
Do not wash any garments treated with solvents in the appli-
ance without having dried them previously in the air.
EN
1-Safety information
5
WARNING!
Daily use
Do not remove or insert the plug in the presence of flammable gas
Do not hot wash foam rubber or sponge-like materials.
Do not wash any laundry which is polluted with fl our.
Do not open detergent drawer during any wash cycle.
Do not touch the door during the washing process, it gets hot.
Do not open the door if the water level is visibly over the porthole.
Do not force the door to open. The door is fitted with a self-
lock device and will open shortly after the washing procedure is
ended.
Switch off the appliance after each wash programme and before
undertaking any routine maintenance and disconnect the appli-
ance from the electrical supply to save electricity and for safety.
Hold the plug, not the cable, when unplugging the appliance.
Do make sure the room is dry and well ventilated. The ambient
temperature should be between 5 °C and 35 °C.
Do not cover any ventilation openings in the base by a carpet or
similar object.
Keep the area around the appliance free of dust and lint
Do make sure that there is only laundry inside the appliance and
no pets or children before you use it.
Only dry textiles washed in water.
Do make sure not to load more than nominal load.
Remove all items such as lighters and matches from pockets.
Use fabric softeners or similar products as specifi ed by the
manufacturer´s packaging.
Notice that the last part of the drying cycle occurs without heat
(cool down cycle) to ensure remaining the garments at a tem-
perature which does not damage them.
Do not leave the appliance unattended during run time for some
time. If a long absence is intended, the drying cycle have to be
interrupted by switching off the unit and unplugging the mains.
Do not switch off the appliance except drying cycle is fi nished, un-
less all items are quickly removed and spread out that the heat
can be released.
1-Safety information
EN
6
WARNING!
Daily use
Do not dry following items in the appliance:
Items which are unwashed.
Items which have been contaminated with inflammable sub-
stances such as cooking oil, acetone, alcohol, benzine, petrol,
kerosene, spot removers, turpentine, waxes, wax removers or
other chemicals. The fumes can cause a fi re or explosion. These
items must always be washed fi rst by hand in hot water with an
extra amount of detergent and then be dried in the open air be-
fore drying in the appliance.
Items which contain padding or fi llings (e.g. pillows, jackets), as
the fi lling can get out with the risk of igniting in the appliance.
Items which contain a large proportion of rubber, foam rubber
(latex foam) or rubber like materials such as shower caps, wa-
terproof textiles, rubberised articles and items of clothing and
pillows with foam rubber fi lling.
Switch off the appliance after each drying programme to save
electricity and for safety.
Maintenance / cleaning
Make sure children are supervised if they carry out cleaning and
maintenance.
Disconnect the appliance from the electrical supply before un-
dertaking any routine maintenance.
Keep the lower part of the porthole clean and open door and
detergent drawer if appliance is not in use to prevent odours.
Do not use water spray or steam to clean the appliance.
Replace a damaged supply cord only by the manufacturer, its
service agent or similarly qualifi ed persons in order to avoid a
hazard.
Do not try to repair the appliance by yourself. In case of repair
please contact our customer service.
EN
1-Safety information
7
Intended use
This appliance is intended for washing machine-washable laundry
only. Anytime follow the instructions given on the label of each gar-
ment label. It is designed exclusively for domestic use inside the
house. It is not intended for commercial or industrial use.
Changes or modifi cations to the device are not allowed. Unintended
use may cause hazards and loss of of all warranty and liability claims.
Installation
Ensure a location which allows opening the door fully. Do not in-
stall the appliance behind a lockable door, a sliding door or a door
with hinges on the opposite side of the appliance door as this
limits the full opening of the appliance door.
The appliance should be placed in a well-ventilated place. Ensure
a location which allows opening the door fully.
Never install the appliance outdoors in a damp place, or in an
area which may be prone to water leaks such as under or near a
sink unit. In the event of a water leak cut power supply and allow
the machine to dry naturally.
Install or use the appliance only where the temperature is above 5 °C.
Do not place the appliance directly on a carpet, or close to a wall or furniture.
Do not expose the appliance to any frost, heat or direct sunlight
or in the near of heat sources(e.g. stoves, heaters).
Make sure that the electrical information on the rating plate
agrees with the power supply. If it does not, contact an electrician.
Do not use multi-plug adapters and extension cables.
Make sure only the delivered electric cable and hose set are used.
Make sure not to damage the electric cable and the plug. If dam-
aged have it replaced by an electrician.
Use a separate earthed socket for the power supply which
is easy accessible after installation. The appliance must be
earthed. Only for UK: The appliance’s power cable is fi tted with
3-cord (grounding) plug that fi ts a standard 3-cord (grounded)
socket. Never cut off or dismount the third pin (grounding). After
the appliance is installed, the plug should be accessible.
Make sure the hose joints and connections are fi rm and there is
no leakage
2-Product description
EN
8
2.1 Picture of appliance
Front (Fig. 2-1): Rear side (Fig. 2-2):
8kg 1400 HW80-BP14979
rpm
8kg 1400 HW80-BP14979
rpm
°C
60
°C
40
8kg 1400 HW80-BP14979
rpm
°C
60
°C
40
Stain removal
Delay
Steam Extr a Ri nse Speed
Temp.
Spin
Drum Cl ean
Hypoall erg i c
Cotton
Dail y
Synthet i cs
Wool Refr esh
Mix
Babycare
UV Sani t iz e
Duvet
Quick 1 5’Deli cat e
Stain removal
Dry Level Delay
i-Refresh
Extra Rinse Speed
Temp.
Spin
Smart
Cotton
Synthetics
Wool
DryFast
Wash and Dry
MixBabycare
Duvet
Eco 40-60Express 15
Delicate
Stain removal
Dry Level
Delay
i-Refresh
Extra Rinse
Speed
Temp.
7
5
6
3
1
4
2
REFRESH
525 DRUM
2.2 Accessories
Check the accessories and literature in accordance with this list (Fig.:2-3):
Inlet hose-
assembly
6 Blanking
plugs
Drain hose
bracket
Noise reduc-
tion pads
User manual
Warranty-card
Note:
Due to technical changes and diff erent models, the illustrations in the following chap-
ters may diff er from your model.
2-3
2-1
1 Detergent /
Softener drawer
2 Worktop
3 Programme selector
4 Panel
5 Washer door
6 Service fl ap
7 Adjustable feet
2x
2-2
2x
1 Iron bar (I1 - I2)
2
Transportation bolts (T1-T4)
3
Rear wall reinforcement
(Only HWD100/120-B...)
4
Power cord
5
Water inlet valve
6
Drain hose
7
Rear
wall
reinforcement
screws
2-2
1 2 4 5 6 73
(R1-R10)
EN
3-Control panel
9
1 “Power“ button
2 Programme selector
3 Display
4 Detergent /Softener drawer
3.1 “Power“ button
Touch this button (Fig. 3-2) gently to switch on, the dis-
play is shining, the indicator of the “Start/Pause” button
is fl ashing. Touch it again for about 2 seconds to switch
off . If no panel element or programme is activated after
a while machine will shut down automatically.
3.2 Programme selector
By turning the knob (Fig. 3-3) one of 14 programmes
can be selected, related LED will light up, its default
settings will be displayed.
3.3 Display
The display (Fig. 3-4) shows following information:
Washing / Drying time
End time delay
Error codes and service information
Function buttons and “Start/Pause“ button
5 Function buttons
6 “Start/Pause“ button
Note : Acoustic signal
In following cases an acoustic signal sounds:
when pressing a button
when turning the programme selector
at the end of programme
The acoustic signal can be deselected if necessary ; see DAILY USE (see P19 6.13).
3-1
Stain removal
Dry Level Delay
i-Refresh
Extra Rinse Speed
Temp.
Spin
Smart
Cotton Synthetics Wool
DryFast
Wash and Dry
MixBabycare
Duvet
Eco 40-60Express 15
Delicate
Stain removal
Dry Level
Delay
i-Refresh
Extra Rinse
Speed
Temp.
i-REFRESH
525 DRUM
4 2
3 1
6
5
Stain removal
Dry Level Delay
i-Refresh
Extra Rinse Speed
Temp.
Spin
Smart
Cotton Synthetics Wool
DryFast
Wash and Dry
MixBabycare
Duvet
Eco 40-60Express 15
Delicate
Stain removal
Dry Level
Delay
i-Refresh
Extra Rinse
Speed
Temp.
Spin
Cotton
Synthetics Wool Dry
Fast
Mix
Babycare
Duvet
Eco 40-60
Cotton 20
Express 15’
Delicate
Wash & Dry
i-REFR
ESH
525 DRUM
ol panel
S tain rem oval S team
T emp.
SpeedEx tra Ri nse
6
5
3-2
3-3
3-4
3-Control panel
EN
10
3.5 Function buttons
The function buttons (Fig. 3-6) enables additional op-
tions in the selected programme before programme
starts. The related indicators are displayed.
By switching off the appliance or setting a new pro-
gramme, all options are disabled.
If a button has multiple options, the desired option can
be selected by pressing the button sequentially.
By touching the buttons, when it is in dull light, the function is
unselected; when it is in bright light, the function is selected.
3.5.1-Function button “Delay“
Press this button (Fig. 3-7) to start the programme
with a delay. End time delay could be increased in
steps of 30 minutes from 0,5-24h. For example display
o : means the cycle will fi nish in 6 hours and 30
minutes. Touch “Start/Pause” button to activate the
time delay. It is not applicable to programme Spin,
Refresh and Eco 40-60.
The time delay must be longer than the programme run
time. Otherwise the programme will start immediatelly
Note: Factory settings
To get best results in each programme Haier has well defi ned specifi c default settings.
If there is no special requirement default settings are recommended.
Note: Liquid detergent
If using liquid detergent, it is not recommended to activate the end time delay.
3.4 Detergent drawer
Open dispenser drawer, the following components can
be seen (Fig. 3-5):
1: Compartment for powder or Liquid detergent
2: Detergent flap slector, lift it up for powder detergent,
keep it down for liquid detergent.
3: Compartment for sanitizer.
4: Compartment for softener.
5: Lock tab, press it down to pull out dispenser drawer.
The recommendation on the type of detergents i suit-
able for the various washing temperatures, please refer
to the manual of detergent (see P17).
Extra Rinse
3-8
Stain removal
Dry Level Delay
i-Refresh
Extra Rinse Speed
Temp.
Spin
Smart
Cotton Synthetics Wool
DryFast
Wash and Dry
MixBabycare
Duvet
Eco 40-60Express 15
Delicate
Stain removal
Dry Level
Delay
i-Refresh
Extra Rinse
Speed
Temp.
Spin
Cotton
Synthetics Wool Dry
Fast
Mix
Babycare
Duvet
Eco 40-60
Cotton 20
Express 15’
Delicate
Wash & Dry
i-REFR
E
SH
525 DRUM
3.5.1
3.5.2
3.5.3
3.5.6
3.5.5 3.5.4
3.5.7
3-6
3-5
1
2
5
3
4
3-5
3-7
Delay
Delay
3.5.2-Function button “Extra Rinse“
Touch this button (Fig. 3-8) to rinse the laundry more
intense with fresh water. This is recommended for
people with sensitive skin. By touching the button seve-
ral times one to three additional cycles can be selected.
They appear in the display with P--1/P--2/P--3.
EN
3-Control panel
11
3.5.4 Function button“Speed“
Touch this button (Fig. 3-10) to change or deselect the
spin of the programme. If no value is illuminated the
display (“”) laundry will not spin.
3.5.6 Function button “i-Refresh”
Touch this button (Fig. 3-12) the programme can be se-
lected, i-Refresh icon will light up, and the indicator in the
middle of the knob is on. Users select different “i-Refresh”
time of the function according to their own needs.It is used
for fresh odor removal, dust removal, mites removal, and
moisture removal.
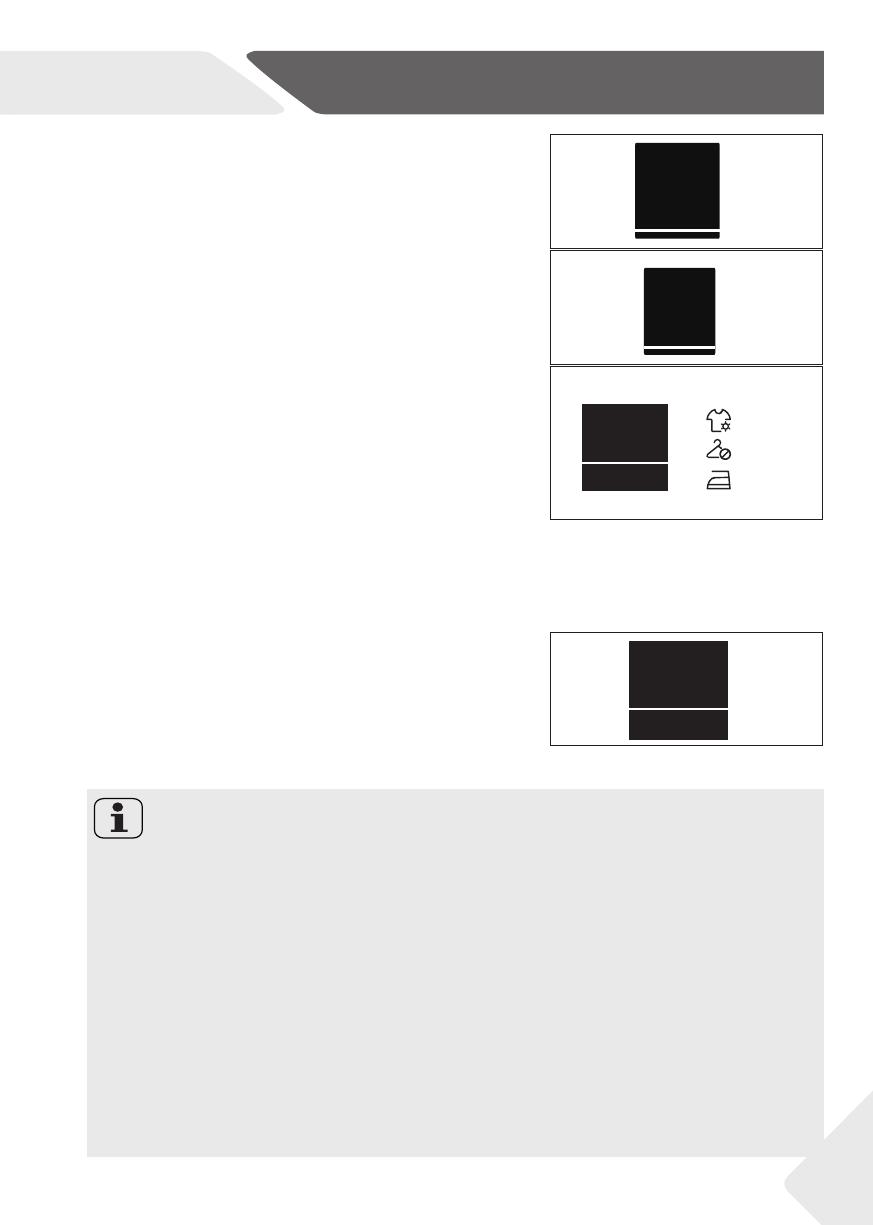
3.5.5 Function button “Dry Level”
Touch this button (Fig. 3-11) to change or deselect
the drying level of the programme according to the
needs. Pic-1 Pic-2 Pic-3
Pic-1: Touch the Dry level button, then it lights up, it
means that clothes can be stored directly after drying.
Pic-2: Touch the Dry level button, then it lights up, it
means that clothes can be directly worn after drying.
Pic-3: Touch the Dry level button, then it lights up, it
means that clothes will be good for ironing after drying.
Pic-1/ Pic-2/ Pic-3: Light up at the same time, then it
displays the fixed drying time.
3-10
3-10
Speed
Temp.
Temp.
Dry Level
Pic-1
Pic-2
Pic-3
i-Refresh
3-11
3-12
3-9
3.5.3-Function button “Temp.“
Press this button (Fig. 3-9) to change the washing
temperature of the programme. If no value is illumina-
ted (the display „--“) the water will not heated.
Note: i-Refresh tips
1.Please button and zip the clothes before i-Refresh. Clothing with adhesive lining,
decoration (PU trim, diamond, buckle, buckle, pin, metal decorations, coating, pen-
dants, etc.), adhesive, finalize the design of metal objects, please be careful.
2.i-Refresh care clothing should be dry clothing, if the clothes are wet or soaked, please
air dry before i-Refresh care, such as i-Refresh wet clothes directly , there is a risk of
shrinkage, deformation.
3.Please use soft cloth to protect the embroidery and decorations on the clothing
surface in advance to avoid scratching the clothing surface.
4.Clothing with support (such as the skirt of wedding dress fabric) please take out the
support before air washing care.
5.i-Refresh has the function of removing smell, please do not spray perfume, freshener, etc.
6.Please do not place too many clothes. Single care is recommended for best results.
7.Dust may remain on the door and window mat after i-Refresh. Please wipe the inter-
layer of the window mat and the door glass in time.
8.Not suitable for large, coated down jackets; Suitable for small, short down jacket care.
3.4 Detergent drawer
Open dispenser drawer, the following components can
be seen (Fig. 3-5):
1: Compartment for powder or Liquid detergent
2: Detergent flap slector, lift it up for powder detergent,
keep it down for liquid detergent.
3: Compartment for sanitizer.
4: Compartment for softener.
5: Lock tab, press it down to pull out dispenser drawer.
The recommendation on the type of detergents i suit-
able for the various washing temperatures, please refer
to the manual of detergent (see P17).
3-Control panel
EN
12
3.7 Child lock
Choosing a program and then start,touch button
“Speed”and ”Start/Pause ”( Fig .3-15) for 3 seconds
simultaneously to block all panel elements against
activation,panel display . For unlocking please touch
again the two buttons.The child lock indicator lights up
when the child lock works. Feature is optional when the
machine is running.
The display shows  (Fig. 3-16) if a button will be
pressed, when the child lock is activated. The change
is not running.
Speed
3-15
3-16
3-15
3-16
Stain removal
3.5.7 “Stain removal“ button
Press this button (Fig. 3-13) to choose special features
for stains. The symbols are explained in the following table
Grass
Soil
Wine
Blood
Milk
Juice
3-13
3-14
3-14
3.6 “Start/Pause“ button
Press this button (Fig. 3-14) gently to start or inter-
rupt the currently displayed programme. During pro-
gramme setting and during programme run the LED
above the button is shining, or if interrupted blinking.
EN
4-Programmes
13
* Water is not heated up.
1)
Choose 90 °C wash temperature only for special hygienic requirements.
2)
Reduce detergent amount because programme duration is short.
3)
Do not use chemical reaction with detergent
4)
Relating to dry laundry.
The design and specifications are subject to change without notice for quality improvement pur-
poses. User shall not add any sanitizer, detergent or softener to the i-Refresh programme
Max. load
4)
in kg
Tempera-
ture
Preset
spin
speed
in rpm
Function
washing
drying
in °C
1)
Preset
Dry Level
i-Refresh
Extra Rinse
Delay
Stain removal
Programme
HWD80-B14979
HWD100-B14979
HWD120-B14979
select
able
range 1 2 3 Fabrics type
8/10/12
5/6/8 * to 90 40
º º
Cotton 1400
4/5/6 2,5/3/4 * to 60 40
º º
Synthetic or
mixed fabrics
1200
2/2,5/3
/
* to 40 30
/ /
Duvet 800 /
/
2/2.5/3
/
* to 40 *
/ /
Machine-washable
fabric made of wool
or with wool content
800
/
/
2/2.5/3
/
* to 30 30
/ /
Delicate laundry
and Silk
600
/
/
/
5/6/8 / / / / / Cotton/Synthetic
/
/ / /
/
8/10/12
5/6/8
/ /
º º
Cotton/Synthetic 1400
/ /
/ / /
4/5/6 2,5/3/4 *to 90
40
º º
Cotton/Synthetic 1000
/
/
8/10/12
4/5/6 *to 60 30
º º
Lightly soiled mixed
laundry of cotton
and synthetic
1000
/
2)
1 1 * to 40
*
º
/
Cotton/Synthetic 1000
/
/
8/10/12 4/5/6 * to 40 40
º º
Cotton/Synthetic 1000
/
/
8/10/12 5/6/8 / / / / / All fabrics 1000
/ / / /
8/10/12 3/4/6 * to 20 20
º º
Cotton 1000
/
/
8/10/12 / / /
º º
/ 1400 / / / / /
3
2
1
2
3
Yes,
º
Optional,
/
No
Detergent compartment for:
1
Detergent
2
Softener or care product
Sanitizer
3)
3
5-Consumption
EN
14
Parameter
Programme
Eco 40-60* Synthetic
Temperature in °C
40°C
60°C
60°C
40°C
Max. load in kg
HWD80-B14979
HWD100-B14979
HWD120-B14979
Washing
- - 8/10/12 -
Drying
- - 5/6/8 -
Energy in kWh
Washing, spinning
and drying
- - 5,43/6,8/7,9 -
Only for washing
and spinning
- - 0,91/0,9/1,15 -
Water in L
Washing, spinning
and drying
- - 100/114/122 -
Only for washing
and spinning
- - 57/62/65 -
Time in h:min
Washing
and drying
- - 11:15/11:55/
11:25
-
Spin drying
performance in %
- - 46/52/43 -
The indicated consumption values may accordingly diff er to local conditions.
* Standard programme for the Energy Labelling according to 96/60 EU
Enter the European standard test procedure: Washing:Select Eco 40-60, often touch
speed for 5 seconds. After the temperature function is selectable, select the temperature
and the maximum speed, touch Start button.
Drying:Select Eco 40-60, often touch speed for 5 seconds. After the temperature func-
tion is selectable, select Dry programme, often touch Dry Level for 5 seconds, then
dispay “”, touch Start button.
The standard Eco40-60* cotton programmes are suitable to clean normally soiled cotton
laundry. They are the most effi cient programmes in terms of combined energy and water
consumption for cotton laundry. Used water temperature may diff er from declared cycle
temperature.
Note: Auto Weight
The appliance is equipped with a loading recognition. At low loading, energy, water and
washing time will be reduced automatically in some programmes. The display shows
.
EN
6-Daily use
15
6.3 Preparing laundry
Sort out clothes according to fabric (cotton, synthet-
ics, wool or silk) and to how dirty they are (Fig. 6-3). Pay
attention to the care labelling of washing labels.
Separate white clothes from coloured ones. Wash col-
oured textiles first by hand to check if they fade or run.
Empty pockets (keys, coins, etc.) and remove
harder decorative objects (e.g. brooches).
Garments without hems, delicates and fi nely wo-
ven textile such as fi ne curtains are to be put into
a wash bag to care for this delicate laundry (hand
or dry cleaning would be better).
Close zippers, velco fastener and hooks, make
sure the buttons are sewn on tightly.
Place sensitive items like laundry without rm
hem, delicate underwear (Dessous) and small
items such as socks, belts, bras, etc. in a wash bag.
Unfold large pieces of fabric such as bed sheets,
bedspreads etc.
Turn jeans and printed, decorated or color-inten-
sive textiles inside out; possibly wash separately.
6-3
6.1 Power supply
Connect the washing machine to a power supply
(220V to 240V~/50Hz; Fig. 6-1). Please refer also to
section INSTALLATION.
6.2 Water connection
Before connecting check the cleanliness and clar-
ity of the water inlet.
Tun on the tap (Fig.6-2).
Note: Tightness
Before use check for leakage in the joints between the tap and the inlet hose by turning
on the tap.
Note: Special hints for drying
Sort clothes according to fabric(cotton, synthetics, etc.) desired dry level and equal
residual moisture. Follow the instructions on the laundry label and dry only machine-
dryable garments
Spin the laundry with the maximum spin speed before drying.
Do not exceed the max. load of 6 kg.
Extra large pieces tend to wind up. If the laundry has not been suffi ciently dry, loosen
up the laundry and dry again with programme DRY.
Especially delicate fabrics which can easily shrink or lose their shape, as well as e.g. silk
stockings, lingerie etc. should not be dried with the appliance. Put delicate garments
inside a laundry bag and avoid overdrying them.
Jersey and knitwear should not be dried to avoid shrinkage.
6-1 6-2
8-7
6-Daily use
EN
16
Care chart
Washing
Washable up to 95°C
normal process
Washable up to 60°C
normal process
Washable up to 60°C
mild process
Washable up to 40°C
normal process
Washable up to 40°C
mild process
Washable up to 40°C
very mild process
Washable up to 30°C
normal process
Washable up to 30°C
mild process
Washable up to 30°C
very mild process
Wash by hand
max. 40°C
Do not wash
Bleaching
Any bleaching allowed Only oxygen/
non -chlorine
Do not bleach
Drying
Tumble drying possible
normal temperature
Tumble drying possible
lower temperature
Do not tumble dryr
Line drying Flat drying
Ironing
Iron at a maximum
temperature
up to 200 °C
Iron at a medial tem-
perature
up to 150°C
Iron at a low temper-
ature up to 110 °C;
without steam (steam
ironing may cause irre-
versible damage)
Do not iron
Professional Textile Care
Dry cleaning in tetra-
chloroethene
Dry cleaning in hy-
drocarbons
Do not dry clean
Professional wet clean Do not professional
wet clean
6.4 Loading the appliance
Put in the laundry piece by piece
Don‘t overload. Note the diff erent maximum load according to programmes! Rule of
thumb for maximum load: Keep six inches between load and drum top.
Close the door carefully. Make sure that no pieces of laundry are pinched.
CAUTION!
Non-textile, as well as small, loose or sharp-edged items may cause malfunctions and
damage of clothes and appliance.
EN
6-Daily use
17
6.5 Selecting detergent
Washing effi ciency and performance is determined by used detergent quality.
Use only machine wash approved detergent.
If needed use specifi c detergents, e.g. for synthetic and woolen fabric.
Mind always detergent manufacturer recommendations.
Do not use dry cleaning agents such as trichloroethylene and similar products.
Choose the best detergent
Programme
Kind of detergent
Universal Colour Delicate Special Softener
L/P L/P - - o
- - L/P - o
- - L L/P -
- - L/P L/P -
- - - L/P -
- - - - -
L/P L/P - - o
L/P L/P - - o
L/P L/P - - o
L L - - o
L/P L/P - - o
- - - - -
L/P L/P - - o
L/P L/P - - -
L = gel-/liquid detergent P = powder detergent O = optional
_
= no
If using liquid detergent, it is not recommended to activate the time delay.
We recomment by using:
Laundry powder: 20°C to 90°C* (best use: 40-60°C)
Color detergent: 20°C to 60°C (best use: 30-60°C)
Wool/delicate detergent: 20°C to 30°C (= best use:)
* Choose 90 °C wash temperature only for special hygienic requirements.
6-Daily use
EN
18
6.7 Switch on the appliance
Touch the “Power“- button to switch on the appli-
ance (Fig. 6-5). The LED of the “Start/Pause“ button
is fl ashing.
6.6 Adding detergent
1. Slide out the detergent drawer.
2. Put the required chemicals into corresponding
compartments (Fig. 6-4)
3. Push back the drawer gently.
Note:
Remove detergent residues before next wash cycle from the detergent drawer.
Do not overuse detergent or softener.
Please follow the instruction on the detergent package.
Always fi ll the detergent just before the beginning of the wash cycle.
Concentrated liquid detergent should be diluted before adding.
Do not use liquid detergent if “Delay“ is selected.
Carefully choose the programme settings according to the care symbols on all laun-
dry labels and according to the programme table.
6.8 Select a programme
To get the best washing results, select a programme
which fi ts the degree of soiling and sort of laundry
type.
Turn the programme knob (Fig. 6-6) to select the
right programme. Related programme LED lights up
and the default settings are displayed.
6.9 Add individual selections
Select required options and settings
(Fig. 6-7);
refer to
CONTROL PANEL.
1
3
2
ol panel
St ain rem oval S team
Te mp.
Spe edExtra Rins e
6
5
6-4
Note: Odour removal
Before fi rst use we recommended to run programme “COTTON+90 °C”+600rpm with
no load and small amount of detergent in washing agent compartment (2) or special
machine cleaner to remove possibly corruptive residues.
6-5
6-6
Stain removal
Dry Level Delay
i-Refresh
Extra Rinse Speed
Temp.
Spin
Smart
Cotton Synthetics Wool
DryFast
Wash and Dry
MixBabycare
Duvet
Eco 40-60Express 15
Delicate
Stain removal
Dry Level
Delay
i-Refresh
Extra Rinse
Speed
Temp.
Spin
Cotton
Synthetics Wool Dry
Fast
Mix
Babycare
Duvet
Eco 40-60
Cotton 20
Express 15’
Delicate
Wash & Dry
i-REFR
E
SH
525 DRUM
6-7
EN
6-Daily use
19
1. At programme cycle end  is displayed.
2. The appliance switches off automatically.
3. Remove laundry as soon as possible to go easy on it and to prevent more wrinkling.
4. Turn off the water supply.
5. Unplug the power cord.
6. Open the door to prevent formation of moisture and odours. Let it open while not used.
6.13 Activate or deactivate the buzzer
The acoustic signal can be deselected if necessary:
1. Switch on the appliance.
2. Select the MIX programme.
3. Touch the “ Dry Level“button and “Temp.” button at the same time for about 3 seconds.
 ” will be displayed and the buzzer will be deactivated.For activating the buzzer
press these two buttons at the same time again. “ ” will be displayed.
To interrupt a running programme press gently “Start/Pause“. The LED above the button is
ashing. Press it again to resume operation.
To cancel a running programme and all its individual settings
1. Touch “Start/Pause” button to interrupt the running programme.
2. Touch “Power“ button for about 2 seconds to switch the appliance off .
3. Touch the “ Power” button to turn on the appliance, run programme “Spin” and select
“no Speed” (speed lights are off ) to drain the water.
4. Close the programm to restart the appliance,select a new programme and start it.
Note: Door lock
For safety reasons the door is locked partially during the washing cycle. It is only pos-
sible to open the door at the end of the programme or after the programme was can-
celled correctly (see description above).
In case of high water level, high water temperature and during spinning it is not pos-
sible to open the door;  is displayed
Note: Standby mode / energy-saving mode
The switched on appliance will go into standby-mode if it will not be activated within 2
minutes before starting the program or at the end of program. The display switsches off .
This saves energy. To interrupt the standby mode push “Power“ button.
Note: Cool down cycle for drying cycle
The last part of the drying cycle occurs without heat to ensure remaining the garments
at a temperature which does not damage them.
6.10 Start wash programme
Touch “Start/Pause“ button (Fig. 6-8) to start. The LED
of the “Start/Pause“ button stops ashing and lights
up continuously
Appliance operates according to present settings.
Changes are only possible by cancelling the programme.
6.11 Interrupt / cancel wash programme
3-14
6-8
6.12 After washing
EN
7-Eco-friendly use
20
Environmentally responsible use
Washing
To achieve best use of energy, water, detergent and time you should use the recom-
mended maximum load size.
Do not overload (hand width clearance above laundry).
For slightly soiled laundry select the Express 15’ programme.
Apply exact dosages of each washing agent.
Choose the lowest adequate washing temperature - modern detergents are ef-
ciently cleaning below 60°C.
Raise default settings only due to heavy staining.
Spin the laundry with the maximum spin speed if you want to use a drying pro-
gramme afterwards.
Drying
Use the maximum fi lling amount of about 5/6/8 kg.
Loosen up the laundry before starting the drying programme.
Do not use softener when washing, because the laundry will become fl uff y and soft
in the dryer programme.
  • Page 1 1
  • Page 2 2
  • Page 3 3
  • Page 4 4
  • Page 5 5
  • Page 6 6
  • Page 7 7
  • Page 8 8
  • Page 9 9
  • Page 10 10
  • Page 11 11
  • Page 12 12
  • Page 13 13
  • Page 14 14
  • Page 15 15
  • Page 16 16
  • Page 17 17
  • Page 18 18
  • Page 19 19
  • Page 20 20
  • Page 21 21
  • Page 22 22
  • Page 23 23
  • Page 24 24
  • Page 25 25
  • Page 26 26
  • Page 27 27
  • Page 28 28
  • Page 29 29
  • Page 30 30
  • Page 31 31
  • Page 32 32
  • Page 33 33
  • Page 34 34
  • Page 35 35
  • Page 36 36
  • Page 37 37
  • Page 38 38
  • Page 39 39
  • Page 40 40
  • Page 41 41
  • Page 42 42
  • Page 43 43
  • Page 44 44
  • Page 45 45
  • Page 46 46
  • Page 47 47
  • Page 48 48
  • Page 49 49
  • Page 50 50
  • Page 51 51
  • Page 52 52
  • Page 53 53
  • Page 54 54
  • Page 55 55
  • Page 56 56
  • Page 57 57
  • Page 58 58
  • Page 59 59
  • Page 60 60
  • Page 61 61
  • Page 62 62
  • Page 63 63
  • Page 64 64
  • Page 65 65
  • Page 66 66
  • Page 67 67
  • Page 68 68
  • Page 69 69
  • Page 70 70
  • Page 71 71
  • Page 72 72
  • Page 73 73
  • Page 74 74
  • Page 75 75
  • Page 76 76
  • Page 77 77
  • Page 78 78
  • Page 79 79
  • Page 80 80
  • Page 81 81
  • Page 82 82
  • Page 83 83
  • Page 84 84
  • Page 85 85
  • Page 86 86
  • Page 87 87
  • Page 88 88
  • Page 89 89
  • Page 90 90
  • Page 91 91
  • Page 92 92
  • Page 93 93
  • Page 94 94
  • Page 95 95
  • Page 96 96
  • Page 97 97
  • Page 98 98
  • Page 99 99
  • Page 100 100
  • Page 101 101
  • Page 102 102
  • Page 103 103
  • Page 104 104
  • Page 105 105
  • Page 106 106
  • Page 107 107
  • Page 108 108
  • Page 109 109
  • Page 110 110
  • Page 111 111

Haier HWD100-B14979 Používateľská príručka

Kategória
Práčky
Typ
Používateľská príručka
Táto príručka je tiež vhodná pre