Tesla Smart Sensor Používateľská príručka

Typ
Používateľská príručka
1
USER MANUAL
TESLA SMART
SENSOR WATER
EN
SK
SL
HR
DE
PL
UA
RU
CZ
HU
2
Product Description
Status indicator
Button
Sensing probe
3
Network Setting
1. Power on the product.
Insert a thin blade or coin into the slot on the battery
cover and rotate it counterclockwise to open the
battery cover.
Remove the battery insulation film to power on the
product and close the battery cover.
CR 2032
CR 2032
4
2. Press the reset button for 5S and release, the green
LED will flash for network setting.
Device pairing Hint:
Press the reset button for 5s-10s, the green LED is on, once
green LED turns off, release the reset button, the green
LED flashes, means ready for network setting.It keeps on
flashing for 20s during network setting.If pressing for more
than 10s, network setting cancelled.
The green LED will be on for 5s to indicate network setting
succeeds. If fails, the greenLED is off.
Press the reset
button for 5s
then release.
5
Installation Instructions
Place the product in the detection area.
Device pairing Hint:
Press the reset button for 5s-10s, untill the green LED
starts to flash.
In Tesla Smart app, locate your Gateway,click on „
Add subdavice“ and follow the instruction
Bottom view
6
Technical Parameters
Wireless Technology ZigBee
Working Voltage DC 3 V (CR 2032 battery)
Transmission Frequency 2.4 GHz
Working Temperature 0°C to +55°C
Undervoltage Alarm supported
Battery Lifespan More than one year (20 times
per day)
Water proof level IP66
Dimensions �50 mm x 18 mm
INFORMATION ABOUT DISPOSAL AND RECYCLING
This product is marked with the symbol for separate collection. The
product must be disposed of in accordance with the regulations
for disposal of electrical and electronic equipment (Directive
2012/19/EU on waste electrical and electronic equipment). Dis-
posal together with regular municipal waste is prohibited. Dispose
of all electrical and electronic products in accordance with all local
and European regulations at the designated collection points
which hold the appropriate authorisation and certification in line
7
EU DECLARATION OF CONFORMITY
Hereby, Witty, s.r.o declares that the radio equipment type
TSL-SEN-WATER is in compliance with EU directives. The
full text of the EU declaration of conformity is available at the
following internet address: teslasmart.com/declaration
Connectivity: Wi-Fi 2,4 GHz IEEE 802.11b/g/n
Frequency band: 2.412 - 2.472 MHz
Max. radio-frequency power (EIRP): < 20 dBm
with the local and legislative regulations. Correct disposal and
recycling help to minimise impacts on the environment and human
health. Further information regarding disposal can be obtained
from the vendor, authorised service centre or local authorities.
Manufacturer
Tesla Global Limited
Gee Chang Industrial Building,
121 Des Voeux Road Central
852 00 Hong Kong
www.teslasmart.com
8
9
BENUTZERHANDBUCH
TESLA SMART
SENSOR WATER
EN
SK
SL
HR
DE
PL
UA
RU
CZ
HU
10
Produktbeschreibung
Zustandskontrolle
Taste
Sensor
11
Netzeinstellung
1. Einschalten des Sensors
Legen Sie eine dünne Klinge oder eine Münze in den
Slot auf der Batterieabdeckung ein, drehen Sie dem
Uhrzeigersinn entgegengesetzt und öffnen Sie die
Batterieabdeckung.
Beseitigen Sie die Isolierungsfolie der Batterie, damit es
möglich ist, das Produkt einzuschalten, und schließen Sie
die Batterieabdeckung.
CR 2032
CR 2032
12
2. Drücken Sie die Reset-Taste und halten Sie diese
für die Dauer von 5 Sekunden und lassen Sie sie los,
die grüne LED-Kontrollleuchte des Netzzustands
beginnt zu blinken.
Pairing der Einrichtung:
Drücken Sie die Reset-Taste und halten Sie diese für die Dauer
von 5-10 Sekunden, es leuchtet die grüne LED-Kontrollleuchte
auf. Sobald sie erlischt, lassen Sie die Taste los, die grüne
LED-Kontrollleuchte blinkt, was bedeutet, dass es möglich ist,
das Netz einzustellen. Die Kontrollleuchte blinkt während der
Netzeinstellung für die Dauer von 20 Sekunden. Wenn Sie die
Taste für die Dauer von mehr als 10 Sekunden halten, wird die
Netzeinstellung aufgehoben.
Nach der erfolgreichen Netzeinstellung bleibt die grüne LED-
-Kontrollleuchte für die Dauer von 5 Sekunden leuchten. Wenn die
Einstellung fehlschlägt, erlischt die grüne LED-Kontrollleuchte.
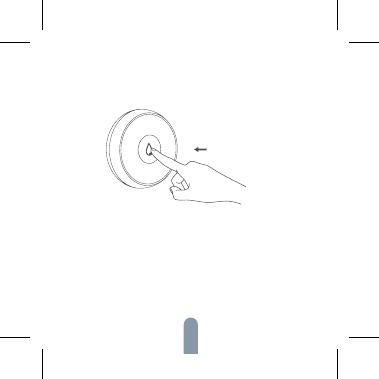
Drücken Sie und
halten Sie die Taste
Reset für 5 Sekun-
den, danach lassen
Sie diese los.
13
Installationsanweisungen
Bringen Sie das Produkt in dem Detektionsbereich
an.
Ansicht von unten
Pairing der Einrichtung:
Drücken Sie die Reset-Taste und halten Sie diese für die Dauer
von 5-10 Sekunden, bis die grüne LED-Kontrollleuchte beginnt
zu blinken.
Öffnen Sie die Applikation Tesla Smart, suchen Sie Ihr Zugriffstor
Gateway aus, klicken Sie auf „Add sub-device“ („Teileinrichtung
hinzufügen“) und gehen Sie nach den Hinweisen vor.
14
Technische Parameter
Drahtlose Technologie ZigBee
Arbeitsspannung DC 3 V (CR 2032 battery)
Sendefrequenz 2.4 GHz
Arbeitstemperatur 0°C to +55°C
Undervoltage Alarm Unterstützt
Lebensdauer der Batterie Mehr als 1 Jahr (bei der Verwendung
20mal pro Tag)
Wasserbeständigkeit IP66
Abmessungen �50 mm x 18 mm
INFORMATIONEN ÜBER DIE ENTSORGUNG UND WIE-
DERVERWERTUNG
Dieses Produkt ist mit einem Symbol für die getrennte Sammlung
gekennzeichnet. Das Produkt muss im Einklang mit den Vor-
schriften für die Entsorgung von elektrischen und elektronischen
Geräten (Richtlinie 2012/19/EU über elektrische und elektronische
Geräteabfälle) entsorgt werden. Eine Entsorgung über den norma-
len Hausmüll ist unzulässig. Alle elektrischen und elektronischen
Produkte müssen im Einklang mit allen örtlichen und europäischen
Vorschriften an dafür vorgesehenen Sammelstellen, die über eine
15
Produzent
Tesla Global Limited
Gee Chang Industrial Building,
121 Des Voeux Road Central
852 00 Hong Kong
www.teslasmart.com
entsprechende Genehmigung und Zertifizierung gemäß den
örtlichen und legislativen Vorschriften verfügen entsorgt werden.
Die richtige Entsorgung und Wiederverwertung hilft dabei die
Auswirkungen auf die Umwelt und die menschliche Gesundheit
zu minimieren. Weitere Informationen zur Entsorgung erhalten
Sie von Ihrem Verkäufer, der autorisierten Servicestelle oder bei
den örtlichen Ämtern.
EU-KONFORMITÄTSERKLÄRUNG
Hiermit erklärt Witty s.r.o., dass der Funkanlagentyp TSL-SEN-
-WATER der Richtlinie 2014/53/EU entspricht. Der vollständige
Text der EU-Konformitätserklärung ist unter der folgenden
Internetadresse verfügbar: teslasmart.com/declaration
Konnektivität: Wi-Fi 2,4 GHz IEEE 802.11b/g/n
Frequenzband: 2.412 - 2.472 GHz
Max. Sendeleistung. (EIRP): < 20 dBm
16
UŽIVATELSKÁ PŘÍRUČKA
TESLA SMART
SENSOR WATER
EN
SK
SL
HR
DE
PL
UA
RU
CZ
HU
18
Popis produktu
Kontrolka stavu
Tlačítko
Senzor
19
Nastavení sítě
1. Zapnutí senzoru
Vložte tenkou čepel nebo minci do slotu na krytu
baterie, otočte proti směru hodinových ručiček a
otevřete kryt baterie.
Odstraňte izolační fólii baterie, aby bylo možné
produkt zapnout, a zavřete kryt baterie.
CR 2032
CR 2032
20
2. Stiskněte a po dobu 5 sekund podržte tlačítko
Reset a uvolněte, zelená LED kontrolka nastavení sítě
začne blikat.
Párování zařízení:
Stiskněte a po dobu 5-10 sekund podržte tlačítko Reset,
rozsvítí se zelená LED kontrolka, jakmile zhasne, tlačítko
uvolněte, zelená LED kontrolka zabliká, což znamená, že je
možné nastavit síť. Kontrolka během nastavování sítě bliká
po dobu 20 sekund. Pokud tlačítko podržíte po dobu více
než 10 sekund, nastavení sítě bude zrušeno.
Po úspěšném nastavení sítě zůstane zelená LED kontrolka
svítit po dobu 5 sekund. Pokud se nastavení nezdaří, zelená
LED kontrolka zhasne.
Stiskněte a po dobu
5 sekund stiskněte
tlačítko Reset, poté
uvolněte.
  • Page 1 1
  • Page 2 2
  • Page 3 3
  • Page 4 4
  • Page 5 5
  • Page 6 6
  • Page 7 7
  • Page 8 8
  • Page 9 9
  • Page 10 10
  • Page 11 11
  • Page 12 12
  • Page 13 13
  • Page 14 14
  • Page 15 15
  • Page 16 16
  • Page 17 17
  • Page 18 18
  • Page 19 19
  • Page 20 20
  • Page 21 21
  • Page 22 22
  • Page 23 23
  • Page 24 24
  • Page 25 25
  • Page 26 26
  • Page 27 27
  • Page 28 28
  • Page 29 29
  • Page 30 30
  • Page 31 31
  • Page 32 32
  • Page 33 33
  • Page 34 34
  • Page 35 35
  • Page 36 36
  • Page 37 37
  • Page 38 38
  • Page 39 39
  • Page 40 40
  • Page 41 41
  • Page 42 42
  • Page 43 43
  • Page 44 44
  • Page 45 45
  • Page 46 46
  • Page 47 47
  • Page 48 48
  • Page 49 49
  • Page 50 50
  • Page 51 51
  • Page 52 52
  • Page 53 53
  • Page 54 54
  • Page 55 55
  • Page 56 56
  • Page 57 57
  • Page 58 58
  • Page 59 59
  • Page 60 60
  • Page 61 61
  • Page 62 62
  • Page 63 63
  • Page 64 64
  • Page 65 65
  • Page 66 66
  • Page 67 67
  • Page 68 68
  • Page 69 69
  • Page 70 70
  • Page 71 71
  • Page 72 72
  • Page 73 73
  • Page 74 74
  • Page 75 75
  • Page 76 76
  • Page 77 77
  • Page 78 78
  • Page 79 79
  • Page 80 80

Tesla Smart Sensor Používateľská príručka

Typ
Používateľská príručka

V iných jazykoch