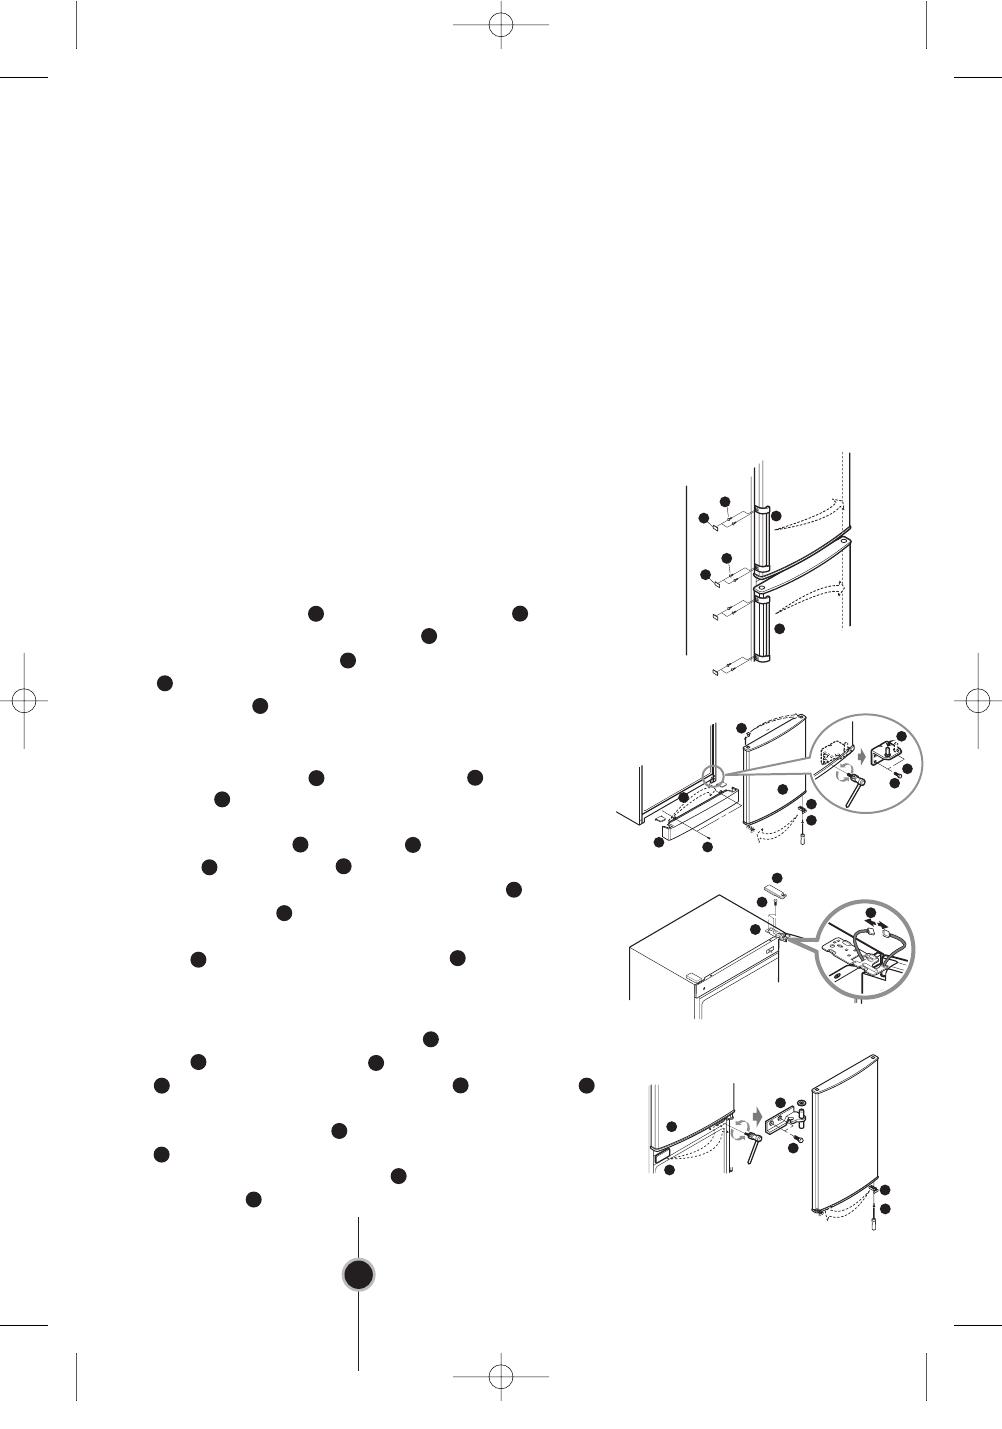
To Reverse the Doors
Your fridge-freezer is designed with reversible doors, so that they may open from either
the left or right hand side to suit your kitchen design.
Precaution
1.
Before reversing the door, first of all, you should take out food and accessories like
shelves
or trays which are not fixed in the fridge-freezer.
2.
Use Torque Wrench or Spanner to fix or remove the bolt.
3.
Do not lay the fridge-freezer down. This will
cau
se problems.
4.
Be careful not to drop the doors in disassembling
or assembling.
How to Reverse the Door
1. Separate the screw after separating the nut on the
left of the refrigerator door handle , then separate th
e
refrigerator door handle . Separate the freezer door handle
in the order in which you separating the refrigerato
r
door handle . (The hidden handle does not need this
procedure)
2
1
1
3
4
1
2. Separate the screw and bottom cover , then separate
the cap of bottom cover and install it on the
corresponding position on the right side. Separate the
hinge lower right and the pin after separating the
screw . Install the pin into the corresponding left hole
on the hinge lower. Separate the freezer door , then
remove the cap on the door and install it on the
corresponding position on the right side. Separate the door
stop after your separating the screw , then install th
e
door stop on the corresponding position on the left.
5
6
8
11
13
7
10
10
9
12
1
4
20
21
3. Separate the cover of hinge upper , separate the two
wire . Separate the screw , separate the hinge middle
, then separate the refrigerator door .Separate cap
and install it on the corresponding position on the right.
Separate the door stop after your separating the screw
, then install the door stop on the corresponding position
on the left. Separate the screw , then separate the hinge
upper right .
15
16
17
18
19
22
23
24
20
17
18
15
23
22
21
12
5
7
6
11
8
10
9
14
13
2
1
4
3
2
3
2
16
19
24


