6
GB
D:\_SONY TV\SY150217_QH 85 EU RG\4584644151\01_4584644151_GB\010COVTOC_GB.fm masterpage: Left
KD-85XD85xx / 75XD9405 / 75XD85xx / 65XD9305 / 65XD85xx / 55XD9305 / 55XD85xx / FW-85XD85xx /
75XD85xx / 65XD85xx / 55XD85xx
4-584-644-15(1)
NOTE ON MAINS ADAPTOR (models with
supplied mains adaptor only)
Warning
To reduce the risk of fire or electric shock, do not expose this
apparatus to rain or moisture.
To prevent fire or shock hazard, do not place objects filled with
liquids, such as vases, on the apparatus. Do not install this
equipment in a confined space, such as a bookshelf or similar
unit.
• Please ensure that the mains socket is installed near the
equipment and shall be easily accessible.
• Be sure to use the supplied mains adaptor and mains lead.
• Do not use any other mains adaptor. It may cause a
malfunction.
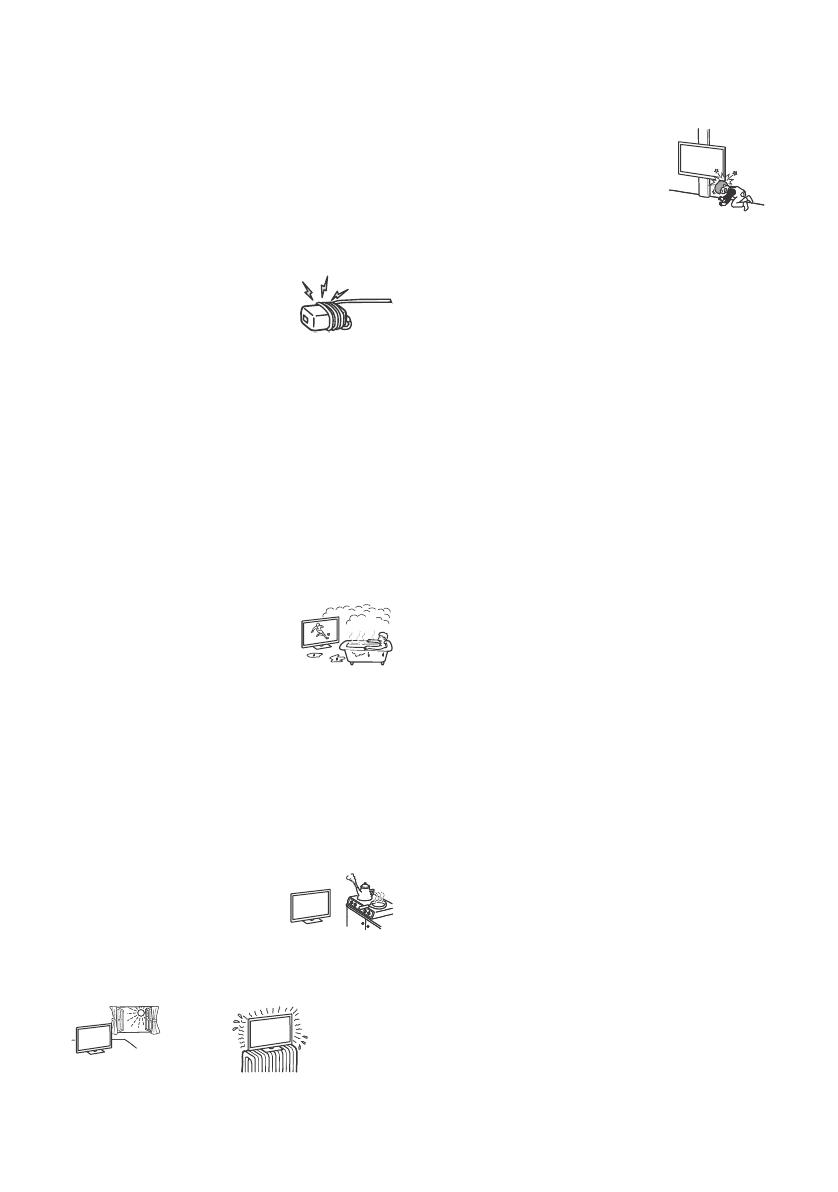
• Connect the mains adaptor to an easily accessible mains socket.
• Do not coil the mains lead around the
mains adaptor. The core wire may be cut
and/or it may cause a malfunction of the
media receiver.
• Do not touch the mains adaptor with wet hands.
• If you notice an abnormality in the mains adaptor, disconnect it
from the mains socket immediately.
• The set is not disconnected from the mains source as long as it
is connected to the mains socket, even if the set itself has been
turned off.
• As the mains adaptor will become warm when it is used for a
long time, you may feel hot when touching it by hand.
Prohibited Usage
Do not install/use the TV set in locations, environments or
situations such as those listed below, or the TV set may
malfunction and cause a fire, electric shock, damage and/or
injuries.
Location:
• Outdoors (in direct sunlight), at the seashore, on a ship or other
vessel, inside a vehicle, in medical institutions, unstable
locations, near water, rain, moisture or smoke.
• If the TV is placed in the changing room of
a public bath or hot spring, the TV may be
damaged by airborne sulfur, etc.
• For best picture quality, do not expose the screen to direct
illumination or sunlight.
• Avoid moving the TV from a cold area to a warm area. Sudden
room temperature changes may cause moisture condensation.
This may cause the TV to show poor picture and/or poor colour.
Should this occur, allow moisture to evaporate completely
before powering the TV on.
Environment:
• Do not install the TV in places that are hot, humid, or excessively
dusty; where insects may enter; where it might be exposed to
mechanical vibration, near flammable objects (candles, etc.).
The TV set shall not be exposed to dripping or splashing and no
objects filled with liquids, such as vases, shall be placed on the
TV.
• Do not place the TV in a humid or dusty
space, or in a room with oily smoke or
steam (near cooking tables or
humidifiers). Fire, electric shock, or
warping may result.
• Do not install the TV in places subject to extreme temperature
such as in direct sunlight, near a radiator or a heating vent. The
TV may overheat in such condition which can cause
deformation of the enclosure and/or TV malfunction.
Situation:
• Do not use when your hands are wet, with the cabinet removed,
or with attachments not recommended by the manufacturer.
Disconnect the TV set from mains socket and aerial during
lightning storms.
• Do not install the TV so that it sticks out
into an open space. This may result in
injury or damage from a person or object
bumping into the TV.
Broken pieces:
• Do not throw anything at the TV set. The screen glass may break
by the impact and cause serious injury.
• If the surface of the TV set cracks, do not touch it until you have
unplugged the mains lead. Otherwise this may cause an electric
shock.
When not in use
• If you will not be using the TV set for several days, the TV set
should be disconnected from the mains for environmental and
safety reasons.
• As the TV set is not disconnected from the mains when the TV
set is just turned off, pull the plug from the mains to disconnect
the TV set completely.
• Some TV sets may have features that require the TV set to be
left in standby to work correctly.
For children
• Do not allow children to climb on the TV set.
• Keep small accessories out of the reach of children, so that they
are not mistakenly swallowed.
If the following problems occur...
Turn off the TV set and unplug the mains lead immediately if any
of the following problems occur.
Ask your dealer or Sony service centre to have it checked by
qualified service personnel.
When:
Mains lead is damaged.
Poor fitting of mains socket.
TV set is damaged by being dropped, hit or having something
thrown at it.
Any liquid or solid object falls through openings in the cabinet.
About LCD TV Temperature
When the LCD TV is used for an extended period, the panel
surrounds become warm. You may feel hot when touching there
by the hand.
WALL-MOUNT BRACKET (models with supplied
Wall-Mount Bracket only)
Below information shows the correct handling of the Wall-Mount
Bracket. Be sure to read this information thoroughly and use the
Wall-Mount Bracket correctly.
To Customers:
Be sure to observe the following precautions for safety to prevent
a serious injury through fire, electric shock, the product toppling
over, or the product dropping.
• Be sure to subcontract the installation to licensed contractors
and keep small children away during installation.
• Be sure to subcontract moving or dismounting of the TV to
licensed contractors.
• Do not remove screws, etc., after mounting the TV.
• Do not make alterations to the parts of the Wall-Mount Bracket.
• Do not mount any equipment other than the specified product.
• Do not apply any load other than the TV on the Wall-Mount
Bracket.
• Do not lean on or hang from the TV.
• Do not handle the TV with excessive force during cleaning or
maintenance.


