Samsung LE32D400E1W Stručná príručka spustenia

Kategória
Televízory
Typ
Stručná príručka spustenia

Táto príručka je tiež vhodná pre

LCD TV
User Manual
imagine the possibilities
Thank you for purchasing this Samsung product.
To receive more complete service, please register
your product at
www.samsung.com/register
Model _____________ Serial No. _____________
E-MANUAL
© 2011 Samsung Electronics Co., Ltd. All rights reserved.
Contact SAMSUNG WORLDWIDE
If you have any questions or comments relating to Samsung products, please contact the SAMSUNG customer care centre.
Country
Customer Care Centre
Web Site
ALBANIA 42 27 5755 -
AUSTRIA 0810 - SAMSUNG (7267864, € 0.07/min) www.samsung.com
BELGIUM 02-201-24-18 www.samsung.com/be (Dutch)
www.samsung.com/be_fr (French)
BOSNIA 05 133 1999 -
BULGARIA 07001 33 11 www.samsung.com
CROATIA 062 SAMSUNG (062 726 7864) www.samsung.com
CZECH 800 - SAMSUNG (800-726786) www.samsung.com
Samsung Zrt., česká organizační složka, Oasis Florenc, Sokolovská394/17, 180 00, Praha 8
DENMARK 70 70 19 70 www.samsung.com
FINLAND 030 - 6227 515 www.samsung.com
FRANCE 01 48 63 00 00 www.samsung.com
GERMANY 01805 - SAMSUNG(726-7864 € 0,14/Min) www.samsung.com
GREECE
"1. Για προϊόντα πληροφορικής και κινητής τηλεφωνίας
Από σταθερό 80111-SAMSUNG (80111 7267864), αστική χρέωση
Από κινητό 210 6897691
2. Για φωτογραφικές μηχανές, βιντεοκάμερες, τηλεοράσεις & οικιακές
συσκευές
Από κινητό και σταθερό 2106293100"
www.samsung.com
HUNGARY 06-80-SAMSUNG(726-7864) www.samsung.com
ITALIA 800-SAMSUNG(726-7864) www.samsung.com
KOSOVO +381 0113216899 -
LUXEMBURG 261 03 710 www.samsung.com
MACEDONIA 023 207 777 -
MONTENEGRO 020 405 888 -
NETHERLANDS 0900-SAMSUNG (0900-7267864) (€ 0,10/Min) www.samsung.com
NORWAY 815-56 480 www.samsung.com
POLAND 0 801 1SAMSUNG(172678) / 022-607-93-33 www.samsung.com
PORTUGAL 80820-SAMSUNG(726-7864) www.samsung.com
RUMANIA "1. 08010 SAMSUNG (72678) – doar din reţeaua Romtelecom, tarif local;
2. 021.206.01.10 – din orice reţea, tarif normal "
www.samsung.com
SERBIA 0700 Samsung (0700 726 7864) www.samsung.com
SLOVAKIA 0800-SAMSUNG(726-7864) www.samsung.com
SPAIN 902 - 1 - SAMSUNG (902 172 678) www.samsung.com
SWEDEN 0771 726 7864 (SAMSUNG) www.samsung.com
SWITZERLAND 0848 - SAMSUNG(7267864, CHF 0.08/min) www.samsung.com/ch
www.samsung.com/ch_fr/(French)
U.K 0330 SAMSUNG (7267864) www.samsung.com
EIRE 0818 717100 www.samsung.com
LITHUANIA 8-800-77777 www.samsung.com
LATVIA 8000-7267 www.samsung.com
ESTONIA 800-7267 www.samsung.com
TURKEY 444 77 11 www.samsung.com
LCD TV
User Manual
BN68-03717G
BN68-03717G-00
[LCD-BT]BN68-03717G-Cover-1.indd 1 2011-04-28 �� 5:08:32
English - 2
For more information on how to use the e-Manual (P.10)
Figures and illustrations in this User Manual are provided for reference only and may differ from actual product appearance.
Product design and specifications may be changed without notice.
Important Warranty Information Regarding Television Format Viewing
1. Functionalities related to Digital TV (DVB) are only available in countries/areas where DVB-T (MPEG2 and MPEG4 AVC) digital terrestrial
signals are broadcasted or where you are able to access to a compatible DVB-C (MPEG2 and MPEG4 AAC) cable-TV service. Please check
with your local dealer the possibility to receive DVB-T or DVB-C signal.
2. DVB-T is the DVB European consortium standard for the broadcast transmission of digital terrestrial television and DVB-C is that for the broadcast
transmission of digital TV over cable. However, some differentiated features like EPG (Electric Programme Guide), VOD (Video On Demand) and so
on, are not included in this specification. So, they cannot be workable at this moment.
3. Although this TV set meets the latest DVB-T and DVB-C standards, as of [August, 2008], the compatibility with future DVB-T digital terrestrial
and DVB-C digital cable broadcasts cannot be guaranteed.
4. Depending on the countries/areas where this TV set is used some cable-TV providers may charge an additional fee for such a service and
you may be required to agree to terms and conditions of their business.
5. Some Digital TV functions might be unavailable in some countries or regions and DVB-C might not work correctly with some cable service
providers.
6. For more information, please contact your local Samsung customer care centre.
The reception quality of TV may be affected due to differences in broadcasting method between the countries. Please check the TV
performance in the local SAMSUNG Authorized Dealer, or the Samsung Call Centre whether it can be improved by reconfiguring TV
setting or not.
Still image warning
Avoid displaying still images (like jpeg picture files) or still image element (like TV programme logo, panorama or 4:3 image format, stock or news
bar at screen bottom etc.) on the screen. Constant displaying of still picture can cause ghosting of LCD screen, which will affect image quality. To
reduce risk of this effect, please follow below recommendations:
• Avoid displaying the same TV channel for long periods.
• Always try do display any image on full screen, use TV set picture format menu for best possible match.
• Reduce brightness and contrast values to minimum required to achieve desired picture quality, exceeded values may speed up the burnout
process.
• Frequently use all TV features designed to reduce image retention and screen burnout, refer to proper user manual section for details.
Securing the Installation Space
Keep the required distances between the product and other objects (e.g. walls) to ensure proper ventilation.
Failing to do so may result in fire or a problem with the product due to an increase in the internal temperature of the product.
When using a stand or wall-mount, use parts provided by Samsung Electronics only.
• If you use parts provided by another manufacturer, it may result in a problem with the product or an injury due to the product falling.
The appearance may differ depending on the product.
Be careful when you contact the TV because some parts can be somewhat hot.
Installation with a stand. Installation with a wall-mount.
10 cm10 cm
10 cm
10 cm
10 cm
10 cm
10 cm
Correct Disposal of This Product (Waste Electrical & Electronic Equipment)
(Applicable in the European Union and other European countries with separate collection systems)
This marking on the product, accessories or literature indicates that the product and its electronic accessories (e.g. charger, headset,
USB cable) should not be disposed of with other household waste at the end of their working life. To prevent possible harm to
the environment or human health from uncontrolled waste disposal, please separate these items from other types of waste and
recycle them responsibly to promote the sustainable reuse of material resources. Household users should contact either the retailer
where they purchased this product, or their local government office, for details of where and how they can take these items for
environmentally safe recycling. Business users should contact their supplier and check the terms and conditions of the purchase
contract. This product and its electronic accessories should not be mixed with other commercial wastes for disposal.
Correct disposal of batteries in this product
(Applicable in the European Union and other European countries with separate battery return systems)
This marking on the battery, manual or packaging indicates that the batteries in this product should not be disposed of with other
household waste at the end of their working life. Where marked, the chemical symbols Hg, Cd or Pb indicate that the battery contains
mercury, cadmium or lead above the reference levels in EC Directive 2006/66. If batteries are not properly disposed of, these
substances can cause harm to human health or the environment. To protect natural resources and to promote material reuse, please
separate batteries from other types of waste and recycle them through your local, free battery return system.
[LCD-BT]BN68-03717G-L09.indb 2 2011-04-28 �� 2:46:50
English - 3
Accessories
Please make sure the following items are included with your TV. If any items are missing, contact your dealer.
The items’ colours and shapes may vary depending on the models.
y Remote Control & Batteries (AAA x 2)
y Owner’s Instructions
y Warranty Card / Safety Guide (Not available in some locations)
y Power Cord
y Cleaning Cloth
An administration fee may be charged if either
(a) an engineer is called out at your request and there is no defect in the product
(i.e. where you have failed to read this user manual)
(b) you bring the unit to a repair centre and there is no defect in the product
(i.e. where you have failed to read this user manual).
The amount of such administration charge will be advised to you before any work or home visit is carried out.
Viewing the Control Panel
The product colour and shape may vary depending on the model.
Control Panel
Remote control sensor Aim the remote control towards this spot on the TV.
Power Indicator Blinks and turns off when the power is on and lights up in standby mode.
SOURCE
E
Toggles between all the available input sources. In the on-screen menu, use this
button as you would use the ENTER
E
button on the remote control.
MENU Displays an on-screen menu, the OSD (on screen display) of your TV’s features.
Y
Adjusts the volume. In the OSD, use the
Y
buttons as you would use the
and buttons on the remote control.
z
Changes the channels. In the OSD, use the
z
buttons as you would use the
and buttons on the remote control.
P
(Power)
Turns the TV on or off.
Standby mode
Do not leave your TV in standby mode for long periods of time (when you are away on a holiday, for example). A small amount
of electric power is still consumed even when the power button is turned off. It is best to unplug the power cord.
[LCD-BT]BN68-03717G-L09.indb 3 2011-04-28 �� 2:46:51
English - 4
Viewing the Remote Control
A B C D
AD/SUBT.
P.SIZE
E-MANUAL
CONTENT
Turns the TV on and off.
Returns to the previous channel.
Cuts off the sound temporarily.
Changes channels.
Displays channel lists on the screen.
Displays the EPG (Electronic Programme
Guide).
Displays information on the TV screen.
Exits the menu.
Press to directly access to channels.
Adjusts the volume.
Alternately select Teletext ON, Double,
Mix or OFF.
Displays the main on-screen menu.
Quickly select frequently used functions.
Displays the My Downloads, Watch TV
and Source.
Returns to the previous menu.
Selects the on-screen menu items and
changes the values seen on the menu.
Buttons used in the Channel List,
Channel Manager, My Downloads
menu, etc.
E-MANUAL: Displays the e-Manual
guide.
P.SIZE: Selects the picture size.
AD/ SUBT.: Audio Description selection.
(Not available in some
locations) / Displays digital
subtitles.
Displays and selects the available video
sources.
Installing batteries (Battery size: AAA)
[LCD-BT]BN68-03717G-L09.indb 4 2011-04-28 �� 2:46:52
English - 5
Connecting to an Antenna
When the TV is initially powered on, basic settings proceed automatically.
Preset: Connecting the mains and antenna.
Plug & Play (Initial Setup)
When the TV is initially powered on, a sequence of on-screen prompts will assist in configuring basic settings. Press the
POWER
P
button. Plug & Play is available only when the Input source is set to TV.
To return to the previous step, press the Red button.
1
Selecting a language
Press the or button, then press the ENTER
E
button.
Select the desired OSD (On Screen Display) language.
P
POWER
2
Selecting Store Demo
or Home Use
Press the or button, then press the ENTER
E
button.
Select the Home Use mode. Store Demo mode is for retail
environments.
To return the unit’s settings from Store Demo to Home Use (standard):
Press the volume button on the TV. When the OSD volume is displayed,
press and hold MENU for 5 sec.
Store Demo is only for shop display. If you select it, several functions
are not able to use. Please select Home Use when you watch at home.
3
Selecting a country
Press the or button, then press the ENTER
E
button.
Select the appropriate country.
After selecting the country in the Country menu, some models may proceed with an
additional option to setup the pin number.
When you input the PIN number, 0-0-0-0 is not available.
The option may differ depending on country.
4
Setting the Clock
Mode
Set the Clock Mode automatically or manually.
Auto: Select the time zone where you are located. (depending on the country)
Manual: Allows you to manually set the current date and time.
5
Selecting an antenna
Press the or button, then press the ENTER
E
button.
Select the desired broadcasting signal.
6
Selecting a channel
Press the or button, then press the ENTER
E
button.
Select the channel source to memorise. When setting the antenna source to Cable, a step
appears allowing you to assign numerical values (channel frequencies) to the channels. For
more information, refer to Channel Auto Tuning.
Press the ENTER
E
button at any time to interrupt the memorisation process.
7
Enjoy your TV.
Press the ENTER
E
button.
If You Want to Reset This Feature...
Select System - Plug & Play (Initial Setup). Enter your 4 digit PIN number. The default PIN number is “0-0-0-0”. If you want to
change the PIN number, use the Change PIN function.
You should do Plug & Play (MENU System) again at home although you did in shop.
If you forget the PIN code, press the remote control buttons in the following sequence in Standby mode, which resets
the PIN to “0-0-0-0”: MUTE 8 2 4 POWER (on).
VHF/UHF Antenna
Cable
or
TV Rear Panel
The position of power input port
may differ depending on the model.
[LCD-BT]BN68-03717G-L09.indb 5 2011-04-28 �� 2:46:53
English - 6
Connecting to an AV devices
¦ Available devices: DVD, Blu-ray player, HD cable box, HD STB (Set-Top-Box) satellite
receiver, VCR, Digital Audio System, Amplifier, DVD Home Theatre, PC
HDMI OUT
Using an HDMI cable (up to 1080p)
HDMI IN 1(DVI), 2
x
If an HDMI to DVI cable is connected to the HDMI IN 1(DVI) port, the audio does not work.
x
The picture may not display normally (if at all) or the audio may not work if an external device that uses an older
version of HDMI mode is connected to the TV. If such a problem occurs, ask the manufacturer of the external
device about the HDMI version and, if out of date, request an upgrade.
x
Be sure to purchase a certified HDMI cable. Otherwise, the picture may not display or a connection error may
occur.
x
A basic high-speed HDMI cable or one with ethernet is recommended. This product does not support the
ethernet function via HDMI.
HDMI connection
TV Rear Panel
EXT
SCART connection
Using a Scart Cable
In Ext. mode, DTV Out supports MPEG SD Video and Audio only.
TV Rear Panel
[LCD-BT]BN68-03717G-L09.indb 6 2011-04-28 �� 2:46:54
English - 7
Connecting to a PC and Audio device
¦ Available devices: Headphone
Headphones connection
Using an Headphone Connection
Headphones
H
: You can connect your headphones to the headphones output on your set. While the headphones
are connected, the sound from the built-in speakers will be disabled.
x
Sound function may be restricted when connecting headphones to the TV.
x
Headphone volume and TV volume are adjusted separately.
TV Rear Panel
¦ Using an HDMI cable or HDMI to DVI Cable
Connecting through the HDMI cable may not be supported depending on the PC.
An HDMI cable supports digital video and audio signals, and does not require an audio cable.
Display Modes (HDMI/DVI Input)
LE32D400 / LE32D403 : Optimal resolution is 1360 x 768 @ 60Hz.
Mode Resolution
Horizontal Frequency (KHz) Vertical Frequency (Hz) Pixel Clock Frequency (MHz) Sync Polarity (H / V)
IBM
640 x 350 31.469 70.086 25.175 + / -
720 x 400 31.469 70.087 28.322 - / +
MAC
640 x 480 35.000 66.667 30.240 - / -
832 x 624 49.726 74.551 57.284 - / -
VESA DMT
640 x 480
31.469 59.940 25.175 - / -
37.861 72.809 31.500 - / -
37.500 75.000 31.500 - / -
800 x 600
37.879 60.317 40.000 + / +
48.077 72.188 50.000 + / +
46.875 75.000 49.500 + / +
1024 x 768
48.363 60.004 65.000 - / -
56.476 70.069 75.000 - / -
60.023 75.029 78.750 + / +
1360 x 768 47.712 60.015 85.500 + / +
AUDIO OUT
DVI OUT
HDMI OUT
PC connection
TV Rear Panel
[LCD-BT]BN68-03717G-L09.indb 7 2011-04-28 �� 2:46:57
English - 8
LE40D503 : Optimal resolution is 1920 X 1080 @ 60 Hz.
Mode Resolution
Horizontal Frequency (KHz) Vertical Frequency (Hz) Pixel Clock Frequency (MHz) Sync Polarity (H / V)
IBM
640 x 350 31.469 70.086 25.175 +/-
720 x 400 31.469 70.087 28.322 -/+
MAC
640 x 480 35.000 66.667 30.240 -/-
832 x 624 49.726 74.551 57.284 -/-
1152 x 870 68.681 75.062 100.000 -/-
VESA DMT
640 x 480 31.469 59.940 25.175 -/-
640 x 480 37.861 72.809 31.500 -/-
640 x 480 37.500 75.000 31.500 -/-
800 x 600 37.879 60.317 40.000 +/+
800 x 600 48.077 72.188 50.000 +/+
800 x 600 46.875 75.000 49.500 +/+
1024 x 768 48.363 60.004 65.000 -/-
1024 x 768 56.476 70.069 75.000 -/-
1024 x 768 60.023 75.029 78.750 +/+
1152 x 864 67.500 75.000 108.000 +/+
1280 x 1024 63.981 60.020 108.000 +/+
1280 x 1024 79.976 75.025 135.000 +/+
1280 x 800 49.702 59.810 83.500 -/+
1280 x 800 62.795 74.934 106.500 -/+
1280 x 960 60.000 60.000 108.000 +/+
1360 x 768 47.712 60.015 85.500 +/+
1440 x 900 55.935 59.887 106.500 -/+
1440 x 900 70.635 74.984 136.750 -/+
1680 x 1050 65.290 59.954 146.250 -/+
VESA DMT /
DTV CEA
1920 x 1080p 67.500 60.000 148.500 +/+
NOTE
x
For HDMI/DVI cable connection, you must use the HDMI IN 1(DVI) jack.
x
If an HDMI to DVI cable is connected to the HDMI IN 1(DVI) port, the audio does not work.
x
The interlace mode is not supported.
x
The set might operate abnormally if a non-standard video format is selected.
x
PC(D-Sub) input is not supported.
SERVICE
Connector for service only.
[LCD-BT]BN68-03717G-L09.indb 8 2011-04-28 �� 2:46:58
English - 9
Changing the Input Source
¦ Source List
Use to select TV or other external input sources such as DVD / Blu-ray players / cable box / STB satellite
receiver connected to the TV.
TV / Ext. / HDMI1/DVI / HDMI2 / USB
In the Source List, connected inputs will be highlighted.
PC(D-Sub) input is not supported. If you want to connect PC to the TV, use HDMI1/DVI input.
If you want to see connected devices only, move to Connected using or button.
Ext. always stay activated.
How to use Edit Name
In the Source, press the TOOLS button, and then you can set an external input sources name you want.
VCR / DVD / Cable STB / Satellite STB / PVR STB / AV Receiver / Game / Camcorder / PC / DVI PC / DVI Devices / TV /
IPTV / Blu-ray / HD DVD / DMA: Name the device connected to the input jacks to make your input source selection easier.
When connecting a PC to the HDMI IN 1(DVI) port with HDMI cable, you should set the TV to PC mode under Edit
Name.
When connecting a PC to the HDMI IN 1(DVI) port with HDMI to DVI cable, you should set the TV to DVI PC mode under
Edit Name.
When connecting an AV devices to the HDMI IN 1(DVI) port with HDMI to DVI cable, you should set the TV to DVI
Devices mode under Edit Name.
Information
You can see detailed information about the selected external device.
Connecting to a COMMON INTERFACE slot
Using the “CI or CI+ CARD”
To watch paid channels, the “CI or CI+ CARD” must be inserted.
y If you do not insert the “CI or CI+ CARD”, some channels will
display the message “Scrambled Signal”.
y The pairing information containing a telephone number, the “CI or
CI+ CARD” ID the Host ID and other information will be displayed in
about 2~3 minutes. If an error message is displayed, please contact
your service provider.
y When the configuration of channel information has finished, the
message “Updating Completed” is displayed, indicating the channel
list is updated.
NOTE
x
You must obtain a “CI or CI+ CARD” from a local cable service
provider.
x
When removing the “CI or CI+ CARD”, carefully pull it out with your hands since dropping the “CI or CI+ CARD” may
cause damage to it.
x
Insert the “CI or CI+ CARD” in the direction marked on the card.
x
The location of the COMMON INTERFACE slot may be different depending on the model.
x
“CI or CI+ CARD” is not supported in some countries and regions; check with your authorized dealer.
x
If you have any problems, please contact a service provider.
x
Insert the “CI or CI+ CARD” that supports the current antenna settings. The screen will be distorted or will not be seen.
y The image may differ depending on the model.
[LCD-BT]BN68-03717G-L09.indb 9 2011-04-28 �� 2:46:59
English - 10
How to use the e-Manual
Screen Display
1
4 5 6
2
3
Basic Features
Changing the Preset Picture Mode
Changing the Picture Options
}
Index
E
Enter
e
Exit
Changing the Preset Sound Mode
Adjusting Sound Settings
Adjusting Picture Settings
1 Currently displayed video, TV programme, etc.
2 The category list. Press or button to select
category you want.
3 Displays the sub-menu list. Use the arrow buttons on
your remote to move the cursor. Press ENTER
E
button to select the sub-menu you want.
4 } Blue (Index): Displays the index screen.
5 E Enter: Selects a category or sub-menu.
6 e Exit: Exit the e-Manual.
How to toggle between an e-Manual topic and the corresponding OSD menu(s).
Picture
Picture Mode : Standard
Backlight : 7
Contrast : 95
Brightness : 45
Sharpness : 50
Colour : 50
Tint (G/R) : G50/R50
Screen Adjustment
E-MANUAL
a
Try Now
Basic Features > Changing the Preset Picture Mode (1/1)
a
Try Now
b
Home
{
Zoom
}
Index
L
Page
e
Exit
This function is not enabled in some menus.
Method 1 Method 2
1. If you want to use the menu that corresponds to an
e-Manual topic, press the red button to select Try Now.
2. To return to the e-Manual screen, press the E-MANUAL
button.
1. Press the ENTER
E
button when a topic is displayed.
Are you sure?” appears. Select Yes, and then press the
ENTER
E
button. The OSD window appears.
2. To return to the e-Manual screen, press the E-MANUAL
button.
E-MANUAL
You can fi nd instructions about your TV’s features in the e-Manual in your TV. To
use, press the E-MANUAL button on your remote. Move the cursor using the up/
down/right/left buttons to highlight a category, then a topic, and then press the
ENTER
E
button. The e-Manual displays the page you want to see.
You can also access it through the menu:
O
MENU
m
Support e-Manual ENTER
E
To return to the e-Manual main menu, press the E-MANUAL button on the remote.
You cannot use Try Now directly if the TV is set to an external input source.
[LCD-BT]BN68-03717G-L09.indb 10 2011-04-28 �� 2:47:02
English - 11
Viewing the Contents
Basic Features > Changing the Preset Picture Mode (1/1)
2 3 4 5
a
Try Now
b
Home
{
Zoom
}
Index
L
Page
e
Exit
1
1 Contents Area: Contains the topic contents, if you
selected a sub-menu. To move previous or next
page, press the / button.
2 Try Now: Displays the OSD menu that corresponds
to the topic. To return to the e-Manual screen, press
the E-MANUAL button.
3 Home: Moves to the e-Manual home screen.
4 Zoom: Magnifies a screen. You can scroll through the
magnified screen by using / buttons.
5 L (Page): Moves to previous or next page.
Using the Zoom mode
U
Move
R
Return
Select the Zoom, and then press ENTER
E
to magnify
the screen. You can scroll through the magnified screen
by using the or buttons.
To return to the screen to normal size, press the
RETURN button.
How to search for a topic on the index page
This function may not be supported depending on the language.
1. If you want to search a keyword, press the blue button to select Index.
2. Press the or button to select a character order you want.
3. Press the or button to select a keyword you want to see, and then press the ENTER
E
button.
4. You can view the corresponding e-Manual instruction screen.
To close the Index screen, press the RETURN button.
[LCD-BT]BN68-03717G-L09.indb 11 2011-04-28 �� 2:47:03
English - 12
Installing the Wall Mount
The wall mount kit (sold separately) allows you to mount the TV on the wall.
For detailed information on installing the wall mount, see the instructions provided with the wall mount. Contact a technician for
assistance when installing the wall mount bracket.
Samsung Electronics is not responsible for any damage to the product or injury to yourself or others if you elect to install the
TV on your own.
Wall Mount Kit Specifications (VESA)
Wall mount kit is not supplied but sold separately.
Install your wall mount on a solid wall perpendicular to the floor. When attaching to other building materials, please contact
your nearest dealer. If installed on a ceiling or slanted wall, it may fall and result in severe personal injury.
NOTE
x
Standard dimensions for wall mount kits are shown in the table below.
x
When purchasing our wall mount kit, a detailed installation manual and all parts necessary for assembly are provided.
x
Do not use screws that do not comply with the VESA standard screw specifications.
x
Do not use screws longer than the standard dimension, as they may cause damage to the inside of the TV set.
x
For wall mounts that do not comply with the VESA standard screw specifications, the length of the screws may differ
depending on their specifications.
x
Do not fasten the screws too strongly, this may damage the product or cause the product to fall, leading to personal
injury. Samsung is not liable for these kinds of accidents.
x
Samsung is not liable for product damage or personal injury when a non-VESA or non-specified wall mount is used or
the consumer fails to follow the product installation instructions.
x
Do not exceed 15 degrees tilt when mounting this TV.
Product
Family
inches VESA Spec. (A * B)
Standard
Screw
Quantity
LCD-TV
19~22 75 X 75
M4
4
26 200 X 100
32~40 200 X 200 M6
46 400 X 400 M8
Do not install your Wall Mount Kit while your TV is turned on. It may result in personal injury due to electric
shock.
[LCD-BT]BN68-03717G-L09.indb 12 2011-04-28 �� 2:47:04
English - 13
Troubleshooting
If the TV seems to have a problem, first try this list of possible problems and solutions. If none of these troubleshooting tips
apply, visit “www.samsung.com”, then click on Support, or call Samsung customer service centre.
Issues Solutions and Explanations
The TV will not turn on. • Make sure the AC power cord is securely plugged in to the wall outlet and the TV.
• Make sure the wall outlet is working.
• Try pressing the POWER button on the TV to make sure the problem is not the remote. If
the TV turns on, refer to “Remote control does not work” below.
There is no picture/video. • Check cable connections (remove and reconnect all cables connected to the TV and
external devices).
• Set your external device’s (Cable/Set top box, DVD, Blu-ray etc) video outputs to match
the connections to the TV input. For example, if an external device’s output is HDMI, it
should be connected to an HDMI input on the TV.
• Make sure your connected devices are powered on.
• Be sure to select the TV’s correct source by pressing the SOURCE button on the remote
control.
• Reboot the connected device by reconnecting the device’s power cable.
The remote control does not work. • Replace the remote control batteries with the poles (+/–) in the right direction.
• Clean the sensor’s transmission window on the remote.
• Try pointing the remote directly at the TV from 5~6 feet away.
The cable/set top box remote control
doesn’t turn the TV on or off, or
adjust the volume.
• Programme the Cable/Set top box remote control to operate the TV. Refer to the Cable/
Set top box user manual for the SAMSUNG TV code.
You can keep your TV as optimum condition to upgrade the latest firmware on web site (samsung.com -> Support ->
Downloads) by USB.
This TFT LCD panel uses a panel consisting of sub pixels which require sophisticated technology to produce. However,
there may be a few bright or dark pixels on the screen. These pixels will have no impact on the performance of the
product.
Licence
List of Features
Excellent Digital Interface & Networking: With a built-in HD digital tuner, nonsubscription HD broadcasts can be viewed without
a cable box / STB (Set-Top-Box) satellite receiver.
[LCD-BT]BN68-03717G-L09.indb 13 2011-04-28 �� 2:47:04
English - 14
Securing the TV to the Wall
Caution: Pulling, pushing, or climbing onto the TV may cause the TV to fall. In particular, ensure that your
children do not hang over or destabilize the TV; doing so may cause the TV to tip over, resulting in serious
injuries or death. Follow all safety precautions provided on the included Safety Flyer. For added stability, install
the anti-fall device for safety purposes, as follows.
To avoid the TV from falling
1. Put the screws into the clamps and firmly fasten them onto the
wall. Confirm that the screws have been firmly installed onto the
wall.
You may need additional material such as an anchor
depending on the type of wall.
Since the necessary clamps, screws, and string are not
supplied, please purchase these additionally.
2. Remove the screws from the centre back of the TV, put the
screws into the clamps, and then fasten the screws onto the TV
again.
Screws may not be supplied with the product. In this case,
please purchase the screws of the following specifications.
Screw Specifications
x
For a 32 ~ 40 inch TV: M6
3. Connect the clamps fixed onto the TV and the clamps fixed onto
the wall with a strong string and then tie the string tightly.
NOTE
x
Install the TV near to the wall so that it does not fall backwards.
x
It is safe to connect the string so that the clamps fixed on the wall are equal to or lower than the clamps fixed on
the TV.
x
Untie the string before moving the TV.
4. Verify all connections are properly secured. Periodically check connections for any sign of fatigue for failure. If you have any
doubt about the security of your connections, contact a professional installer.
Storage and Maintenance
If you remove the attached sticker on the TV screen, clean the residues and then watch TV.
Do not spray water or a cleaning agent directly onto the
product. Any liquid that goes into the product may cause a
failure, fire, or electric shock.
Clean the product with a soft cloth dapped in a small amount
of water.
Wall
[LCD-BT]BN68-03717G-L09.indb 14 2011-04-28 �� 2:47:08
English - 15
Specifications
Environmental Considerations
Operating Temperature
Operating Humidity
Storage Temperature
Storage Humidity
10°C to 40°C (50°F to 104°F)
10% to 80%, non-condensing
-20°C to 45°C (-4°F to 113°F)
5% to 95%, non-condensing
TV System
Analogue: B/G, D/K, L, I (Depending on your country selection)
Digital: DVB-T/DVB-C
Colour/Video System
Analogue: PAL, SECAM, NTSC-4.43, NTSC-3.58, PAL60
Digital: MPEG-2 MP@ML, MPEG-4, H.264/AVC MP@L3, [email protected], [email protected]
Sound System BG, DK, L, NICAM, MPEG1, DD, DD+, HEAAC
HDMI IN
Video: 1080 24p, 1080p, 1080i, 720p, 576p, 480p
Audio: 2Ch Linear PCM 32/44.1/48kHz, 16/20/24bits.
Model Name LE32D400 LE32D403
Display Resolution 1360 x 768
Screen Size 32 inches 32 inches
Sound
(Output) 10 W X 2
Dimensions (WxDxH)
Body
With stand
784.4 X 88.8 X 502.9 (mm)
784.4 X 182.4 X 545.3 (mm)
784.4 X 98.1 X 502.9 (mm)
784.4 X 182.4 X 545.3 (mm)
Weight
Without Stand
With Stand
8.1 kg
9.2 kg
7.7 kg
8.7 kg
Model Name LE40D503
Display Resolution 1920 x 1080
Screen Size 40 inches
Sound
(Output) 10 W X 2
Dimensions (WxDxH)
Body
With stand
970.0 X 98.1 X 586.6 (mm)
970.0 X 206.9 X 629.1 (mm)
Weight
Without Stand
With Stand
11.6 kg
13.3 kg
Design and specifications are subject to change without prior notice.
For information about power supply, and more about power consumption, refer to the label attached to the product.
[LCD-BT]BN68-03717G-L09.indb 15 2011-04-28 �� 2:47:09
Čeština– 2
Další informace o použití Elektronické příručky (str.10)
Obrázky ailustrace vtéto uživatelské příručce slouží pouze pro informaci amohou se lišit od skutečného vzhledu výrobku.
Provedení aspecifikace výrobku se mohou změnit bez předchozího upozornění.
Důležité záruční informace týkající se formátu obrazu při sledování televizoru
1. Funkce spojené sdigitálním televizním vysíláním (DVB) jsou dostupné pouze vzemích/oblastech, kde jsou vysílány signály pozemního
digitálního vysílání DVB-T (MPEG2 a MPEG4 AVC) nebo kde je přístup ke kompatibilní službě kabelové televize DVB-C (MPEG2 a MPEG4
AAC). Ohledně příjmu signálů DVB-T nebo DVB-C kontaktujte svého místního prodejce.
2. DVB-T je evropský standard digitálního televizního vysílání přes pozemní vysílače a DVB-C je standard digitálního televizního vysílání vsítích
kabelových televizí. Vtěchto standardech však nejsou zahrnuty zvláštní služby, jako například EPG (Elektronický programový průvodce), VOD (Video-
On-Demand) adalší. Tyto služby proto nejsou vtuto chvíli podporovány.
3. Ačkoli tento televizor splňuje nejnovější standardy DVB-T a DVB-C kdatu [srpen, 2008], kompatibilitu sbudoucím pozemním digitálním
vysíláním DVB-T akabelovou televizí DVB-C nelze zaručit.
4. Vzávislosti na zemi nebo oblasti, ve které se nacházíte, mohou někteří poskytovatelé kabelového televizního vysílání za takovou službu vybírat
zvláštní poplatek amůže být třeba váš souhlas sjejich smluvními podmínkami.
5. Některé funkce digitální televize nemusí být vněkterých zemích dostupné aDVB-C nemusí uněkterých poskytovatelů služeb kabelové
televize fungovat správně.
6. Další informace získáte ve vašem středisku péče o zákazníky Samsung.
Kvalita příjmu televizoru může být negativně ovlivněna rozdíly ve způsobu vysílání vrůzných zemích. Prověřte výkon televizoru umístního
autorizovaného prodejce společnosti SAMSUNG nebo vcentru telefonické podpory společnosti Samsung azjistěte, zda jej lze zlepšit
změnou konfigurace nastavení televizoru.
Upozornění týkající se statických obrázků
Nezobrazujte na obrazovce statické obrázky (např. obrazové soubory JPEG) nebo statické obrazové prvky (např. logo televizního programu,
panoramatický formát obrazu nebo formát 4:3, informační pruh scenami akcií nebo se zprávami ve spodní části obrazovky atd.). Dlouhodobé
zobrazování statických obrazů může na obrazovce LCD způsobit zbytkový obraz anepříznivě tak ovlivnit kvalitu obrazu. Abyste snížili riziko vzniku
tohoto jevu, postupujte podle níže uvedených doporučení:
• Nezobrazujte po delší dobu stejný televizní kanál.
• Vždy se obraz snažte zobrazit na celou obrazovku. Použijte nabídku pro nastavení formátu televizního obrazu anastavte nejbližší mož
formát.
• Snižte hodnoty jasu akontrastu na minimum nutné pro dosažení požadované kvality obrazu. Nadměrné hodnoty mohou urychlit vznik
zbytkového obrazu.
• Používejte často všechny funkce televizoru určené pro zkrácení doby zobrazení stejného obrazu apro snížení rizika vytváření zbytkového
obrazu. Podrobné údaje naleznete vpříslušné části uživatelské příručky.
Zabezpečení prostoru instalace
Zajistěte potřebnou vzdálenost mezi výrobkem ajinými objekty (např. zdmi), aby byla umožněna dostatečná ventilace.
Vopačném případě může dojít kpožáru nebo problémům svýrobkem vdůsledku zvýšení teploty uvnitř výrobku.
Při použití stojanu nebo při montáži na zeď používejte pouze díly společnosti Samsung Electronics.
• Poijete-li díly jiho výrobce, může dot kpožím srobkem nebo ke zranění způsobenému jeho pádem.
Vzhled se může lišit vzávislosti na modelu.
Při kontaktu stelevizorem buďte opatrní, některé části mohou být horké.
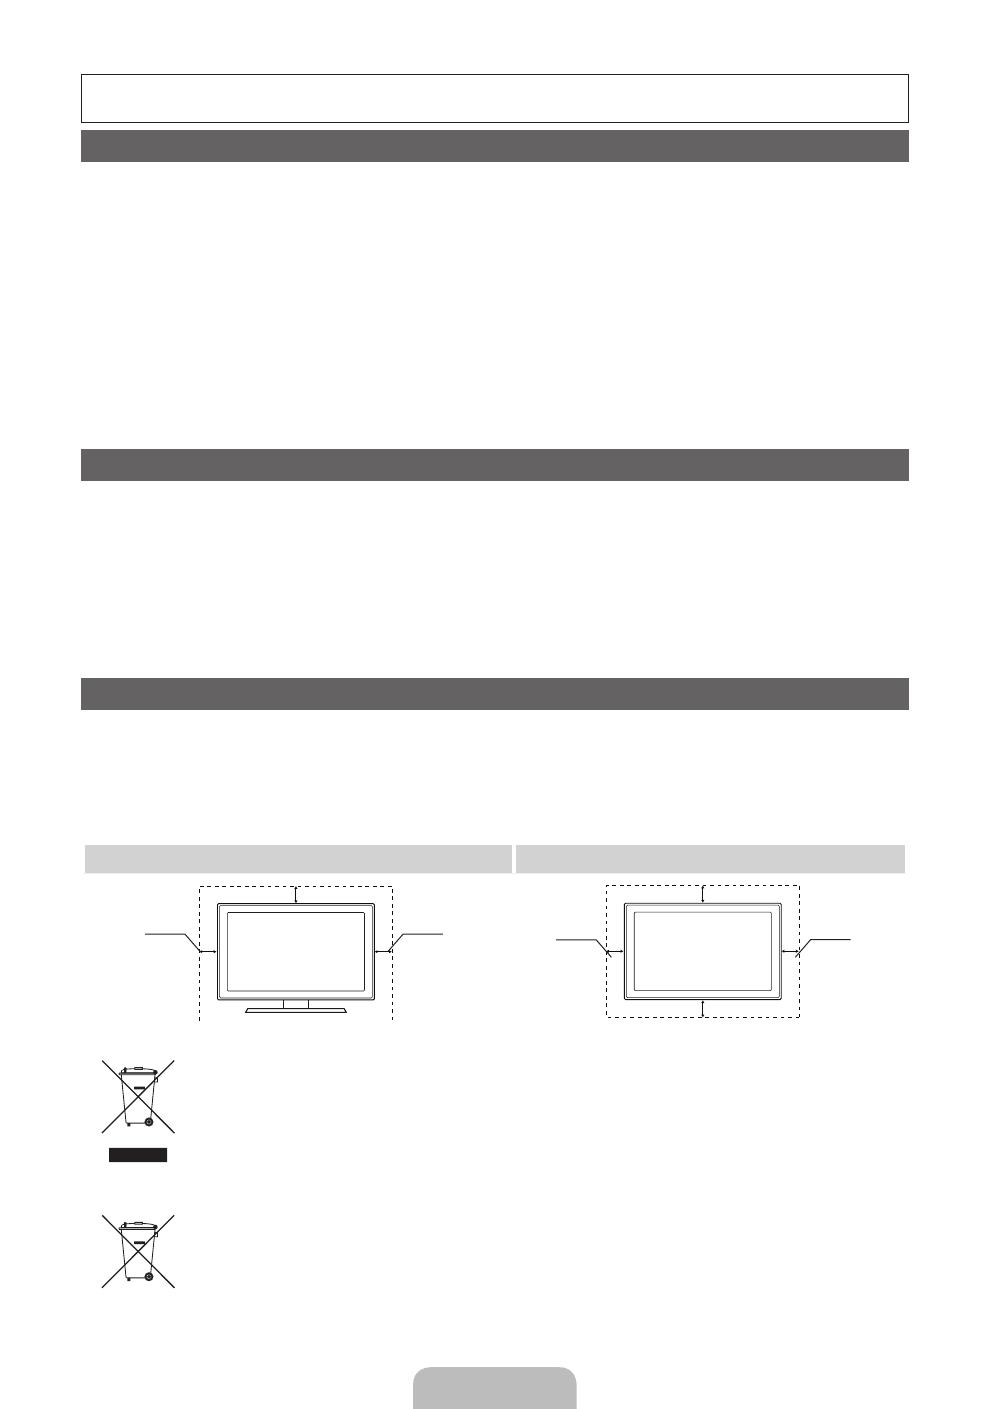
Instalace se stojanem. Instalace sdržákem na zeď.
10 cm10 cm
10 cm
10 cm
10 cm
10 cm
10 cm
Správná likvidace tohoto výrobku (odpady zelektrických aelektronických zařízení)
(Platí vEvropské unii avdalších evropských zemích se zavedenými systémy třídění odpadu.)
Toto označení na výrobku, na příslušenství avtištěných materiálech znamená, že by se tento výrobek ajeho elektronická příslušenství
(např. nabíječka, sluchátka či kabel USB) na konci životnosti neměly likvidovat společně sjiným domovním odpadem. Oddělením od
jiných druhů odpadu azodpovědnou recyklací podpoříte trvale udržitelné opakované využití materiálních zdrojů, zabráníte znečištění
životního prostředí nebo poškození zdraví způsobenému neřízenou likvidací odpadu. Domácí uživatelé by měli kontaktovat buď
maloobchodního prodejce, ukterého tento výrobek zakoupili, nebo úřad místní správy, avyžádat si informace otom, kam ajak
mohou tyto jednotky dopravit za účelem recyklace bezpečné pro životní prostředí. Firemní uživatelé by se měli obrátit na svého
dodavatele azkontrolovat podmínky kupní smlouvy. Tento výrobek ajeho elektronická příslušenství by neměla být slučována sjiným
hospodářským odpadem.
Správná likvidace baterií vtomto výrobku
(Platí vEvropské unii avdalších evropských zemích se zavedenými systémy samostatného sběru baterií.)
Toto označení na baterii, vpříručce nebo na obalu znamená, že by baterie na konci své životnosti neměla být likvidována společně
sjiným domovním odpadem. Označení chemickými symboly Hg, Cd nebo Pb znamená, že baterie obsahuje vyšší úroveň rtuti,
kadmia nebo olova, než určuje směrnice ES2006/66. Pokud nebudou baterie vhodně zlikvidovány, tyto látky mohou poškozovat
zdraví nebo životní prostředí. Vzájmu ochrany přírodních zdrojů aopětovného použití materiálů vás žádáme, abyste oddělili baterie od
ostatních typů odpadu arecyklovali je vrámci místního systému recyklace baterií.
[LCD-BT]BN68-03717G-L09.indb 2 2011-04-28 �� 2:47:10
Čeština– 3
Příslušenství
Přesvědčte se, zda jste obdrželi spolu stelevizorem všechny následující položky. Pokud některé položky chybí, obraťte se na prodejce.
Barva atvar výrobku se mohou ujednotlivých modelů lišit.
y Dálkový ovladač abaterie (AAA x 2)
y Návod kpoužití
y Záruční list / Bezpečnostní příručka (vněkterých zemích nejsou dostupné)
y Napájecí kabel
y Čisticí textilie
Správní poplatek bude účtován vpřípadě, že
(a) je na vaši žádost přivolán technik a na výrobku není odhalena žádná závada
(např. když jste řádně nenastudovali uživatelskou příručku),
(b) přinesete výrobek do opravárenského střediska ana výrobku není odhalena žádná závada
(např. když jste řádně nenastudovali uživatelskou příručku).
Výše takového správního poplatku vám bude oznámena před tím, než bude provedena jakákoli práce nebo než dojde
knávštěvě technika.
Seznámení sovládacím panelem
Barva itvar výrobku mohou být různé vzávislosti na modelu.
Ovládací panel
Snímač dálkového ovladače Zaměřte dálkový ovladač na tento bod na televizoru.
Indikátor napájení Blikne azhasne při zapnutí napájení asvítí vpohotovostním režimu.
SOURCE
E
Přepíná mezi všemi dostupnými vstupními zdroji. Toto tlačítko používejte vnabídce na
obrazovce stejným způsobem, jako tlačítko ENTER
E
na dálkovém ovladači.
MENU Slouží kzobrazení nabídky na obrazovce (OSD) sfunkcemi televizoru.
Y
Slouží knastavení hlasitosti. Vnabídce na obrazovce lze tlačítka
Y
použít
stejným způsobem jako tlačítka a na dálkovém ovladači.
z
Slouží kpřepínání kanálů. Vnabídce na obrazovce používejte tlačítka
z
stejným způsobem jako tlačítka a na dálkovém ovladači.
P
(Napájení)
Slouží kzapnutí či vypnutí televizoru.
Pohotovostní režim
Nenechávejte televizor vpohotovostním režimu delší dobu (například po dobu dovolené). Ivpřípadě, kdy je přístroj tlačítkem
napájení vypnutý, stále spotřebovává malé množství energie. Nejlepší je odpojit napájecí kabel.
[LCD-BT]BN68-03717G-L09.indb 3 2011-04-28 �� 2:47:10
Čeština– 4
Popis dálkového ovladače
A B C D
AD/SUBT.
P.SIZE
E-MANUAL
CONTENT
Zapnutí avypnutí televizoru.
Návrat na předchozí kanál.
Dočasné vypnutí zvuku.
Přepnutí kanálů.
Zobrazení seznamu kanálů na obrazovce.
Slouží kzobrazení elektronického
programového průvodce EPG.
Zobrazení informací na obrazovce
televizoru.
Zavře nabídku.
Stisknutím přejdete přímo ke kanálům
Slouží knastavení hlasitosti.
Můžete zvolit možnost Teletext
ZAPNUTÝ, Dvojitý, Mix nebo VYPNUTÝ.
Slouží kzobrazení hlavní nabídky na
obrazovce.
Rychlý výběr často používaných funkcí.
Zobrazí položky Můj obsah, Sledovat TV
a Zdroj.
Slouží knávratu do předchozí nabídky.
Slouží kvýběru položek nabídky na
obrazovce azměně hodnot zobrazených
vnabídce.
Tlačítka používaná vnabídce Seznam
kanálů, Správce kanálů, Můj obsah atd.
E-MANUAL: Slouží kzobrazení
elektronické příručky.
P.SIZE: Slouží k výběru velikosti obrazu.
AD/ SUBT.: Slouží k výběru zvukového
popisu. (vněkterých
oblastech nedostupné)
/ Slouží kzobrazení
digitálních titulků.
Zobrazení avýběr dostupných zdrojů
videa.
Instalace baterií (velikost baterií: AAA)
[LCD-BT]BN68-03717G-L09.indb 4 2011-04-28 �� 2:47:11
Čeština– 5
Připojení antény
Při prvním zapnutí televizoru automaticky proběhne základní nastavení.
Přednastavení: Připojení napájení aantény.
Funkce Plug & Play (Počáteční nastavení)
Při prvním zapnutí televizoru vám sekvence výzev na obrazovce pomůže provést konfiguraci základního nastavení. Stiskněte
tlačítko POWER
P
. Funkce Plug & Play je kdispozici pouze tehdy, když je položka vstup nastavena na hodnotu TV.
Chcete-li se vrátit kpředchozímu kroku, stiskněte červené tlačítko.
1
Výběr jazyka
Stiskněte tlačítko nebo apoté stiskněte tlačítko ENTER
E
.
Vyberte požadovaný jazyk nabídky na obrazovce.
P
POWER
2
Výběr možnosti
Prodejna nebo
Domácnost
Stiskněte tlačítko nebo apoté stiskněte tlačítko ENTER
E
.
Vyberte režim Domácnost. Režim Prodejna je určen pro použití
vmaloobchodní prodejně.
Jak vrátit nastavení přístroje zrežimu Prodejna do režimu Domácnost
(standardní nastavení): Stiskněte tlačítko hlasitosti na televizoru. Jakmile
se zobrazí hlasitost vnabídce na obrazovce, stiskněte tlačítko MENU
apodržte je 5sekund.
Režim Prodejna je určen pouze pro předvádění vprodejně. Pokud jej
vyberete, nebude možné použít několik funkcí. Pro sledování televizoru
doma vyberte režim Domácnost.
3
Výběr země
Stiskněte tlačítko nebo apoté stiskněte tlačítko ENTER
E
.
Vyberte příslušnou zemi.
Jakmile nastavíte vnabídce Ze vaši zemi, některé modely mohou nabídnout další
možnost – nastavení čísla PIN.
Při zadávání čísla PIN nelze použít číslo 0-0-0-0.
Možnosti se mohou lišit vzávislosti na zemi.
4
Nastavení možnosti
Režim hodin
Režim hodin lze nastavit automaticky nebo ručně.
Autom.: Vyberte svoje časové pásmo. (podle země)
Manuální: Umožňuje ruční nastavení aktuálního data a času.
5
Výběr antény
Stiskněte tlačítko nebo apoté stiskněte tlačítko ENTER
E
.
Vyberte požadovaný vysílací signál.
6
Výběr kanálu
Stiskněte tlačítko nebo apoté stiskněte tlačítko ENTER
E
.
Vyberte zdroj kanálu, který se má uložit do paměti. Pokud zdroj antény nastavíte na
možnost Kabel, zobrazí se krok postupu, který umožní kanálům přidělit číselné hodnoty
(kmitočty kanálů). Další informace najdete včásti Kanál Automatické ladění.
Proces ukládání do paměti můžete vlibovolném okamžiku přerušit stisknutím tlačítka
ENTER
E
.
7
Užijte si svůj televizor.
Stiskněte tlačítko ENTER
E
.
Obnovení původních nastavení této funkce...
Vyberte možnost SystémPlug & Play (Počáteční nastavení). Zadejte svůj čtyřmístný kód PIN. Výchozí kód PIN je „0-0-0-0“.
Chcete-li kód PIN změnit, použijte funkci Změna kódu PIN.
Je nezbytné, abyste doma opět provedli operaci Plug & Play (MENU Systém), a to i přesto, že jste ji provedli již vprodejně.
Zapomenete-li kód PIN, stiskněte vpohotovostním režimu tlačítka dálkového ovladače vnásledujícím pořadí. Obnovíte
tak původní kód PIN „0-0-0-0“: MUTE 8 2 4 POWER (zapnuto)
Anténa VHF/UHF
Kabel
nebo
Zadní panel televizoru
Umístění vstupního napájeho
konektoru se může lišit podle
modelu.
[LCD-BT]BN68-03717G-L09.indb 5 2011-04-28 �� 2:47:12
Čeština– 6
Připojení kAV zařízení
¦ Dostupná zařízení: přehrávač disků DVD/Blu-ray, kabelový přijímač HD, satelitní přijímač
(set-top box) HD, videorekordér, digitální audio systém, zesilovač, domácí kino DVD,
osobní počítač
HDMI OUT
Použití kabelu HDMI (až 1080p)
HDMI IN 1(DVI), 2
x
Je-li kabel HDMI-DVI připojen ke konektoru HDMI IN 1 (DVI), zvuk nebude fungovat.
x
Pokud je ktelevizoru připojeno externí zařízení, které používá starší verzi režimu HDMI, nemusí se obraz
zobrazovat normálně (nebo se nezobrazí vůbec), nebo nemusí fungovat zvuk. Pokud se vyskytnou takové potíže,
požádejte výrobce externího zařízení osdělení verze režimu HDMI, apokud je verze zastaralá, vyžádejte si
aktualizaci.
x
Nezapomeňte koupit certifikovaný kabel HDMI. V opačném případě se nemusí zobrazovat obraz nebo může dojít
k chybě připojení.
x
Doporučujeme použít základní vysokorychlostní kabel HDMI nebo kabel HDMI pro síť Ethernet. Tento produkt
funkci sítě Ethernet přes kabel HDMI nepodporuje.
Připojení kabelem HDMI
Zadní panel televizoru
EXT
Připojení SCART
Použití kabelu Scart
Vrežimu Ext. podporuje výstup DTV pouze video azvuk ve formátu MPEG SD.
Zadní panel televizoru
[LCD-BT]BN68-03717G-L09.indb 6 2011-04-28 �� 2:47:14
  • Page 1 1
  • Page 2 2
  • Page 3 3
  • Page 4 4
  • Page 5 5
  • Page 6 6
  • Page 7 7
  • Page 8 8
  • Page 9 9
  • Page 10 10
  • Page 11 11
  • Page 12 12
  • Page 13 13
  • Page 14 14
  • Page 15 15
  • Page 16 16
  • Page 17 17
  • Page 18 18
  • Page 19 19
  • Page 20 20
  • Page 21 21
  • Page 22 22
  • Page 23 23
  • Page 24 24
  • Page 25 25
  • Page 26 26
  • Page 27 27
  • Page 28 28
  • Page 29 29
  • Page 30 30
  • Page 31 31
  • Page 32 32
  • Page 33 33
  • Page 34 34
  • Page 35 35
  • Page 36 36
  • Page 37 37
  • Page 38 38
  • Page 39 39
  • Page 40 40
  • Page 41 41
  • Page 42 42
  • Page 43 43
  • Page 44 44
  • Page 45 45
  • Page 46 46
  • Page 47 47
  • Page 48 48
  • Page 49 49
  • Page 50 50
  • Page 51 51
  • Page 52 52
  • Page 53 53
  • Page 54 54
  • Page 55 55
  • Page 56 56
  • Page 57 57
  • Page 58 58
  • Page 59 59
  • Page 60 60
  • Page 61 61
  • Page 62 62
  • Page 63 63
  • Page 64 64
  • Page 65 65
  • Page 66 66
  • Page 67 67
  • Page 68 68
  • Page 69 69
  • Page 70 70
  • Page 71 71
  • Page 72 72
  • Page 73 73
  • Page 74 74
  • Page 75 75
  • Page 76 76
  • Page 77 77
  • Page 78 78
  • Page 79 79
  • Page 80 80
  • Page 81 81
  • Page 82 82
  • Page 83 83
  • Page 84 84
  • Page 85 85
  • Page 86 86
  • Page 87 87
  • Page 88 88
  • Page 89 89
  • Page 90 90
  • Page 91 91
  • Page 92 92
  • Page 93 93
  • Page 94 94
  • Page 95 95
  • Page 96 96
  • Page 97 97
  • Page 98 98
  • Page 99 99
  • Page 100 100
  • Page 101 101
  • Page 102 102
  • Page 103 103
  • Page 104 104
  • Page 105 105
  • Page 106 106
  • Page 107 107
  • Page 108 108
  • Page 109 109
  • Page 110 110
  • Page 111 111
  • Page 112 112
  • Page 113 113
  • Page 114 114
  • Page 115 115
  • Page 116 116
  • Page 117 117
  • Page 118 118
  • Page 119 119
  • Page 120 120
  • Page 121 121
  • Page 122 122
  • Page 123 123
  • Page 124 124
  • Page 125 125
  • Page 126 126
  • Page 127 127

Samsung LE32D400E1W Stručná príručka spustenia

Kategória
Televízory
Typ
Stručná príručka spustenia
Táto príručka je tiež vhodná pre