Electrolux EWF1141AESA Používateľská príručka

Kategória
Práčky
Typ
Používateľská príručka

Táto príručka je tiež vhodná pre

EWF1141AESA
EWF1141AEWA
EWF1142BESA
EWF1142BEWA
User Manual
Tài Liệu Hướng Dẫn Sử Dụng
2
40
Washing Machine
Máy Giặt
EN
VN
2 www.electrolux.vn
CONTENTS
1.1 Conditions Of Use
1.2 Child Safety
1.3 General Safety
1.4 Installation
1.5 Use
1. SAFETY INFORMATION
........................................................................................................ 4
.................................................................................................................. 5
............................................................................................................. 5
.................................................................................................................... 6
.............................................................................................................................. 6
2.1 Parts
2.2 Accessories
2.3 Load Sensor (Only Model EWF1141***)
2.4 Detergent Dosing Advice (Only Model EWF1141***)
2.
PRODUCT DESCRIPTION
............................................................................................................................ 7
................................................................................................................. 8
...................................................................... 9
................................................... 9
3.1 Control Panel Description
3.2 Program Chart
3.3 Program Options Compatibility
3.4 Options
3.5 Settings
3.6 Start/Pause ( ) and Add Clothes ( ) Touchpad
3.
CONTROL PANEL
........................................................................................... 10
............................................................................................................. 11
..................................................................................... 13
........................................................................................................................ 13
........................................................................................................................ 16
.................................................... 17
Visit our website to:
Warning / Caution-Safety information.
General information and tips
Environmental information.
Subject to change without notice.
WE’RE THINKING OF YOU
CUSTOMER CARE AND SERVICE
Thank you for purchasing an Electrolux appliance. You’ve chosen a product that brings
with it decades of professional experience and innovation. Ingenious and stylish, it has
been designed with you in mind. So whenever you use it, you can be safe in the
knowledge that you’ll get great results every time. Welcome to Electrolux.
We recommend the use of original spare parts.When contacting Service, ensure that
you have the following data available. The information can be found on the rating plate.
Model, PNC, Serial Number.
Get usage advice, brochures, trouble shooter, service information, buy accessories
& spare parts, online product registration : www.electrolux.vn
Adherence to the directions for use in this manual is extremely important for health and
safety. Failure to strictly adhere to the requirements in this manual may result in personal
injury, property damage and affect your ability to make a claim under the Electrolux
manufacturer’s warranty provided with your product. Products must be used, installed and
operated in accordance with this manual. You may not be able to claim on the Electrolux
manufacturer’s warranty in the event that your product fault is due to failure to adhere to
this manual.
IMPORTANT INFORMATION THAT MAY IMPACT YOUR
MANUFACTURER’S WARRANTY
Being ensured permissible content limitaon of some toxic chemicals
(RoHS compliant)
RoHS
Compliant
ENGLISH 3
5.1 Loading The Laundry
5.2 Using Detergent And Additives
5.3 Options Setting
5.4 Starting A Cycle ( )
5.5 Interruption Of A Program
5.6 Changing A Program
5.7 Changing The Options
5.8 Opening The Door
5.9 At The End Of The Program
5.10 When The Washing Program Is Completed, But There Is Water In The Drum
5.11 AUTO Off Mode
5.
DAILY USE
.................................................................................................... 18
.................................................................................... 18
............................................................................................................ 19
.................................................................................................. 20
............................................................................................ 20
................................................................................................... 20
................................................................................................ 20
........................................................................................................ 20
........................................................................................ 21
......... 21
......................................................................................................... 21
6.1 Sorting The Laundry
6.2 Temperatures
6.3 Before Loading The Laundry
6.4 Maximum Loads
6.5 Removing Stains
6.6 Detergents Type And Quantity Of Detergent
6.
WASHING HINTS
.................................................................................................... 22
............................................................................................................... 22
........................................................................................ 22
........................................................................................................... 22
.......................................................................................................... 22
............................................................... 23
8.1 External Cleaning
8.2 Descaling
8.3 After Each Wash
8.4 Maintenance Wash With “Tub Clean” Program
8.5 Cleaning The Dispenser Drawer
8.6 Cleaning The Drawer Recess
8.7 Cleaning The Pump
8.8 Cleaning The Water Inlet Filter
8.9 Frost Precautions
8.
CARE AND CLEANING
........................................................................................................ 25
..................................................................................................................... 25
.......................................................................................................... 25
........................................................... 25
.................................................................................. 25
...................................................................................... 26
...................................................................................................... 26
.................................................................................... 28
......................................................................................................... 29
9.1 Possible Failures
9.2 Emergency Door Opening
9.
TROUBLESHOOTING
........................................................................................................ 30
........................................................................................... 33
4.
BEFORE FIRST USE
....................................................................................................... 17
7.
INTERNATIONAL WASH CODE SYMBOLS
................................................................ 24
10.
TECHNICAL DATA
.......................................................................................................... 34
11.1 Unpacking
11.2 Positioning
11.3 Water Inlet
11.4 Water Drainage
11.5 Electrical Connection
................................................................................................................... 34
.................................................................................................................. 36
.................................................................................................................. 37
......................................................................................................... 37
................................................................................................. 39
11.
INSTALLATION
12.1 Packaging Materials
12.2 Old Machine
12.3 Ecological Hints
.................................................................................................. 39
............................................................................................................... 39
......................................................................................................... 39
12.
ENVIRONMENT CONCERNS
4 www.electrolux.vn
SAFETY INFORMATION
In the interest of your safety and to ensure the correct
use, before installing and first using the appliance, read
this user manual carefully, including its hints and
warnings.
This appliance is intended to be used in household and
similar applications such as:
farm houses;
by clients in hotels, motels, and other residential type
environments;
1.1 Conditions Of Use
To avoid unnecessary mistakes and accidents, it is
important to ensure that all people using the appliance
are thoroughly familiar with its operation and safety
features.
Save these instructions and make sure that they remain
with the appliance if it is moved or sold, so that everyone
using it through its life will be properly informed on
appliance use and safety.
1.
bed and breakfast type environtments;
areas for communal use in blocks of flats or in
launderettes.
staff kitchen areas in shops, offices and other working
environtment;
WARNING! The appliance must not be supplied
through an external switching device, such as timer,
or connected to a circuit that is regularly switched on
and off by utility.
ENGLISH 5
This washing machine is not intended for use by
young children or infirm persons without supervision.
Young children should be supervised to ensure that
they do not play with the appliance.
The packaging components (e.g. plastic film,
polystyrene) can be dangerous to children - danger of
suffocation! Keep them out of children’s reach.
Keep all detergents in a safe place out of children’s
reach.
1.2 Child Safety
1.3 General Safety
It is dangerous to alter the specifica-
tions or attempt to modify this product
in any way.
During high temperature wash
program the door glass may get hot.
Do not touch it!
Make sure that small pets do not
climb into the drum. To avoid this,
please check inside the drum before
using the appliance.
Any objects such as coins, safety
pins, nails, screws, stones or any
other hard, sharp material can cause
extensive damage and must not be
placed into the machine.
Only use manufacturer’s
recommended quantities of fabric
softener and detergent. Damage to
the fabric or appliance can occur if
you exceed the recommended
amount.
Wash small items such as socks,
laces, washable belts etc in a
washing bag or pillow case as it is
possible for such items to slip down
between the tub and the inner drum.
Do not use your washing machine to
wash articles with whalebones,
material without hems or torn
material.
Make sure that children or pets do not climb into the
drum.
This machine is provided with child safety lock option
( ) to prevent children playing with the control panel.
(see page 16)
This appliance is not intended for use
by persons (including children) with
reduced physical, sensory or mental
capabilities, or lack of experience and
knowledge, unless they have been
given supervision or instruction
concerning use of the appliance by a
person responsible for their safety.
Always unplug the appliance and turn
off the water supply after use, clean
and maintenance.
6 www.electrolux.vn
Never use the washing machine if
the power supply cable, the control
panel, the working surface or the
base are damaged so that the inside
of the washing machine is accessi-
ble.
This appliance is heavy. Care should
be taken when moving it.
When unpacking the appliance, check
that it is not damaged. If in doubt, do
not use it and contact the Service
Centre.
All packing and transit bolts must be
removed before use. Serious damage
can occur to the product and to
property if this is not adhered to. See
relevant section in the user manual.
Under no circumstances should you
attempt to repair the machine
yourself. Repairs carried out by
inexperienced persons may cause
injury or serious malfunctioning.
Contact your local Service Centre.
Always insist on genuine spare parts.
1.4 Installation
After having installed the appliance,
check that it is not standing on the
inlet and drain hose and the worktop
is not pressing the electrical supply
cable.
If the appliance is installed on a
carpeted floor, please adjust the feet
in order to allow air to circulate freely.
Always be sure, that there is no water
leakage from hoses and their
connections after the installation.
Any plumbing work required to install
this appliance should be carried out
by a qualified plumber.
Any electrical work required to install
this appliance should be carried out
by a qualified electrician.
Only wash fabrics which are
designed to be machine washed.
Follow the instructions on each
garment label.
Do not overload the appliance. See
the relevant section in the user
manual.
Before washing, ensure that all
pockets are empty and buttons and
zips are fastened. Avoid washing
frayed or torn articles and treat stains
such as paint, ink, rust, and grass
before washing.
Garments which have been in
contact with volatile petroleum
products should not be machine
washed. If volatile cleaning fluids are
used, care should be taken to ensure
that the fluid is removed from the
garment before placing in the
machine.
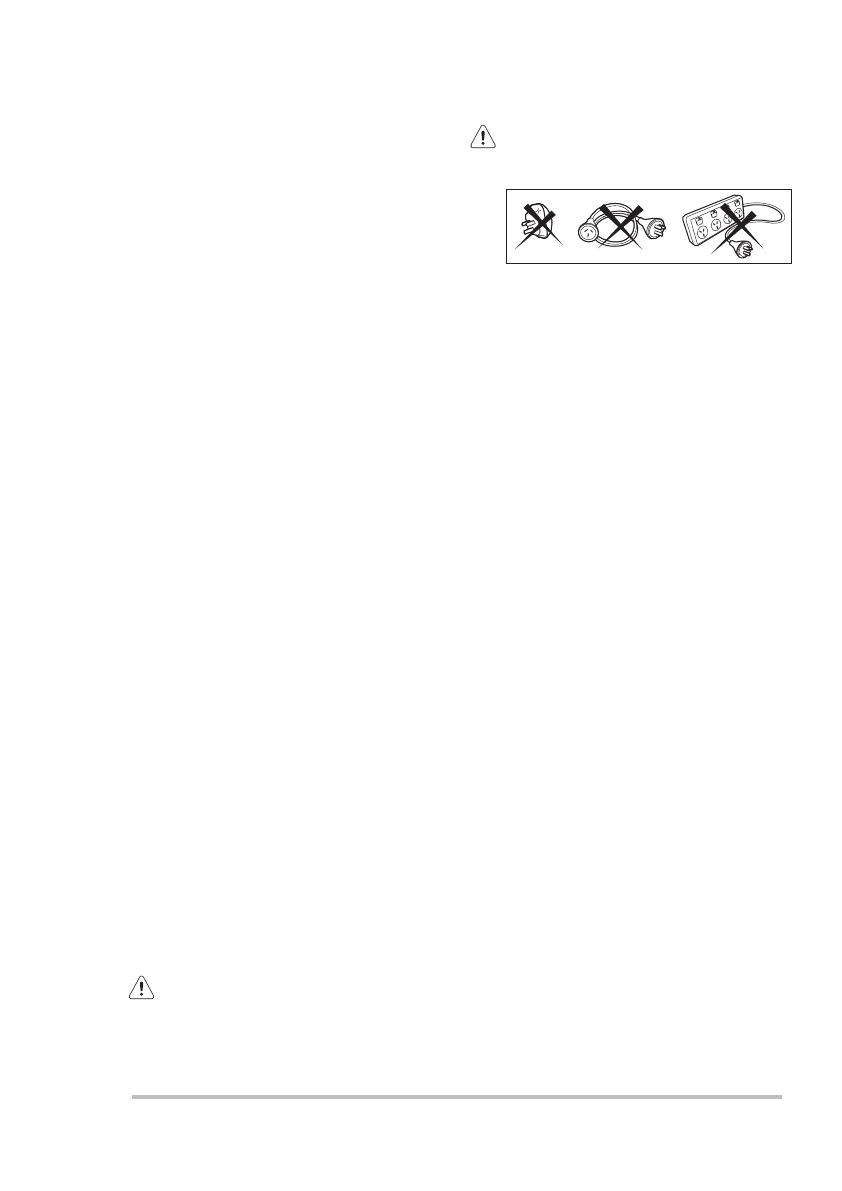
Never pull the power supply cable to
remove the plug from the socket;
always take hold of the plug itself.
1.5 Use
May cause electric shock! if the
machine is not connected to an
earthed/ground system. DO NOT
touch the wet clothes and metal
parts.
For safety reasons do not use
double adaptors, extension
cords and multi-plug adapters.
ENGLISH 7
PRODUCT DESCRIPTION2.
Detergent/Softener
Dispenser
(see page 18)
Cabinet
Front Panel
Door
Drain Pump Filter
(see page 26)
Level Adjustment
Feet (Front)
Level Adjustment
Feet (Back)
Water Inlet Hose
(see page 37)
Transit Bolts &
Hose Support
Transit Bolts &
Hose Support
Mains Cable
Water Drain Hose
(see page 37)
2.1 Parts
Worktop
Control Panel
(see page 10)
Transit Bolts
8 www.electrolux.vn
Drain Pump
Filter Door
2.2 Accessories
To connect the drain hose
on the edge of a sink.
To close the holes on
the rear side of the
cabinet after the
removal of the transit
bolts.
Plastic Caps
Plastic Hose Guide
Drain Pump
Filter
Detergent/Softener Dispenser
(For more informations, see page 18, 25)
Transit Bolt (when remove)
Transit bolts must be removed
before using the appliance.
Drain Pump Filter (when open)
Level Adjustment Feet
Drum Lifter
Stainless
Steel
Washing
Drum
Door (when open)
(for more informations, see page 18)
Softener
Prewash
Main Wash
ENGLISH 9
2.3 Load Sensor
(Only Model
EWF1141***
)
This machine has “Load Sensing Device”
which shows how much load you put in
the machine and maximum load
recommended for selected wash
program.
The display will show “ ” when
max limit is reached for selected
program.
On the display, the weight of the
laundry updates by 0.5 kg steps.
The weight is a general indication that
changes with the type of the laundry.
The weight shown on display is
an approximate weight only.
For correct operation of the load
sensor, activate the appliance
and set a wash program BEFORE
loading the laundry in the drum.
The display shows these
indicators when the door is
open.
-
-
-
If you exceed the max weight limit of a
program, the symbol “ ” will start
flashing as long as the load in the
drum is more than recommended load,
even after the door is closed.
-
When the door is closed after the laundry
load. The display also gives the indication
about the detergent dosing advice. It can
be displayed as either percent (%) or
milliliter (ml) if you has set a valid value in
the Detergent Dosing Setting menu.
By default, the detergent quantity
indication is given as a percentage.
100% is the maximum detergent quantity
(quantity as per the product
manufacturers’ instructions) that you can
put in the “ ” compartment of the
detergent drawer.
You can set the indication as “ to
have more precision, by pressing
“Vapour” and “Prewash” at the same time
for approximately 3 seconds.
Press “Time Manager” and “Delay End”
touchpads to scroll up and down to
define a certain amount of detergent (in
ml) to correspond the percentage
dosing advice as manufacturer
recommendation on the packaging
which is the 100% equivalent.
For the maximum detergent quantity,
see the detergent manufacturer
recommendation on packaging.
You can set 100% equivalent 0 ml
to 330 ml.
To save and exit the settings mode,
press and hold “Prewash” and “Stain”
at the same time for approximately 3
seconds.
-
-
-
2.4 Detergent Dosing Advice
(Only Model
EWF1141***
)
Temperature
(Symbol “ ” represents Cold water)
10 www.electrolux.vn
CONTROL PANEL3.
3.1 Control Panel Description
15 12 1014 13 11
2 51 3 7 8 94 6
1
2
3
4
5
7
8
6
9
Program Selector Knob
Vapour Touchpad
Sensor Wash Touchpad
On/Off Button
Stain Touchpad
Save Favourite Program Option
Child Lock Option
Remote Touchpad
10
11
12
13
Time Manager Touchpad
Delay End Touchpad
14
15
Display
Temperature Selection Touchpad
Spin Selection Touchpad
Start/Pause and Add Clothes Touchpad
Prewash Touchpad
Display
N
M
L
K J I H
A BC D
G
E
F
A)
B)
C)
D)
E)
F)
H)
I)
J)
K)
L)
M)
N)
Child Lock Icon
Remote Icon
Delay End Icon
Door Lock Icon
Program Time
Time Manager Level
Ultramix phase,
Spin phase,
Vapour phase
Wash phase,
Rinse phase,
Add Clothes Icon
Anticrease Phase Icon
Extra Silent Icon
(Only model EWF1141***)
Rinse Hold Icon
Spin Speed
Program Phase Indication Icon:
G)
Maximum Load Capacity of Selected
Program /
Detergent Dosing Advice
(Only model
EWF1141***)
ENGLISH 11
3.2 Program Chart
Program;
Temperature
range
Cold to 90°C
1400
rpm
11 kg
1200
rpm
4 kg
800
rpm
3 kg
1400
rpm
11 kg
1400
rpm
11 kg
1400
rpm
11 kg
1200
rpm
4 kg
800
rpm
1.5 kg
1400
rpm
5.5 kg
1.5 kg
Type of load and soil level Max.
Spin
Speed
Max. Load
(Dry
Clothes)
30°C
60°C
Vapour
Refresh
Lightly soiled synthetics or mixed fabrics.
This cycle removes odours and helps to dewrinkle
the laundry.
Cold to 60°C
Cold to 60°C
30°C to 60°C
Bedding; Special program for one synthetic blanket, duvet,
bedspread and so on. (Adjust wash time according
to soil level. See Time Manager table on page 14)
Rinse + Spin To rinse and spin the laundry.
Spin
To spin the laundry and drain the water in
the drum.
Energy
Saver;
40°C and
60°C
1)
White and colourfast cotton. Set this program to
have a good washing results and decrease the
energy consumption. The time of the washing
program is extended.
Coloured cotton e.g. shirts, blouses, towels and
undergarments with normal level of soil.
Baby cotton clothes and delicate knitting items with
normal soil.
Cottons;
Mixed;
Daily 60;
Quick 15;
Baby Care;
Tub Clean;
For cleaning the tub.
Do not add detergent.
White and coloured cotton. (Adjust wash time
according to soil level. See Time Manager table on
page 14)
Synthetic or mixed fabric items. (Adjust wash time
according to soil level. See Time Manager table on
page 14)
Cold to 40°C
You can send any additional program from Mobile
Application to store at this program position and
can recall to using it everytime when you rotate
program knob to this position. This can be done
through the App.
App Program
Program “Outdoor” is the default stored
program from factory.
12 www.electrolux.vn
1) Energy Saver Program with 60degC option selected is recommended for a full load of
normally soiled cotton and is the Energy and Water rating label program.
Program;
Temperature
range
1200
rpm
2 kg
1200
rpm
4 kg
Type of load and soil level Max.
Spin
Speed
Max. Load
(Dry
Clothes)
Cold to 40°C
Cold to 40°C
Specially tested program for woollen garments
bearing the “Pure new woollen, non-shrink,
machine washable” label.
Delicates;
Wool ;
Favourite Recall you favourite program.
Delicate fabrics such as acrylics, viscose, polyester
items. (Adjust wash time according to soil level.
See Time Manager table on page 14)
Woolmark Apparel Care - Blue
The wool wash cycle of this machine has been approved by The
Woolmark Company for the washing of wool garments labelled as
“hand wash” provided that the garments are washed according
to the instructions issued by the manufacturer of this washing machine.
Follow the garment care label for drying and other laundry instructions.
M1361
The Woolmark symbol is a Certification mark in many countries.
The door stays locked with the water
in the drum. To continue the cycle,
you must press (Start/Pause).
ENGLISH 13
Temperature Touchpad
Press this touchpad repeatedly to increase
or decrease the wash temperature if you
want your laundry to be washed at a
temperature different from the one
proposed by the washing machine.
Spin Selection Touchpad
Press this touchpad repeatedly to increase
or decrease the spin speed or select Rinse
Hold, if you want your laundry to be spun
at a speed different from the one proposed
by the washing machine.
No spin option eliminates all the spin
phases and increase the number of
rinses.
No Spin ( )
By selecting this option the water of the last
rinse is not emptied out and the drum turns
regularly to prevent the laundry creases.
The door is still locked to indicate that the
water must be emptied out.
Rinse Hold ( )
3.4 Options
By selecting this option, the machine will
not drain the water of the last rinse to avoid
wrinkling the laundry. All spinning phases
are suppressed. This washing cycle is very
quiet, and can be selected at night or other
appropriate times.
Extra Silent ( ) (Only Model
EWF1141***)
The door stays locked with the water
in the drum. To continue the cycle,
you must press (Start/Pause).
3.3 Program Options Compatibility
Program
Option
Cottons
Mixed
Bedding
Energy Saver
Vapour Refresh
Tub Clean
Spin
Rinse + Spin
Baby Care
Quick 15
Daily 60
Wool
Delicates
Favourite
App Program
2)1)3)
1) “Vapour” option can be combined with temperature 40 to 90 °C only.
2) “Stain” option can be combined with temperature 40 to 90 °C only.
3) “Extra Silent” option, only in model
EWF1141***
.
Time
Manager
Prewash StainDelay
End
VapourSensor
Wash
No
Spin
Rinse
Hold
Extra
Silent
14 www.electrolux.vn
Delay End ( ) Touchpad
Time Manager
This option allows you to adjust the wash
time. Press this touchpad repeatedly to
decrease or increase the wash time
according to the soil level of your wash.
Use the table below as a guide.
Before you start the program, this option
makes it possible to define the end of the
washing program from minimum of 1 hour
to maximum of 20 hours.
If program duration is longer than
3 hours, minimum Delay End
option starts from 4 hours.
Time Manager function is not
available when is on.
After selecting Delay End time, press
Start/Pause touchpad to start the
program. Machine will then countdown
and update time on the display every
hours until it reaches the starting point of
the wash cycle.
Press the Delay End touchpad to choose
the end time as you wish. The display
shows the number of hours and the
indicator beside the touchpad is on.
For example, if the program duration of
your selected program is 3.20 hours and
you define the “Delay End” time to 6
hours. This means your wash program
will finish in 6 hours. (See diagram)
3.20 hrs.2.40 hrs.
Working Cycle
“Delay End” Time : 6 hrs.
Pressed
Start/Pause
End of
Cycle
Start the
Program
Countdown
This option must be selected after
choosing the wash program, and
before pressing the “Start/Pause”
touchpad.
If you wish to modify or cancel Delay End
option after starting the program, follow
the steps below:
set the washing machine to PAUSE by
pressing “Start/Pause” touchpad;
press the “Start/Pause” to start the
program.
deselect this option by pressing
“Delay End” touchpad repeatedly till
the display shows delay time “ ”;
Soil Level
>>Light Medium >> Heavy
( ) Touchpad
Select “ ” option to turn ON
the sensors for the dirt and detergent
residue.
The “SensorWash” is switched ON
by default. If you want to turn OFF
the sensor press this touchpad
once. (Please see the table
“Program Options Compatibility”
for which programs can be used
with this option.)
The initial time displayed on
the control panel indicates the
time needed for the maximum
dirt level.
When using this option, the washing
machine will automatically check the dirt
level and detergent residue in your
laundry. It will automatically adjust the
washing time and numbers of rinses
according to the load to make sure that
your clothes are really clean.
The SensorWash technology consist of 2
different sensors for detection:
1) The 1
st
Turbidity sensor detects the dirt
level at the start of cycle and automati-
cally calculates the actual time needed
to remove the level of dirt in the wash;
from low dirt levels all the way to the
maximum dirt level.
ENGLISH 15
Prewash ( ) Touchpad
Select this option if you wish your laundry
to be pre-washed before the main wash.
Use this option for heavy soil. The
indicator of this option will be on.
Stain Touchpad
Press this touchpad to add the stain
phase to a program. The indicator of this
option comes on.
Use this function for laundry with hard
stains to remove.
When you set this function, put the stain
remover into “ ” compartment.
Select this option to add approximately
30 minutes of tumbling in vapour during
the wash cycle. Vapour helps open fabric
fibers up to allow laundry additives to
release tough stains. The indicator of this
option will be on.
Vapour ( ) Touchpad
Vapour may not necessarily be visible
inside the drum during a vapour wash
cycle. Vapour is created below the
drum and allowed to naturally rise into
the clothes.
At the end of the Vapour cycle, the
clothes will be warmer, softer and
detached from the drum.
If Vapour option is selected, rinse
temperatures will be elevated.
During a vapour cycle, you may notice
vapour exiting from the drain hose of the
washing machine, this is normal and
there is no cause for alarm.
Vapour may not be present during the
entire vapour wash cycle.
Vapour function is more effective with
half load.
NOTE
When you set this function, put the
detergent into the “ ” compartment.
This function increases the program
duration.
This function increases the program
duration.
Stain option can be combined with
temperature 40 to 90 °C only.
Please see details of detergent
usage at “Detergents Type and
Quantity of Detergent”
2) The 2
nd
Conductivity sensor will check
the amount of detergent residue after
the first rinse and the machine will
calculate the optimum number of
rinses (Maximum of 2 additional
rinses) needed to make sure that the
detergent residue is properly removed.
Remote ( ) Touchpad
This option allows you to connect
washing machine to Wi-Fi network and to
link it to your smart phone.
By this functionality you can receive
notifications, control and monitor your
washing machine from your mobile
devices.
To connect the washing machine with
your smart phone you need:
When the door is open, remote
functions are disabled.
Connection setting and other
suggestions please refer to attached
leaflet of this user manual.
WI-FI specification requirements:
Wireless network at home with internet
connection enabled.
Smart Phone connected to wireless
network.
Frequency
Protocol
Max Power
2.4 GHz according to
local country regulation
IEEE 802.11b/g/n
According to local country
regulation
16 www.electrolux.vn
Save Favourite ( ) Program
3.5 Settings
Child Safety Lock ( ) Option
Your appliance is provided with CHILD
SAFETY LOCK which permits you to
leave the appliance unsupervised with
the door closed without having to worry
that children might be injured by or cause
damage to the appliance.
Set this option after pressing the
Start/Pause touchpad.
To activate the function, press and
hold “Prewash” touchpad about
2 seconds until the display shows the
icon “ ”.
To set “Child Lock” option:
This setting permits you to either enable
or disable the buzzer at the end of the
program. As an example, you might wish
to disable this buzzer when you start a
wash when going to bed, so that when the
wash finished approximately 1 hour later,
it will not disturb you through the night.
Error warning beeps such as critical
faults are not disabled.
Enabling/Disabling End-Of-Wash
Buzzer
To deactivate the function, press and
hold “Prewash” touchpad about
2 seconds until the icon “ ” goes off.
This function remains enabled
even after the appliance is
switched off.
The touchpads are locked
(except for the On/Off button).
To disable the buzzer sound, press
“SensorWash ( ) and Vapour ( )”
touchpads at the same time about
3 seconds, the icon “ ” will show
on display along with buzzer sound.
To return to default configuration press
these 2 touchpads at the same time
about 3 seconds, the icon “ ” will
show on display along with buzzer
sound.
Program settings that are frequently used
can be saved (e.g. Cotton, 60°C, 1200
rpm, with Prewash and Vapour).
To program/re-program Favourite with
your own selections and save them,
proceed as follows:
If you press any touchpad while
Child Lock is activated, the icon
will flash on display 3 times
along with buzzer sound.
App Program cycle cannot be
saved as a Favourite on the
appliance.
To recall the favourite wash program,
turn selector knob to “Favourite ”
program. You will get acknowledgement
on the screen when the Favourite
program is loaded.
1. Put machine in Stand-By mode.
2. Select your desired wash settings.
3. To save favourite program, press and
hold “Vapour ” touchpad about
2 seconds and you will hear “Bip, Bip”
sound and “Favourite” LED is flashing.
ENGLISH 17
3.6 Start/Pause ( ) and
Add Clothes ( ) Touchpad
This touchpad has 2 functions:
Start/Pause ( )1.
To interrupt a program which is
running, press this touchpad to pause
the machine, the Start/Pause pilot light
flashes.
After you have selected the desired
program and options, press this
touchpad to start the machine. The
Start/Pause pilot light will stop flashing
and remain lit until the water level is
above the bottom edge of the door
then pilot light goes OFF. If you have
selected a “Delay End” option, the
countdown will begin and will be
shown on the display.
BEFORE FIRST USE4.
Ensure that the electrical and water
connections comply with the
installation instructions.
Put 2 litres of water in the detergent
compartment for washing phase. This
activates the drain system.
1.
2.
3.
Select a Cottons cycle at 90 °C,
without any laundry in the machine, to
remove any manufacturing residue
from the drum and tub then start the
machine.
To restart the program from the point
at which it was interrupted, press this
touchpad again, the Start/Pause pilot
light will stop flashing.
Add Clothes ( )2.
To add clothes:
Pressing the “Start/Pause”
touchpad to pause the program.
You can only add clothes when
the icon “ ” shown on the
display.
1.
2.
Resume the program by pressing
“Start/Pause” touchpad again.
4.
Add clothing and close the door.
3.
During installation or before first use
you may observe some water in the
machine. This is a residual water left in
the machine after a full functional test
in the factory to ensure the machine is
delivered to customers in perfect
working order and is no cause for
concern.
NOTE
Wait for the machine to come to a
complete stop before opening the
door (wait for door lock “ ” icon
to turn off).
18 www.electrolux.vn
DAILY USE5.
Press the On/Off button to turn on the
washing machine. Turn the knob to
set a program. The washing machine
will propose a temperature and
automatically select the spin value
provided for the program you have
chosen.
Check and remove objects (if there
are any) that could be trapped in the
fold.
1.
2.
5.1 Loading The Laundry
Connect the main plug to the main
socket.
Turn the water tap on.
3.
Place the laundry in the drum, one
item at a time, shaking them out as
much as possible. (Refer to page 22
“WASHING HINTS”)
5.
Close the door.
6.
4.
Make sure that no laundry
remains between the seal and
the door.
IMPORTANT: Please read
“Detergents Type and Quantity of
Detergent”on page 23 before use.
5.2 Using Detergent And
Additives
The selector knob can be turned either
clockwise or counter-clockwise.
Detergent Dispenser Drawer
1.
The detergent dispenser is divided
into three compartments.
Compartment “SOFTENER”
Compartment “PREWASH”
This compartment is used for fabric
conditioner and starching agent.
This compartment is only used for
detergent when a “Prewash” option
is selected.
Compartment “MAIN WASH”
This compartment is used for
detergent on all programs.
Detergent flap
Position down:
for liquid
detergent.
Position up:
for powder
detergent.
ENGLISH 19
Do not use gelatinous or thick
liquid detergents.
Do not put more liquid than the
maximum level.
Do not set the “Delay End”.
Do not set the “Prewash” phase.
NOTE: When you use the
liquid detergent
Pull out the dispenser drawer until
it stops.
-
-
-
-
-
-
Measure out the detergent and the
fabric softener;
2.
Close the drawer gently.
Residues of detergent, softener
and water may remain in the
dispenser. It is recommended to
clean the dispenser regularly to
remove any residue.
The softener amount used must
not exceed the “MAX” mark in the
drawer.
If you use thick softeners it is
recommended to dilute with water.
If you want your laundry to be spun or
use temperature different from the one
proposed by the washing machine,
press “Spin” and “Temp” touchpads
repeatedly to change the spin speed
and temperature.
Press the option touchpads, if you
want your laundry to be washed with
special functions.
Different functions can be
combined which is dependent on
the program selected.
If an option is not compatible with
the wash program selected, the
symbol “ ” will flash on display
along with buzzer sound.
If you want to adjust washing time,
press the “Time Manager” touchpad
repeatedly to increase or decrease
washing time. (See Time Manager
guide on page 14)
If you want to define the end of the
washing program, press the “Delay
End” touchpad repeatedly to choose
your washing machine working time.
5.3 Options Setting
1.
2.
NOTE
NOTE
NOTE
Measure out the amount of
detergent required, pour it into the
main wash compartment .
If you wish to carry out the
“Prewash” phase, pour it into the
compartment marked .
If required, pour fabric softener into
the compartment marked .
-
-
20 www.electrolux.vn
The appliance will automatically adjust
the selected program duration
according to the type and size of the
load.
The display will show adjusted
program duration.
To start a program, press the Start/Pause
touchpad. The corresponding pilot light
will stop flashing and a default program
duration will be displayed on the screen.
5.4 Starting A Cycle ( )
After approx. 15 minutes from the start of
a program:
If you press any touchpad while a
program is operating, the symbol “
will flash on display along with buzzer
sound. (except Start/Pause touchpad
and On/Off button)
To pause, press Start/ Pause.
The indicator will start flashing.
Press the Start/Pause again.
The program will continue.
Changing a running program is possible
only by switching off the appliance.
Press the “On/Off” button to cancel
the program and to turn off the
appliance.
5.5 Interruption Of A Program
5.6 Changing A Program
It may be possible to change some of the
options after a wash program has started.
Press the “On/Off” button again to
start the appliance.
5.7 Changing The Options
Press the touchpad Start/Pause. The
indicator will start flashing.
1.
If available change the options that
you wish.
2.
Press Start/Pause again. The program
will continue.
3.
While a program or the Delay End is
operating, the appliance door is locked
and the display shows the indicator “ ”.
First, set the machine to PAUSE by
pressing the “Start/Pause” touchpad. Wait
until the door lock indicator goes off, then
the door can be opened.
If the door lock indicator “ ” does not
disappear, this means that the machine
is already heating and the water level is
above the bottom edge of the door or the
drum is turning. In this case the door
CAN NOT be opened. If you need to
open it, you must drain the water to open
the door.
In case of Remote ( ) function is
activated, when program cycle end and
anticrease phase is complete. The door
will remain locked for 5 minutes, if you
want to open the door at that time, press
Remote ( ) touchpad once to turned off
function then the door is unlocked.
In case of emergency please
refer to “Emergency door
opening” on page 33.
5.8 Opening The Door
NOTE
NOTE
Now you can set a new wash program
and change any available options. Press
Start/Pause to start the new program.
The appliance will not drain the water
(except programs; Vapour Refresh, Spin,
Rinse + Spin, Tub Clean).
1 / 1

Electrolux EWF1141AESA Používateľská príručka

Kategória
Práčky
Typ
Používateľská príručka
Táto príručka je tiež vhodná pre

V iných jazykoch