10
GB
Detergents and laundry
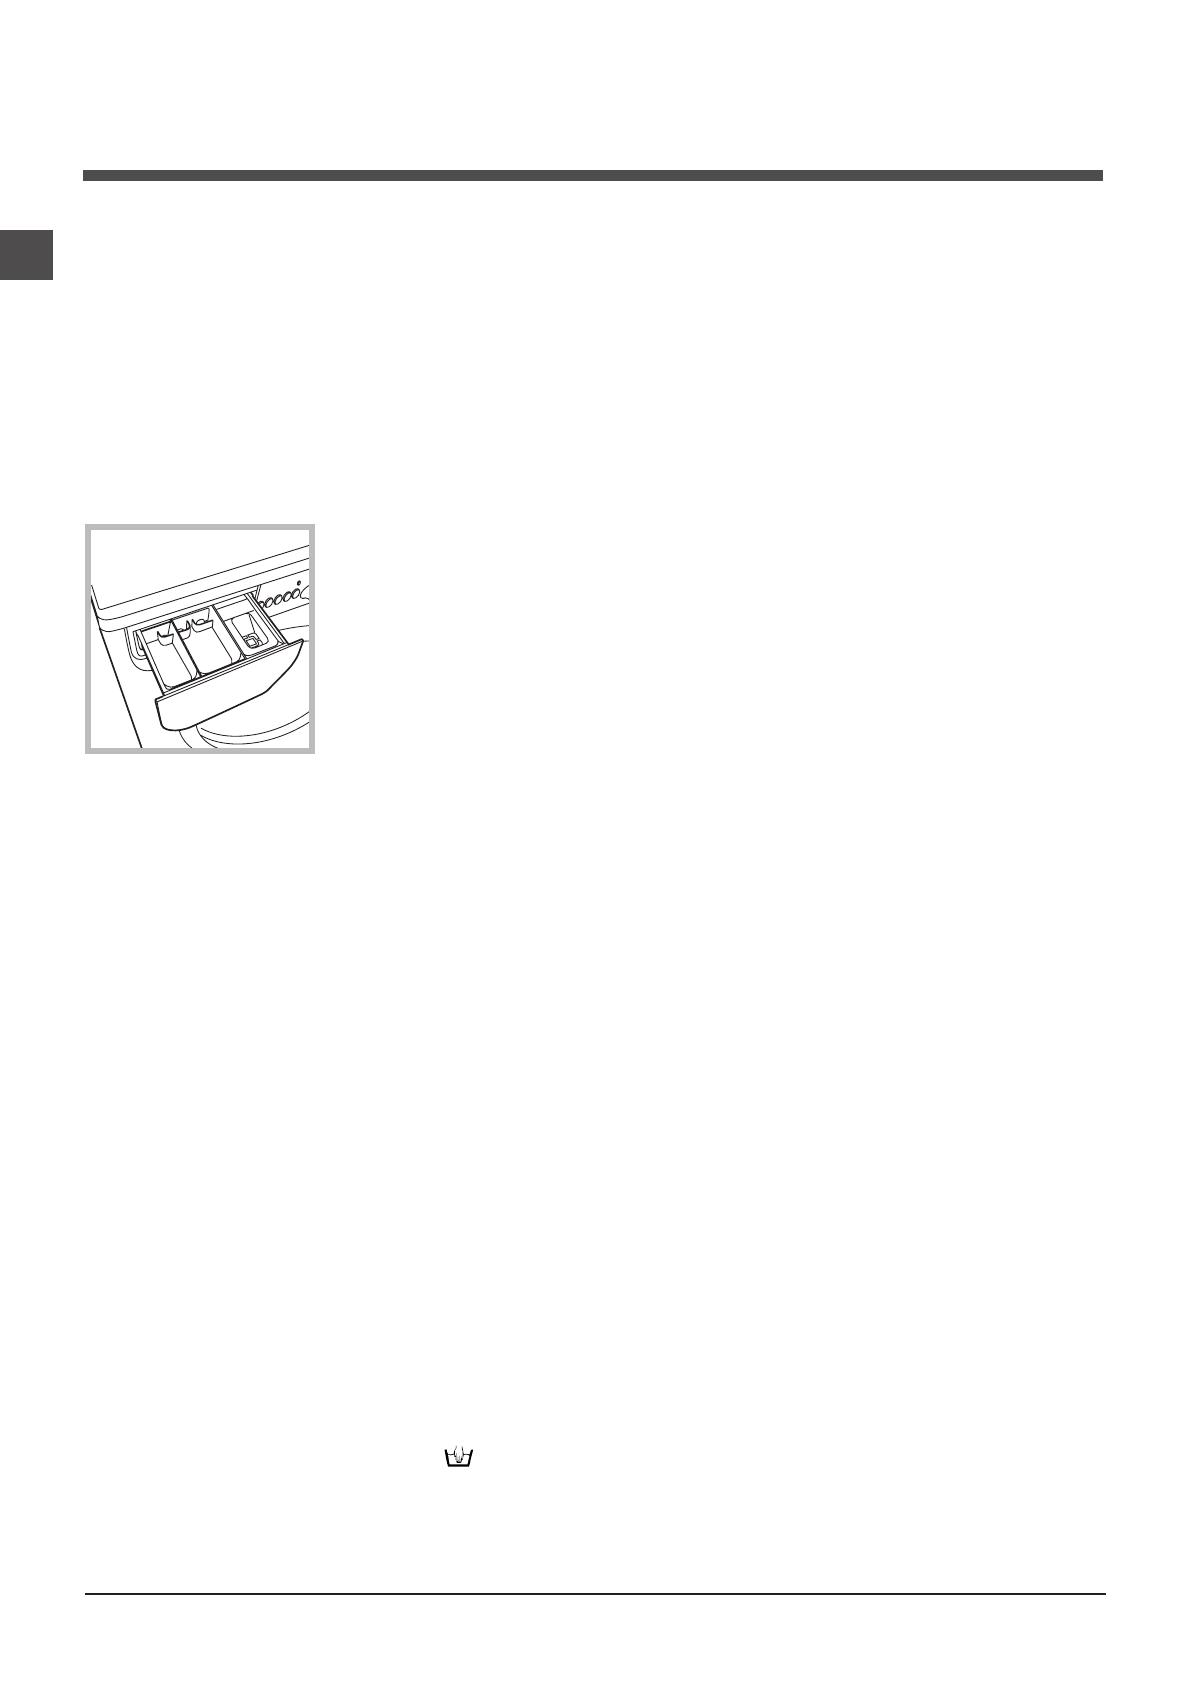
Detergent dispenser drawer
Good washing results also depend on the correct dose of
detergent: adding too much detergent will not necessarily
result in a more efficient wash, and may in fact cause build
up on the inside of your appliance and contribute to envi-
ronmental pollution.
! Do not use hand washing detergents because these create
too much foam.
! Use powder detergent for white cotton garments, for pre-
washing, and for washing at temperatures over 60°C.
! Follow the instructions given on the detergent packaging.
Open the detergent dispen-
ser drawer and pour in the
detergent or washing additi-
ve, as follows.
compartment 1: Pre-wash detergent (powder)
compartment 2: Detergent for the wash cycle
(powder or liquid)
Liquid detergent should only be poured in immediately
prior to the start of the wash cycle.
compartment 3: Additives (fabric softeners, etc.)
The fabric softener should not overflow the grid.
Preparing the laundry
• Divide the laundry according to:
- the type of fabric/the symbol on the label
- the colours: separate coloured garments from whites.
• Empty all garment pockets and check the buttons.
• Do not exceed the values listed in the “Table of wash
cycles”, which refer to the weight of the laundry when dry.
How much does your laundry weigh?
1 sheet 400-500 g
1 pillow case 150-200 g
1 tablecloth 400-500 g
1 bathrobe 900-1200 g
1 towel 150-250 g
Special wash cycles
Silk: use special wash cycle 9 to wash all silk garments.
We recommend the use of special detergent which has
been designed to wash delicate clothes.
Curtains: fold curtains and place them in a pillow case or
mesh bag. Use wash cycle 9.
Wool: all wool garments can be washed using programme
10, even those carrying the “hand-wash only” label. For
best results, use special detergents and do not exceed 1 kg
of laundry.
Jeans: Turn garments inside-out before washing and use
a liquid detergent. Use programme 11.
Sport Intensive (programma 12): is for washing heavily
soiled sports clothing fabrics (tracksuits, shorts, etc.); for
best results, we recommend not exceeding the maximum
load indicated in the “Programme table”.
Sport Light (programma 13): is for washing lightly soiled
sports clothing fabrics (tracksuits, shorts, etc.); for best
results, we recommend not exceeding the maximum load
indicated in the “Programme table”. We recommend using
a liquid detergent and dosage suitable for a half-load.
Sport Shoes (programma 14): is for washing sports shoes;
for best results, do not wash more than 2 pairs simulta-
neously.
The 20° wash cycles (20° Zone) offer effective washing
performance at low temperatures, reducing electricity
usage and expenditure while benefitting the environment.
The 20° wash cycles meet all requirements:
Cotton Standard 20° (programme 6) ideal for heavily
soiled cotton loads. The effective performance levels
achieved at cold temperatures, which are comparable to
washing at 40°, are guaranteed by a mechanical action
which operates at varying speed, with repeated and
frequent peaks.
Mix Light (programme 7) ideal for mixed loads (cotton
and synthetics) with a normal soil level. The effective
performance levels achieved at cold temperatures are
guaranteed by a mechanical action which operates at
varying speed, across set average intervals.
20’ Refresh (programme 8) ideal for refreshing and
washing lightly soiled garments in a few minutes. It lasts
just 20 minutes and therefore saves both time and energy.
It can be used to wash different types of fabrics together
(except for wool and silk), with a maximum load of 1.5 kg.
Load balancing system
Before every spin cycle, to avoid excessive vibrations and
to distribute the load in a uniform manner, the drum rotates
continuously at a speed which is slightly greater than the
washing rotation speed. If, after several attempts, the load
is not balanced correctly, the machine spins at a reduced
spin speed. If the load is excessively unbalanced, the
washing machine performs the distribution process instead
of spinning. To encourage improved load distribution and
balance, we recommend small and large garments are
mixed in the load.


